This "4-claw" design can be made using "CAD". But unfortunately, not everyone can afford this program because of the dollar costs and have access to a computer design program at their bench. (Here are 40 photos in this essay.)
The "Difficulty Level" is about 8, out of 10, chances of making errors are something I must constantly show you. In Diamond Setting, nothing is easy!
The next step is to do much of this "claw creating" on your own.
This basic exercise is (almost) easy to create. There is no need to use any alternative computer design programs in making this new '4-claw setting'.
A fellow who owned an 'exclusive, high-end' jewellery shop where I was teaching showed me this simple method. Thankfully, I examined the technique just like taking a 'mental picture' of it, this picture is now yours.
"CAD", aka "Computer Assisted Designs" are just fantastic, but this method is so inexpensive. The costs are for a few selected round and bud-shaped burs, but knowing how to create this, is so unbelievably easy.
==============================================
VERY IMPORTANT NOTES FOR YOU!
1) Initial 'spacing' is not as you know from my previous essays. Remember, this is not anything like Pave' setting where the stones must almost touch, not here!
2) We can use any size of gemstone that you need, why? This is mainly for 1.50 mm <=> 3.0 mm sized genuine stones, you just can't do this with Pave' setting.
3) Another note is that we are not creating a 'Pave' style of beads, we are now actually making individual 'CLAWS', and this is the main difference.
4) This process is great for a "4-claw setting", (6-claws are not in this exercise).
===============================================
Before you start your drilling of the gemstone holes, do what I just did is to use an inking pen and 'decide where these holes could be located'.
Once you've decided on the location and spacing, use a small round bur and make a little indentation for your twist drill. Here is the first step in the drilling process. Keeping the twist drill in a near vertical position.
At this point, open up the hole to a more workable size. I'd use a bud-shaped bur for this basic step.
If or by any chance your hole needs to be 'moved', you can do this very easily, just lean your bud-shaped bur in the direction that you need.
I like to keep my working surface clean, I use a wire-wheel to do this.
Here are just a few of the 'preferred' burs that I have on my bench peg for easy access.
From each drilled hole a 'rough cutting' line is carved. This is so important as the centre square will be made into 'claws'. Just watch and see what happens!
Recut this line DEEP as you can. The deeper you go, the longer the new claws will be created. DON'T MAKE YOUR CUTS TOO SHALLOW.
At the end of the two lines of cutting, this is where a 'decoration' effect will be made. If you think that this looks like an error, I did this with a purpose.
This is what 'we' are aiming for in our DEEP' rough-cutting. At this depth, I can "Bright-Cut" anywhere that's needed.
Make sure that there is no metal on the edge of the numerous holes. I'd use a #005, or #006 Bud-shaped bur to do removal any metal. DO THIS NOW, not when the 1.4 mm stones are set!
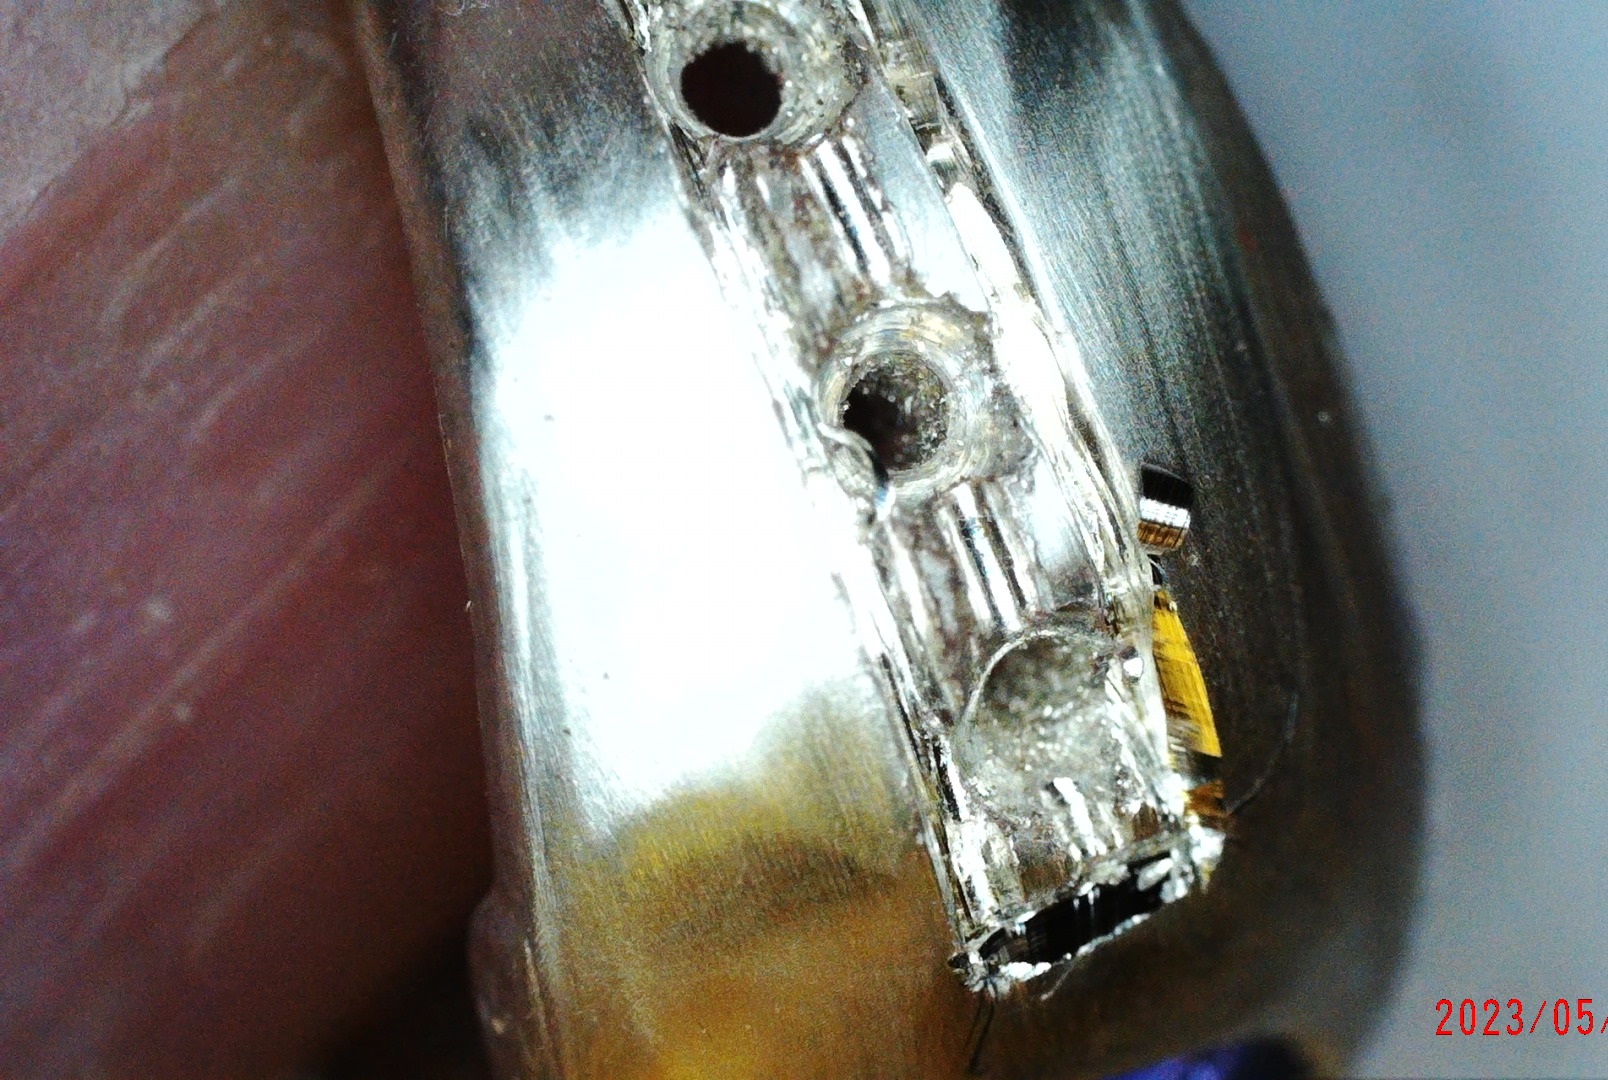
On my 'Digital Microscope' screen, I can easily examine and enlarge every step at approximately 125x power magnification.
If you see that one of the 'lines' are out of alignment, what would I do in this case? I'd use a saw blade of #4 cut and address this problem!
Use your #006 Bud bur to cut a line from one rough-cut side to the other. 
I 'sometimes' use my tapered cutting bur, as this action will start to give me a lead for the next step..."Bud Bur carving".
Don't worry if there are a few "metal slips" these can be easily repaired.
Keep the depth of the bur carving always as you can cut deeper and the claws will be more effectively created.
The "Cross" carvings are now giving you the claws that you need. Use a Bud bur on the 'hole to hole' carvings. Then use a Round bur to cut from one sideline to the one across. Two burs when used will give you the claws that you need.
This is my larger selection of burs. I don't let them sit 'everywhere' to get lost on my bench.
From one side to the other, I will carve with my bur a deep line. This is the very first step in making claws. Please use a Round bur to scribe each bur line.
Don't be too concerned if you slip with your burs, they can be repaired.
I'm now joining the two side lines together, using a 'bud-shaped' bur. I prefer the 'tapered cutting' bur to continue the 'joining' process.
A Bud bur of #005, or #006 will give me the desired depth.
To repeat, don't keep the bur carving too shallow, get your burs to cut DEEP.
Cut these 'joining lines' DEEP, as these will be claws so very soon!
In using my Digital Microscope, here are an ultra close-up of the new claws. Think of creating a 'cross' of line cuttings. Remembering to cut this cross DEEP. The deeper you can go, the more pronounced these claws will be.
From a new series of carvings, you can see how this set of 4-claws is starting to get nicely ready for setting.
====================================================== Here are many pieces of metal on the edges of the holes, GET RID OF THEM NOW before the stone setting, I'd use a #006 bud bur to clean this.
Just to show you that the simplest error can lead to major problems. One hole on the left is 'off-centre' from the others. Bud bur cutting held on an angle will gently repair this problem, don't use a round bur. This is called 'moving a hole'.
Additional examples of "4-Claw Setting"!
In these final few photos, I suggest using your #77B Cup bur and rounding off the claw tips now, why NOW?
When your mini 1.4 mm gemstones are placed into the claws you need to round off the tips, something happens as you are trying to keep the tips round. During this delicate process, you might just damage them. Why not just use your Cup Bur and make them round NOW.
This is the reason for rounding them at this point. You will transform them from a 'little square, mini-claw' to a nice-looking round-looking claw. This is a 1.4mm stone and with my 156C Undercutting bur. I'll make a little bearing incision at the base of each new claw, this will prevent and stone from being set crooked.
This is how the enlarged "X" claw-carving looks under 140x power magnification.
When you fully need to push over claws of this size, I suggest using your "Bead Burnishing tool". This will push and as well, keep the round tip from getting maligned in the process.
If you are having any sort of a challenge in keeping the ends square. You can cut & curve the ends into a half-circle...as shown! There are curves all over as they will reflect the curved design that is around the Pear Shaped centre stone.
"Square-cutting does not mix well with the centre stone curves". This essay is now happily completed. I've shown you so many variations on these two tutorial essays, I just couldn't allow any instructions to get ignored.


.jpg)




.jpg)
.jpg)
.jpg)
.jpg)
.JPG)


.jpg)


.jpg)



.jpg)
.jpg)
.jpg)
.jpg)