While having bouts of 'exhaustion & malaise' due to my Covid-19 symptoms, I'm still finding some inner-strength in writing important tutorial-essays for your bench. (If not me, who else?)==========================================
After excessive cleaning my burs & gravers a build-up of metal builds up on the surface of any oil-stone. After a while, these metal shavings bury themselves INTO THE PORES OF THE OIL-STONE. These shards of metal collect and keep building up until the stone is nearly useless.
The light brown colour turns from brown to black. The 'black' colour are the steel particles.
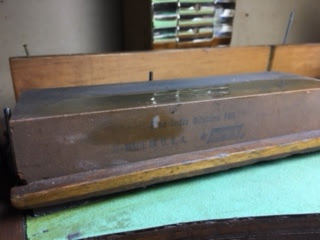
This is the original colour of my "India Oilstone FB6", a light colour of brown.
From a Cup-Shaped bur, I modify every bur or graver extensively. This 'modification' is the main culprit in getting the oilstone 'dirty and useless'.
On the left side of my setting bench shows a well-used oil-stone, this stone needs constant cleaning.
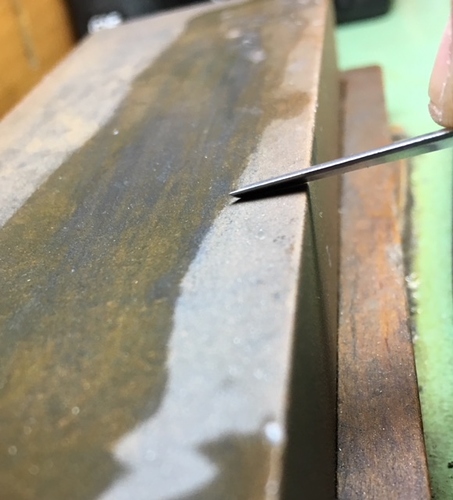
My gravers and burs are in constant use and the stone shows much 'wear' during a normal days use.
Three draws of my graver leaves a trail of metal shards INTO THE PORES of any oil-stone.
After a short while, the gravers and burs steel are just being added into the stone.
It gets to a point where my setting tools are being rendered useless, why? Each draw on the stone adds up and the stone gets to be a problem in resurfacing, as the day progresses.
How can I remove these minute particles of steel? The answer is so easy to answer. I use a thin layer of 'lighter fluid" and this 'suspends the steel', with a magnet these particles can be seen being 'lifted' off the stone.
On this photo, you can see how much of the steel is being lifted up & removed. The 'lighter fluid' is just a medium to lift the steel shards. This process won't work too well with a viscos oil.
In using my magnet, the steel was easily removed.
After many years of constant use, my oil-stone has seen some better days, agree?
This is my oil-stone under 160x power magnification.
I'm using an oilstone to highlight different areas of the cutting blade. More metal is being shaved off during this process.

Would you believe that this is the surface of the oil-stone under 75x power magnification?
This photo shows the steel shards and (my graver tip is on the left side). This why the oil stone needs to be kept 100% CLEAN at all times.
The steel has been carefully removed with the help of my strong magnet. This is why an oilstone needs to be kept clean at every opportunity.
No matter how small the steel pieces can be, they can still be your enemy.
This photo shows additional steel shards even under a slight magnification.
Here is my 220x power microscope at work, I only use this for my blog photography.
I really can't over-emphasize how important it is to keep your oilstone CLEAN.


.jpg)


.jpg)


.jpg)
%20(1).jpg)


