Saturday 14 September 2024

"Wax carving to a wearable pendant" 53.35minute VIDEO


 Here is a link to a video which our own "Ganoksin" made with me. This video lasts for 53.35 minutes. It starts as a wax carving and finishes as a silver pendant set with 3 square-cut Cubic Zirconia stones.
 As always, there are no costs or monthly charges to view my videos. I do all of my video-making free of charge.
https://www.youtube.com/watch?v=YAZNxVKx90O

Thursday 12 September 2024

ADDITIONAL detailed "Florentine" graver photos - 8 photos

I know there is a lengthy and very popular essay on "Florentine gravers" that is posted on this blog. I located additional and very important photos for you to view.
 The original "Florentine" essay was posted on September 29th, 2018. To view this important essay,  just scroll down to the first of 500 tutorial essays.
 When you are grinding the graver on your bench grinder please use a beaker of water to keep the blade from over-heating. If the blade turns to a definite brown colour that means the steel is softening and thus becoming difficult to return to the normal steel strength for engraving.
 
  The price quoted is in Canadian dollars (plus the 13% Provincial & Federal taxes). $21.41. The "STRT" represents a "Straight" liner. 
 
 Both graver blades are with '6 lines', but each is of different widths. ("E.C. Muller" is the 'best' engraving blade to buy, if you see this brand name 'go for it').


  Here is a magnified view of the 'two liners' being shown above.
 The "width' represents how wide the actual blade is, meaning that there is no less number of lines. For every 'line-cutting', the engraver has a choice of a 'wide cut' or a 'narrower series of cuts'.
 These numbers embossed into the blade are all that the engraver has to see.
 Each of these two blades still has '6 lines', but now either a 'wider' or narrower'  blade width. 

  Here is a prime example of 'how & where' the blade is being chosen and 'why' these numbers are so important to the engraver. 
 The 'number of lines in each cut' has a direct reference to the width of the 'cuts' the engraver has to be concerned with. (this is a very technical study of line-cutting).
 
  After I set the stone, I chose to use my "liner" (Florentine graver) just to give more 'visual interest' to the silver ring.
 The method that I used is to engrave a 'cross-cut'. The first cut is deep, then the second cut is at a 90-degree angle, but this second cut is not too deep.
 (Hoping that this is not too confusing to you or to the beginner). 

 This photo displays a ring that has not yet been engraved. The option is up to the setter and the clients' wishes on what is required.
--------------------------------------
 Before the engraving is to start, the 'centre groove' should be highly polished with  Pumice Wheels of #180 grit and then #1,000 grit (Polishing) wheels.
 If any polishing with a cloth polishing wheel is done after engraving, the "Florentine" effects might get rubbed-off in the process. I've seen this on many occasions and it is a challenge to 'repair'.

 Hoping this additional topic on engraving gives you a better understanding of this interesting engraving effect. Gerry Lewy. 


Wednesday 11 September 2024

Odd-shaped diamonds set into a bracelet - 3 photos

 Is it possible to bead-set "Mein-Cut" diamonds? The answer is 'YES' and here is the proof in this essay. 
This plate had to be drilled and then the holes were specifically contoured to the exact proportions of each stone. 
The Rate of Difficulty was a resounding 20, out of 10. 


 The tools that I used in this project relied upon using Bud-shaped and Round burs. Every hole had to be cut into the 'exact proportions' to each diamond. 

 This rather unheard of method of 'filling in the spaces' on this plate was not my idea. Even today I find this method distasteful, I just did what my client wanted. 


"Few holes drilled" and other interesting photos - 11 photos

 Here are a few photos of unfinished pieces of rough castings. My client only wanted me to determine how many diamonds would be needed in these rings and bracelets. 

This particular item was a bangle bracelet and it had to be placed upon a shellac stick for the stone setting. 


   The posts that are seen here will be saved for 2 Pearls.

    In this ring, there would be 2 large Pearls mounted on the posts.


  The Baguette stones were an 'afterthought' in the design and gemstone setting. I had to deal with what I was given. 


 This delicate setting had a (pale) Blue Topaz and diamonds were mounted into the claws. The method that I thought of was to "pre-drill the tip of the claws" for the large semi-precious stone. 

 Once the stone was very carefully set, I gently set the 'prepared diamond area' near the tip of the 4 claws after the Blue Stone was in the ring.

 In this photo, you can see how mediocre the quality of the diamonds that I had to deal with. They were of SI-2 at best and the stone was <6.0 on the "Mohs Scale of Softness". 

 I had to 'Pre-Polish' the metal and then set the large stone very carefully afterwards.

 
 This multitude of bright & shiny partly drilled holes was my client's idea. I frowned upon this method as the labour involved was extra setting fees. He chose to make his labour in a diamond setting as inexpensive as possible. 


Monday 9 September 2024

Dutch (Flemish text) Book on Diamond Polishing - circa 1923 A.D. - 11 photos

 In Antwerp, Belgium my dear Father (z"l) used this entire book to teach himself "How to Polish Diamonds" and this was in the year 1923. As he was fluent in Flemish, (the Dutch language of Holland), he could understand all of the subtle nuances with instructions being then written.
 Not all diamonds have to be used in jewellery, as we know it. Many of them are not fit to be put into "pieces of wearable art". Those stones that are remaining are for "industrial consideration".  


 These few diagrams show the formation of the "Faceting of a Diamond" from the Table Facet to the Pavilion (which is underneath the Girdle of the stone).
 
  To make the polishing process easier to understand, all of these facets have been given names as a reference.


 This is my photo of my Dad, as "Industrial Diamonds" were literally an unknown craft in the earlier years of the diamond trade in North America. To add to this honour, he appeared on television many times.
 It is because of my Father, that he suggested that I should as well enter this field. I did enter this specialized craft and after 9 years of apprenticeship, "I am who I am today".  

 
 When my (both) Parents tragically died in a motor vehicle accident I had many artefacts and books on jewellery. This book in Flemish was among those books, I gave this same book to our "Seth Rosen, of the Orchid-Ganoksin community" to keep as a gift from me. 
  -------------------------------------------------
 Here are some of the books that were being used in those earlier days of jewellery manufacturing.


  I find it interesting to read that the year of this publishing was 1948, and that is 76 years ago. My Father brought to North America the unusual uses of "Industrial Diamonds". Today his ideas have then turned into what is now used in building construction and aircraft along with motor vehicle maintenance regularly. 
  

"BENCH" magazine HSS bur recutting


Creating the "Gold & Diamond Dolphin" pendant - 41 photos

 The underside of this enormous pendant is a Diamond Setters dream, why is this? Every bit of my training went into making this gold pendant into a "Piece of Usable Art".
=====================================
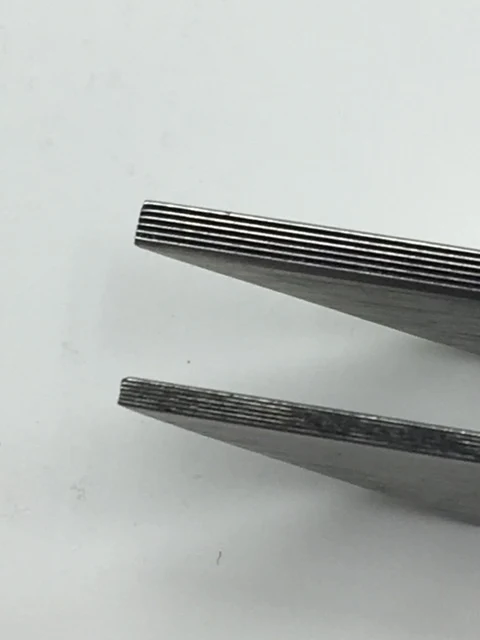
 Rule number one is to countersink every hole from the underneath. This will give a uniform shape to all of the drilled holes, thus leading to a cleaner and smoother surface.
      The Rate of Difficulty was an unbelievable "50, out of 10".
(This pendant wasn't polished as to my clients wishes, all I did was the stone setting).
 Here is the 'finished' medallion prior to being shipped back to the client.


    I held on to this medallion for a short while just in case of further changes.


 Since I had very little areas to Bright-Cut in the recessed areas. I then decided to just fill in the spaces with a multitude of Beads.

 With this pendant sitting in my fingers you can see the relationship to it's overall size.
 
  At the curved spots on the disk I used two sizes of diamonds. The pre-drilled holes display where these two sizes of stones will be used or set.

  As all of these stones are diamonds, I placed the largest diamonds where they would be seen at first glance.
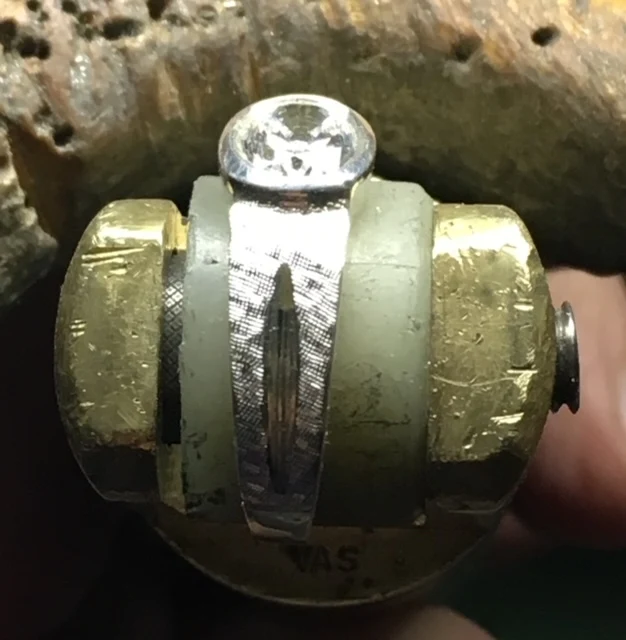
 The main body of the Dolphin was full of gentle curves and elevations, at this point I held the Dolphin in my leather gripping ring clamp.

 At the near completion of this intense project, the outer stone setting can be seen.
 
   What changes were to be used in the tail of this Dolphin? First of all my client wanted smaller diamonds (even after the stone setting) the holes had to be filled in. Then he wanted even MORE diamonds from 7, to 10 stones all of different sizes. OUCH!

 Oh by the way, the 'client' now wanted white diamonds in the head of the Dolphin, where there weren't any before. So many changes, as these changes occurred literally every few days.

  I planned every placement of diamonds even before a hole was drilled for any of them.
When a line of stones was decided upon, I used an felt-marker to 'plot each stone'. 

If I broke my 'twist drill' from the over-heated bur in the drilling I would have a major repair being started.
 
  You can see some of the faint 'stone plotting recesses' at some of the desired spots.

 This photograph shows the exact method that I used in marking the spots prior to drilling. You can see the felt-marker plotting and then a recessed spot prior to drilling.

   Just for some extra colours for my' stone plotting', I used a few ink coloured pens.


   Even the size of the round bur for 'counter-sinking' of the holes had to be carefully worked and decided. 
This drilling, repairing, plotting of stones along with setting, took me nearly 4 WEEKS.
 The intense strain on my eyes had to be dealt with continually.


 The intense planning added many more days & hours to this project.
 If one diamond was out of alignment by just 1-2 mm's. I removed a complete section and re-arranged many stones...again. Time was never wasted, planning was so very critical.

 This 'stone plotting' was like using a GPS on the gold plate. Every diamond had to planned as to where it will be set, not to mention the stone size because of the location..


  There was to be not one space left open without a diamond, or 'decoration' beads. Many sections of the anatomy of the Dolphin had to decided where each stone was to be set. 
You can see the different sizes of diamonds that were to be used.

  "Counter sinking" of the holes was a major task prior to the stone setting. All of the bur drilling had to be of the same size. "Uniformity" was the key element in the drilling. 

 You now see just how wide the flame was to allow the solder to 'flow'.

 
   After plotting the white 'helmet' diamonds, I again of course, counter-sunk the new drilled holes. There was so much labour that went on 'behind the scenes'.


 At the finish of stone setting, the client then wanted more white diamonds on the helmet and around the letter "M". You can see the variety of sizes.
 
  BTW, not one diamond was misplaced during this 'mind numbing' experience.

 If I needed to drill a few more holes, then I did so...BUT still knowing that the 'drilling of EACH hole had to be afterwards to get be 'Counter-Sunk'.  

 This was an ultimate diamond setting project of my career. Of course, there were no short-cuts even thought of.

 My client and I decided how many extra diamonds were to be added then he shipped them to me. We exchanged photos during this long diamond setting process, if he decided more stones should be used, then we agreed and decided where each new stone should placed.
It is easier now to see the many angles and elevations around the body of the Dolphin.


 If a diamond was placed in a wrong spot, my jeweller greatly assisted me in his soldering. His torch-flame had to be at a higher temperature than 'normal' thus in him using a wider overall flame.
 The pendant was of a very thick design and he was very concerned that no diamonds got 'burned' from the higher than normal temperatures.


 If just one stone had to be relocated, or moved (back to my jeweller it went). The metal was so darned thick that his intense flame was the only solution we had.

 Just to fill in the metal for one hole was a challenge, as he was very concerned of over-heating the metal with the diamonds.


 Many times during the diamond setting and partial setting of the Pink stones, he would email me more stones to set. I HAD TO COMPLY TO HIS (THEIR) WISHES.

  This 2 week (originally planned) process took me almost 4 weeks in total. The time that was spent was due to the ongoing changes in planning and cross-country shipping. 
 For legal reasons I can't divulge the exact name of this disk, the final destination had to be kept secret. I never even asked how much the true value of this item was.