Saturday 20 May 2023

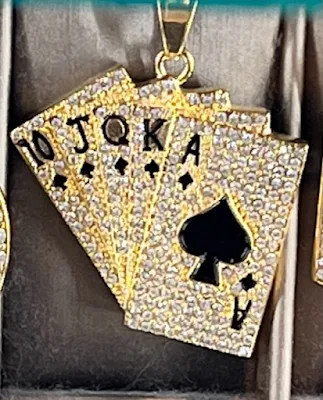
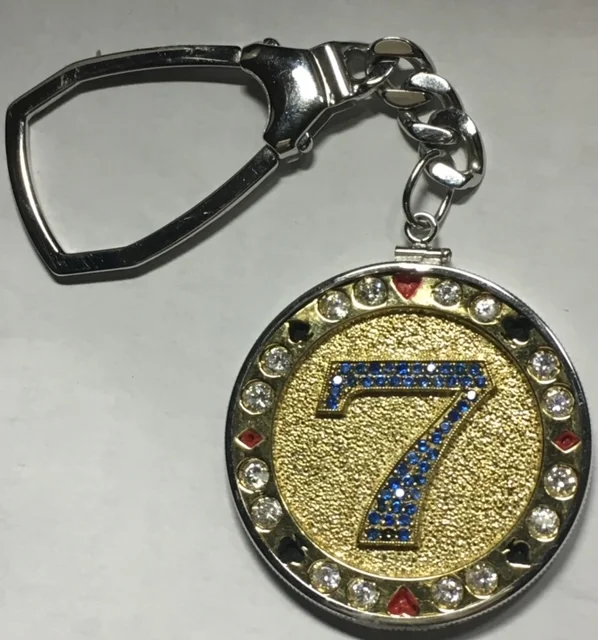
"Casino-related Jewellery" (18 photos)

 When I received my "Guinness World Record" some years ago, I created a series of jewellery befitting a Casino player. There are no need for text writing, why? These photos speak for themselves.


Monday 15 May 2023

Setting Gemstones in a 'Non-Claw' ring. (10 photos)


 The question arises how can I set these Blue Sapphires with no visible claws? The answer is quite simple (to a point) I must 'create' four new individual claws. That alone is the first task.

 When I had this ring given to me some time ago, I overlooked the opportunity in photographing this important setting technique. 
 
 What I MUST do is to make use of simple diagrams, then do my texting for each diagram.


 As you can see in this photo, that this Blue Sapphire is slightly crooked. This is NOT ACCEPTABLE.

 The colours of these two Sapphires have different shades of blue. I implore you to examine (prior to stone setting) the colours and keep them with one colour. I always have extra stones just for this important situation.

  Either you use a lighter shade, or a darker blue, never mix the shades together.
 
 I would use a large round bur just to prepare the Pavilion of the stone to sit in the ring.
As I need to put the stone securely into the ring.

 I need to use a "156C" (under-cutting) bur to prepare a seat for the stone. A (HSS) High Speed Bur is not advisable as it is too aggressive in this delicate bearing-cutting.


 On the 'selected' 6 stones, there are even 'four shades' of blue stones seen here.

 You can see that an attempt to make a seat for the stone has started, which is just above the bezel.


 Where there are 'Red Lines' I suggest that you should Bright-Cut the centre section. It will make that area cleaner looking. Please excuse my rough diagrams, drawing sketches is not my forte'.


 Always clean the 'connecting bezel' with your Flat graver, or a #4 grit Triangular file. Every piece of extra metal must be removed prior to any stone setting.


I'm hoping that this tutorial essay has been interesting and helpful to you. 

Remember to keep all of the shades of any colour that you use, please keep them separate.
gerrylewy18@gmail.com


VERY, VERY OLD 'Setting & Jewellery' tools. (16 photos)

 There are many Gemstone and Diamond Setting tools abound and many come from different countries. There is a history on many of them, I enjoy showing these antiques to you, why?

 I want their own history to continue with the help of my blog. What new tools today will be history' in the next version of that tool. Even my 240x power Digital Microscope is now a 'tool of the past'. My 'Inside, Ring-Holder' is now completely outdated, as it's now nearly 20 years OLD.

----------------------------------------------------------------------------------

 This Diamond Scale has a very rich history, this was my Fathers' (z"l) scale that he used in London, England, and as well as here in Toronto, Canada circa 1930 - 1968.

 The scale was hand-held with the aid of a string. He put these little weights in one scoop and the diamond on the other to be weighed.

 Accuracy was almost accurate, but it was a start to give him an idea of the stone weight. The tweezers were stored in the lid of the box. The weights were in Grams and DWT (penny weights)


On the left is a rotating 'wire, buffing-wheel' and with another grinding wheel on the right. To operate the turning action, there were pulleys attached to an electric motor situated on the floor.

 Would you believe that this was the forerunner of a 'Bench Grinder'? This large wheel must have weighed 50-60 pounds and this is without the wooden, bench supports. Imagine grinding your gravers on this (what ever you want to call it).

 This graver had a long history, it was a beginning of your Onglette graver. The name was a "Bull Stick", strange name but it is still in my collection of old tools. The date of this graver goes back to circa 1940. My teacher (Stan Levine, z"l ) gave it to me and I cherish it.


 The slanted shape of the front of this graver had only one use. It was to create exceptional designs in gold or in silver. The 'cutting action' was only on one side. My own Onglette graver is shaped like this tool. I call it a "Right-Sided, Bright-Cutting Onglette Graver".

  Imagine that this simple "Bull Stick" created these fantastic Onglette cuts? Remember that this was 'light years' before CAD was even a twinkle in anyone's brain cells.


 By the way, the jewellers and setters had to learn how to make each of their own tools. None of these were bought in tool supply stores like we do today. 

 In some countries that I hear that this 'pump drill' is still being used, why? Electricity is not always available.

 My Dad had business cards printed with a long list of 'fractions and decimals'. As many of his clients worked in machine shops and these were so darned helpful for them.

  Can you believe that this is a barbers shaving brush? I use it every day, it has a wide swath and is gentle for cleaning up the inside of the bench.


 Here are a few of the close up photos of his Diamond Scale and it's tweezers.

Here are the individual weights with their 'grams & carat' weights.


 This was bought so long ago, I just 'Googled' their name, YES they are still in business. The name tag is on the lid of this box.

 This "Inside, Ring Holder" was shown to me as a suggestion, I bought it about 20+ years ago. I used it in many of my essays, I'm so happy that I did.

   In my 'setting bench' there are a collection of very useful setting tools that I still use. Even in this year 2023, I keep my bench in pristine condition as all of my setting tools are in easy reach.


 I hope that you had a joyful trip down 'memory lane'?
 gerrylewy18@gmail.com

Sunday 14 May 2023

"Wire-Claw" ring setting. (6 photos)


  In my earlier days of learning (circa 1964) this style of ring was named "Lucida". But for this essay,  let's just name it a 'Wire-Claw' ring!

 The only method that I prefer in 'closing the claws, equally' is to use pliers that come to a point and have easier access to the tips of each claw. The 'bent configuration' is much easier to grasp each of the two sets of claws.

 The very first step in this setting is to clean where the PAVILLIONS of the stones will be laying. For this, I prefer to use a round bur and make sure that all of the unwanted metal has been removed. 
I would then 'pre-polish' those inner-bezels. Everything MUST be kept clean and spotless.

 Select the size of the stones and where each of them will be sitting.

 With your 'pointed' pliers, arrange each of the 4-claws to be 'equally spaced'. In this photo, there are many, many errors in the 'claw arrangement'.

In this photo, I'm using either an Emerald or even a Blue Sapphire centre stone. 

 The most delicate few step in this delicate ring, are the positioning of the multiple claws. As it is written somewhere "THOU SHALL NOT RUSH", take your time!

 Life is too short in redoing the setting again & again. Do not push those 20 claws 'one at a time' with any brass or steel pusher, why? This will give your ring uneven looking claws. The final claw configuration must be 100% PERFECT.

 Not one claw must out of alignment. That is why I use my pointed pliers 100% of the time.
 
 I must advise you to examine each of those claws for security and being symmetrical to each other.
 THIS PROCESS LOOKS EASY, IT ISN'T. I rate this setting at 9, out of 10.

  Make sure that all of the 20 claws are DOWN ON EACH CORNER.
 The claw tips must be no higher than the 'Table' on each stone. 
 
 When the stones have been set, use your "77B, Cup Bur" as the claw-tips MUST BE ROUNDED.
 If there are any striations on any claw being seen from using your pliers, please use your 'Tapered Pumice Wheel' with a #180 grit.
 Be 100% gentle when setting the Emerald, or any soft stone.


  There is so much to think of, while setting these few stones. I think about 2-3 steps ahead of my actual setting. That is why I put the Rate of Difficulty so high.
 I examine this ring under a 10-15x power loupe, there must not be any errors anywhere and also anytime during the setting process.