Friday, 2 August 2024

"How to Sharpen & Maintain your Gravers" - 17 photos

 I've been active in my blog discussing this important technique, which is very important in our jewellery profession.

 Many graver polishing machines are on the market, but I avoid these 'bench-top' mechanisms. They are not meant for those who are on a minimal budget. The costs for the Polishing papers and wooden sticks will be equivalent to a 'noon-day lunch' of $30.00.

        =============================================

What tools are required? 

1) GRAVERS (of any size and age)

2) Paint stirrer sticks (made of wood)

3) Polishing papers (as shown)

 This graver polishing can be used on any style & all gravers of any size.

  This is my collection of Polishing Paper boards/sticks every one of the papers are shown  in sequential order.


 This is the rough texture of an Emery board at #240 grit.

 
 The next paper is in order of grit is #400. This is the correct order of polishing papers.

 The next Emery paper is rated at #600 grit. ALL TOOL SUPPLIERS HAVE THESE 'Polishing Papers' IN THEIR INVENTORY.
 
  These next few papers being shown are #800 grit, but still more are needed to give the Onglette blade a shiny metal cutting surface.

 
  Lastly, is my favourite #1,200 grit paper, but there is still more to come. I'm polishing my FLAT graver in this photo. I have a little surprise for you!
 
I will only use a 'half of the board' while polishing the graver. 


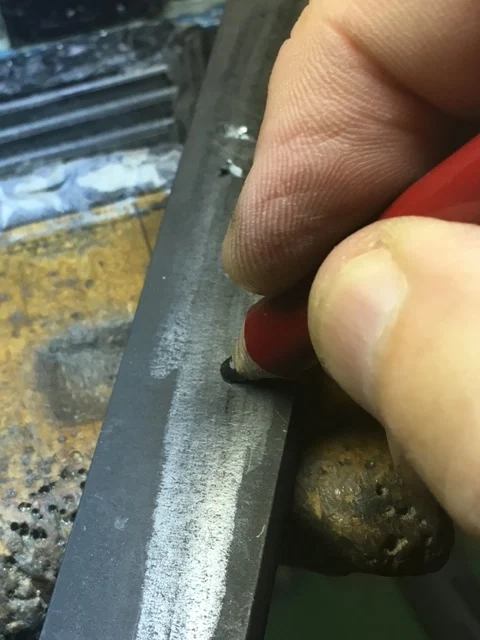
 On any of these papers, I will have my soft-core pencil and thoroughly rub the paper with this pencil.

 The rubbing of the pencil leaves a fine amount of soft lead inside the pores of the papers

 This is an up-close photo taken with my 175x power microscope. You can now see the remnants of the pencil rubbing.
 
 As a review of the #600 grit paper, you can easily see the 'pores of the paper' without the soft pencil not being filled with lead.

 Finally, here is a very good photo of the pencil rubbing. The papers will now have an increase of at least 50% increase of grit. 
On any polishing paper, this 50% will apply to all papers. Instead of buying more polishing papers, all you need is to use your soft-pencil rubbings.

 
 This is an enlarged photo of the soft pencil lead that I use all the time.


 My overall repair & maintenance costs are equal to buying a 'cuppa tea or coffee and dessert'. The costs of the equipment being shown range from $1,500.00 - $2,250.00 
(all quoted in Canadian Funds). Which route do you want to use?


I've been using this "Pencil-Rubbing" technique for the past 65 years, and it has served me very well.


Wednesday, 31 July 2024

My 450th essay: "Reciprocating Hammer, Anvils" - 14 photos.

 As this is my 450TH ESSAY, I wish to familiarize you with the Reciprocating Hammer - ANVIL. This little anvil is the main reason of using the hammer. 
 These anvils come to you with no shape (seen on the left) from the tool supplier. IT IS FOR YOU TO SHAPE IT ACCORDING TO YOUR OWN OWN SPECIFIC NEEDS.


There are times where I will reshape the 'tip of the anvil' and make it into a sharp point and use it for decoration (texturing) purposes on flat surfaces.
The 'texturing' was initially made on the metal mold. I used this metal mold many times instead of hammering on subsequent metal 'copies'.


 After many weeks, or even months little pieces of steel break away, as seen in the hammer second from the left. DON'T USE A FILE TO RESHAPEN IT. I use an Emery wheel of "MEDIUM, 220 grit".


 In this photo you can see my EMERY WHEEL reshaping the tip of the anvil.
 
  Here is my assortment of Pumice wheels and Emery disks.

 From a company supplied anvil, I can modify any anvil that is needed. I always have extra anvils in case one has to be modified (again) at a moments notice.

  After the Emery wheel has been reshaped, I usually apply my Pumice wheel of 180 grit to keep the steel anvil smooth for the delicate hammering processes.

 Every one of these anvils came to my setting bench being 'round and untouched'. 


 This is my Reciprocating Hammer doing what the anvil is supposed to do. I NEVER HOLD THE ANVIL PERPENDICULAR, I hold it at an angle of 45 degrees. The anvil doesn't hit flat, but it 'pushes the metal' towards the stone.

 Always inspect the hitting surface just to make sure that there are no defects on the 'face'.

   These are the 'before & after' views.

 This hammer anvil being shown here 'has seen better days'. I truly suggest that a good trimming of the 'edges and face' will give you better 'contact' spots.
 The best tool to use is a 'MEDIUM, 220 grit', Emery paper disk. 
 I always like to keep my Diamond Setting tools in pristine condition. When I put the anvil under my 150 power bench-microscope, I decided to remove the anvil from the Reciprocating Hammer and repair the 'contact' spots.

 When you need to put the anvil back into the 'hammer socket', please make sure that the anvil is screwed in 'tight'. If not, there is a great tendency for the anvil to loosen and come out of the hammer socket.


 Hoping that this essay came to you with a greater understanding what this little anvil can do for you.

Monday, 29 July 2024

Engraving on a "Silver, Bangle bracelet" - 17 photos

 Engraving on silver is nice, but the engraving on THIS BANGLE BRACELET is beyond beautiful, it's just SPECTACULAR.
 A client wanting me to scrap the metal for a few measly dollars, I decided not to do this and I kept it. This was 6 years ago and during this time I took many close-up photos of this bangle-bracelet. BTW, all of this engraving was 'done by hand', and not with a CAD program.
 I'll avoid any text in this essay, "JUST ENJOY THE PHOTOS". 


                         Is this a "Piece of Wearable Art?"