Saturday 24 August 2024

Cabochon Turquoise stone (before setting) - 7 photos

  These few stones are a rare find for me, why? The stone polisher gave me the stones and the 'dob' many decades ago. I thought that it would be prudent if I shared these with you in this essay. 

The matrix in the stones made these two stones almost 'non-usable'. But for me this shows how a natural stone can be made completely usable, even with subtle defects.

 This stone is being seen under my microscope at approximately 250x Power
magnification. This is stronger than continually using my iPhone camera. The matrix in this stone is quite colourful, but it isn't suitable for jewellery, pity!


  I like this stone as it looks like a 'map of the world and its blue oceans', agree?


This photo shows the underneath side of the stone. The matrix is quite apparent in this view. 


 This final photo shows the cement as it is being made ready for the 'polishing process' that will start shortly.


Thursday 22 August 2024

Why use an Onglette graver #1? - 11 photos.

The many reasons for using an Onglette graver are explained in this blog-essay
 Let's start with metal cutting and progress further showing many techniques.
Not having or using an Onglette #1 graver can be very troubling. 
       ------------------------------------------------------------------------------------
 This particular tool engraves lines before any Bright-Cutting that has to take place.
 
 Here are some interesting engraved lines all though 'very rough looking'. But in my mind, this cutting 'breaks the surface' of the metal and allows further Ongelette #2 graver cutting. 

 The Onglette graver #1 allows new fine-cutting to take place before any further cutting. In this photo, I wouldn't use any saw blade, but a graver will permit me to see EXACTLY WHERE EACH LINE WILL BE CUT.
 I will control each cut, as a saw blade doesn't give me that option.

  When I make the 'first cut', they are almost superficial and 'gently cutting into the surface'. I will again make additional cuts, but each time deeper and continue to cut the metal with a more direct series of cuts.
 The second cut will be more precise than the original. No other graver will give me that option.
 
 Without any prior Onglette #1 cutting, no Bright-Cutting can be initiated. Simple as that!
 
  When you are holding your (sharp) Onglette Graver #1 the (razor-sharp) blade can easily cut into your skin. PLEASE USE A THUMB GUARD, as this will prevent any serious infections from occurring.

 Upon looking at this CAD-created casting, there is no possible method of cleaning to take place unless the metal is (surgically) cleaned with your Onglette #2, or using a FLAT graver #40.

 This photograph shows exactly 'where and how' the graver is to cut into the metal.

 This is the closeup of the first series of cutting. The Onglette #1 is a fantastic graver, as its main purpose is to prepare for the many metal cuttings.

 This is my very own "knife edge" graver, it is quite thin but it sure needs to have a "Thumb-Guard" during its constant uses.
 You can see the shiny portion of the blade, that is the cutting section and it needs to cut DEEP. 
 
 With 400x power magnification, the 'deep cutting' is quite obvious. I will use my Onglette #2 graver to Bright-Cut. I'll 'recut' where necessary, and then the gemstone will be set.


Tuesday 20 August 2024

What is a "Bead Raiser" & what does it do? - 22 photos.

Under normal circumstances our CAD "Computer Aided Designing" program might not give us the necessary tools. Therefore 'we' must make our own to suite our specific needs.


In this photo, you can see the 'face' of the graver nestled against the lower right side of the bead. 

 This is the "Bead Raising Tool" under 250x magnification, it shows the gentle 'uplift' of the 
'Onglette #2 graver with the modified point'.


 The main difference between an "Onglette (metal cutting) graver" and the "Beading tool" (also an Onglette graver) is the 'rounding' of the point.


 This 'rounding' allows the front of the graver to dig into the metal without breaking the delicate graver point, simple as that!
 No matter the graver's length, it still works with the 'adjustable handle'.
The required Emery Paper has a grit of #240; if needed, you can use #400 grit. I prefer the #240 grit, as the blade won't slide along the metal while 'digging in'.


  All of my graver blades are of "HSS", aka "High-Speed Steel". The reasoning is that I need a durable blade that won't bend or break in the (aggressive) beading processes.

 From a substantial piece of steel, I fashioned a new tool to create new beads.

 Underneath the face of the graver point will be my new Bead-Raiser. That section will now be smoothed and rounded on "Emery Paper" of  #240 grit.

  No matter the length of the graver, all three of them will eventually be used in conjunction with my "Adjustable, Graver Handle".

 In using silver as my 'chosen metal', I use it specifically for its softness and being able to make my metal cuttings shine. You can see the first samples of 'Raising Beads'.
 

 Without any new tools, there wouldn't be any method or technique for securing or forming the new beads.


 A Bead Raiser tool has just one purpose and that is to move metal over the Girdle of the stone.

  You can see how the 'curvature of the blade' as it now looks under my microscope.


 This is a #400 power magnification of the course #240 Emery paper. This paper will literally 'round off' the front edge of the blade.


    Here is a finer paper that is used to shape the steel blade, it's rated at #600 grit.

   It is imperative to have this 'new tool' in our inventory. The "CAD" program is not the only way to set stones, WE MUST THEREFORE IMPROVISE ON OUR METHODS.

 Supposing that we have to set gemstones, as shown in the following photos? There is only one solution to this problem and that is to use a "Bead Raiser".
 
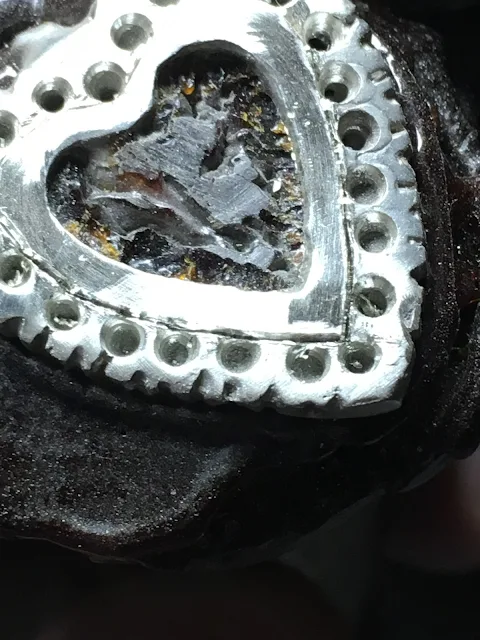
 Only after the holes have been enlarged to accept the stones, then the hand-made beads are ready to have the stones put into the metal. I will gladly use my Bead Raiser to "move the metal" over the Girdle of stones.

 Each hole must be made larger to accept each stone.
 As I always say there are "NOT SHORT-CUTS IN GEMSTONE SETTING" The 'quickest route' is always 'the correct route'.
 After each stone is placed into the metal, use your Bead-Raising graver/tool to dig into the metal and tighten every stone where each bead is located.
 As you can see all of the metal cutting has been attended to before setting any of the stones.
 Is this a difficult process? I think this process is rated at about 7-8 out of 10.