Thursday 7 June 2018

Different types of Duplex, or 'Flex-Shaft' handles

Different types of Duplex or “Flex-Shaft” handles for Diamond Setting!
Some of these handles are good and some are 'just great', you pick! If you contact any tool company, the answers could be that there are some other kind of handles for you to use.
 These have been my "setting-friends" for many decades, I'm only explaining my past experiences in using them. 
====================================================
(Located @ the bottom of the handles)
 Style #30. The handle is great for jewellery manufacturing, but is it good for Gemstone Setting? NO! Here are the reasons for and against!

 Against: It has very limited, or no freedom to move the bur around the item for setting. It is literally physically ‘joined’ to the heavy shaft and movement is not great for simple stone setting. A poor choice of a handle for setting!  This handle does not come with a ‘Duplex, Flex-shaft’.
Weight: 155.6 grams. On a scale of 10 for setting, I’d give it a 3…maybe!
It is very 'wide & heavy' to hold, your fingers cannot get close to the rotating bur.

For: It only has one ‘for’, is that it can take any size of a bur-shaft!

---------------------------------------------------------------------------------------------
(Located @ the third from the top)
Duplex, Flex-shaft; with a finger-tightening system”:  (#n/a)
 For: This is very reasonably priced handle: Under $100.00, for a beginner in setting I suggest you buy this for a start. Weight: 155.0 grams
Your fingers can ‘almost’ get close to the actual setting. It is quite easy to hold and the ‘flex’ gives the setter more freedom. Out of a 10 of great, I’d give it a definite 6.5!

Against: It still has ‘some limited’ movement. If the ‘Flex shaft’ needs repair, it can be quite costly, as much a new handpiece! It has some limited use at the setter’s bench, but not for continual use! There is heat build-up during long term setting!

----------------------------------------------------------------------------------------------------
(Located @ the second from the top)
 Micro-Motor Handle! The ‘only’ apparatus to buy, no heating in the shaft, because there is nothing to heat up! Very little need for any repairs. The fingers of the setter can get very close to the rotating bur while in motion. The electric fan is located inside the handle. There is no ‘limited movement’, total freedom at all times! The ultra-quiet, internal motor is inside the handle. The total weight is 190.8 grams. I rate this at a definite 10+, on my 10 scale of approval!

Against? I have not yet had any problems in my many years. Just a wonderful tool have and use.  BTW, I have two of these great machines!
---------------------------------------------------------------------------------------------------------

( Located @ the top of photograph)
Reciprocating Hammer” I call this particular hammer my Roll-Royce or a Mercedes, why so? I paid loads of dollars for it, but after 2-3 setting jobs, it was literally paid for. If you take absolute care of this remarkable hammer handpiece, you should have many YEARS of continual use, trust me!


Pro: It has a twisting, 'coupling/screw' at the end of the handle. Here you can easily adjust with either: the foot pedal or bench-top rheostat: 1) The speed of the hitting anvil, 2) The hitting power of the 'anvil' to the metal. 
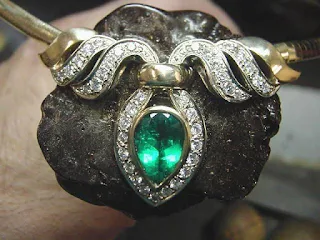
Just how delicate can this hammer get? I have just one photograph to show you and then you be the judge.
 In this photograph, I used both my Micro-Motor & Reciprocating Hammer handles.
 

'Rules & guidelines' the setter must follow!

"AM I READY TO START SETTING NOW"? 

What does a setter have to know prior to the actual setting of a gemstone or even the Diamond?

  As the ring is now finished from the "Preparation Stage" from the casting and the jewellers hands. He must observe and ask himself these many important questions!

                Here are a few 'Basics' to watch out for!

A) Are there any PIN-HOLES? Fix them NOW!

B) Are the selected diamonds going 'TO FIT PROPERLY'?

C) Are all of the diamonds 'THE CORRECT & UNIFORM SIZE'?

D) Are the stones 'THE CORRECT COLOUR'?

E) Are there any 'INCLUSIONS TO WATCH OUT FOR'?

F) Are the holes for setting 'CORRECTLY SPACED'?

G) Have the correct 'SETTING INSTRUCTIONS BEEN PROVIDED'?

H) Is the 'DEPTH OF THE METAL SUFFICIENT FOR “BEAD-SETTING'?

I) Will the stone 'CULET PROTRUDE THROUGH THE BOTTOM OF THE GOLD', just measure from the “Table-facet to the Culet” PRIOR TO SETTING! If the Culet is being felt & protruding, please don't start on the setting!!

J) Is the 'RING SIZE CORRECT'?

K) Are the 'TRADE-MARK STAMPS PROPERLY ASSIGNED'?

L) Are the 'CLAWS IN THE RIGHT POSITION'?

M) Are the 'UNDERNEATH HOLES COUNTERSUNK'? A.K.A. "AZURE".

N) Is this ring adequately 'PRE-POLISHED'?

O) Is this 'THE CORRECT COLOUR OF METAL & KARAT'?

      And above all, when finished, will you be proud of your creation?


Examining prior to setting of stones!

During my many decades of setting stones, I've made a short 'rule list of setting-steps' that are so important!   

What should a setter know prior to the setting of a Diamond?

  Once the ring is finished the preparation stage from the casting and jewellers hands. The setter must ask some of these many important questions! Here are a few “Basics” to watch out for.

A)  ARE THERE ANY PIN-HOLES?

B) ARE THE DIAMONDS GOING TO FIT PROPERLY?

C) ARE THESE DIAMONDS ALL THE CORRECT SIZE?

D) ARE ALL THE GEMSTONES THE CORRECT COLOUR?

E) Are all of the stones 'defects & inclusions' accurately noted on your work-envelope ?

F) ARE THE HOLES FOR SETTING CORRECTLY SPACED? (Very Important!)

G) HAVE THE "CORRECT SETTING" INSTRUCTIONS BEEN explained?

H) IS THE DEPTH OF THE METAL SUFFICIENT FOR “BEAD-SETTING”?

I) WILL THE “CULET” OF THE STONES PROTRUDE THROUGH THE

BOTTOM. (MEASURE FROM THE “TABLE-FACET” to the "Culet" PRIOR TO SETTING!)

J) IS THE RING SIZE CORRECT? 

k) Do you have all of the necessary tools at your bench?

L) ARE THE CLAWS IN THE RIGHT POSITION?

M) ARE THE UNDERNEATH diamond HOLES NICELY CLEANED ?

N) IS THIS RING PRE-POLISHED CORRECTLY?

O) IS THIS THE CORRECT KARAT?

P) Have you and your client agree on your setting fees?
 I always tell my students my little phrase: "Price, Speed and Quality. Pick any two!"


Wednesday 6 June 2018

Wax-Carving to silver stone setting project.

“Wax-Carving of a pendant!”
 A few years ago, “Hanuman" the original owner of Orchid & I put our first teaching video on to YouTube. In excess of 31,600 jewellers (worldwide) have seen this wax-carving project.
 The video was narrated by myself! Hanuman & his diligent staff volunteered to edit this 52 minute video with his time & much labour.
What is the “Difficulty Score on this video”? A definite 8+ out of 10.

youtube.com/watch?v=https://YAZNxVKx9o0

"Additional Diamond Setting Notes!"


These two pages of  'Additional Diamond Setting Notes' are so very important, I need to fully explain every subtle nuance of what to look for prior to setting the first stone among many at your bench!
Even though these setting notes were written many years, they never show their age...(only I do)
 Please do me a favour & that is to print them out! Keep them as your growing gemstone setting library


Tuesday 5 June 2018

"High Speed Steel" bur cutting angles!


 In these three coloured photographs, you can see just how one single 'High Speed Steel', aka HSS bur can navigate around multiple claws with ease. The most desired is a 90 degree angle bur, not a 'setting bur' as these are two very different styles of bearing-cutting burs. As it is written (somewhere)
"Thou Shalt Not buy a 70 degree angle, Under-Cutting bur!" No where can you find a 70 degree angle gemstone, those 70 angle burs are available, but I wouldn't buy one, so why would you?

 Furthermore, don't buy the soft "156C" carbide with very shallow teeth for this style of engagement rings, as these burs have a very short shelf-life. The HSS burs ARE THE BEST there are. Their teeth will carve the metal more aggressively and now PLEASE notice how an incorrectly contoured bearing is made, shown in the bottom three pictures!!

 The bur-shaft must be held at a 45-angle away from Centre. This is the correct positioning of the Pavillion facet as it will rest/sit! Please look at the 'top row' of diagrams, understand?
Also notice just where the "Culet" of stone is now resting, right in the very centre of the claws!
"Thou Shalt Not buy a 70 degree angle, Under-Cutting bur!" No where can you find a 70 degree angle gemstone, those 70 angle burs are available, but I wouldn't buy one, so why would you?
 Furthermore, don't buy the soft "156C" carbide with very shallow teeth for this style of engagement rings, as these burs have a very short shelf-life. The HSS burs ARE THE BEST there are. Their teeth will carve the metal more aggressively and now PLEASE notice how an incorrectly contoured bearing is made, shown in the bottom three pictures!!
 The bur-shaft must be held at a 45-angle away from Centre. This is the correct positioning of the Pavillion facet as it will rest/sit! Please look at the 'top row' of diagrams, understand?
Also notice just where the "Culet" of stone is now resting, right in the very centre of the claws!
 BTW, in my collection of HSS burs, I have approximately 136 burs all ready to carve bearings.

'Ornamental '4-Bead Designs and Patterns'

       “Detailed Description of General Beading Designs that are often used.
       
                                                       (21 STYLES)
  (These names below were explained to me by my European-trained Diamond Setter teacher and instructor/mentor.)   BTW, please excuse my typing diagrams!        
           

                 Bead style and description: 
·          Two bead settings; two beads opposing each other used on an angle.
·          Four bead settings; with an inside square cutting, or a four-sided pattern.
·         “Fish-Tail” setting; two beads with filing & pushing over the metal opposite the beads. The result looks like a Fish’s “tail”, hence its name!
·        “S-shape” with two beads; A curved, or swivel shape inside of the two stones.
·        European Pattern”; four beads with two sculptured angled cuttings 0:^:0:^:0:
·          Five bead; simple five beads, with one bead in the centre to be used for decoration, using the “Pre-Cut” method.
·          Six Beads; same as the five-bead, but two more in between the diamonds.
·         “Cut-Down” in the “Art Deco” style era, using only 4 beads, used on a semi-round band. This has been described in great detail in my previous essays!
·         “Cut-Down” same as above, but using NO beads, but a simple sliver of metal.
·         “Pave” using all beads that are cleaned out, stones almost ‘girdle to girdle’.
·          Seven beads; using only four for the stone with 3 beads in between.
·          Four bead; using 4 beads & cleaning of any inside metal, as in watch cases.
·          Shared Beading; two beads, both in the center of the two diamonds.

===================================================

End of Line” Cuttings:

  • SQUARED OFF double cuts at the end :0:0:0:||
  • “V SHAPE” within the square end :0:0:0:<|
  • ANTIQUE: “ART DECO” All of the cutting coming to a point at the end of the diamond line.

    =============================================================

    Ornate” used for Single Stone Setting:
  • Star-Set”; four beads with an Eight star engraved cutting
  • Recessed, Semi-Gypsy”; Bright-Cut around the recessed hole.
  • Gents”; total of 12 beads; 3 on each 4 corners “Picture” frame effect.
  • Gypsy/Flush”; metal hammered over the stone and Bright-Cut.
  • Double Star” 5 beads or more, used in white gold, in a yellow gold situation.
Now with "Computer Aided Designs" (aka. CAD) many of these patterns are slowly not getting used or even seen anymore. I'd like to continue in describing how these styles are used and now they will be remembered. I stand corrected if you are still using them..thanks!


Diamond Clarity Grades


 These "Clarity Grades" are the official quoted names from G.I.A. These names are so very important to know & understand. When I'm choosing diamonds, I prefer to stay within the boundaries of "VS1
to SI2" and I prefer to examine the stones (with professional help) before keeping them.
 On one occasion, a diamond dealer gave me a group of VS2 diamonds, I went to have them all (16x.10pts.) "Pre-Appraised" for an "independent (quality-colour) assessment". Not one of those 16 stones were in the category of the stones that I requested & wanted. The offending dealer said "well mistakes can happen!" Can't imagine if the customer went to his appraiser and he returned the ring back to me...I haven't seen this 'dealer' since then.
 Moral of this little story; always check & double check your stones when in the 'loose stage'.

Monday 4 June 2018

My collection of gravers!

 What you are now viewing are my full set of gravers. Obviously you can see that I never throw any long-used gravers away. The longer shaft handle can still use those smaller in length gravers.
 I may have 5 Onglette #2 gravers, but each one might be just a tad different from the other. The reason being, is that I might contour one graver side at a different cutting angle or width. Such are "The Joys of being a Diamond Setter!" BTW, the dark brown graver handle is 60+ years old.


Names of Diamond Facets

 I'm not suggesting that you learn all of these diamond names. A few of the important names will make your buying & understanding of the diamond easier! It's all in the communication between you with the diamond supplier/dealer & finally the independent Diamond Appraiser, interesting agree?
 

Collection of Archived Setting Notes!

 All through my many years of Diamond Setting, at last count, it's 57 yrs. (I only hope that these setting numbers keep clicking!...)
 I've collected, put-aside & printed and archived so many setting notes that once in a while MORE notes keep showing their heads to me. Here are a few more..learn & above all have fun!

 Collection of Recently Archived Setting Notes!
  
Do not measure the stone size from the wax form. In this case the obvious is forgetting the 10+% shrinkage from the wax to the final gold stage of manufacturing!

If you don’t have the right tool, improvise. Not every tool you need is in the tool supply company in your city! Many of my own ‘required’ setting tools are now bought from hardware, or even automotive stores!

Do not be afraid to buy “new and improved” tools. They may be just that, new and improved ready for you to use!

If the cabochon stone “rocks” in the bezel, it isn’t sitting correctly and more fitting is required before setting takes place! I suggest re-drilling the base or bearing cut!

Tighten all stones before the polishing or soldering process. Due to these two processes,
Heat expands the gold. Subsequently, stones will get loose just when you don’t need them to happen…when a customer is waiting..!

Protect your eyes when breaking out damaged stones of any kind. Safety-glasses, or just a tight-fitting visor is needed to save your sight!

Tighten loose “solitaire-set” stones. Slide with the aid of small pliers and squeeze two claws that are side by side. Then slide the other opposing claws together. Once the stone is tight, re-arrange the 4 claws into the original configuration.

How can you tell the difference between a CZ and a diamond? Hold the CZ culet up and notice a ‘halo’ effect around the girdle, those are the Crown facets showing through.
The girdle is highly polished, and no matching faceting above & below the girdle. The CZ is basically transparent. The edges of each of the facets are not sharp and crisp, or ‘smoothed’ over. These many differences are not scientific, but after many years of setting these stones, experience dictates what is and isn’t in these stones.

What to look for in 'setting-stones-in-wax'? First of all, do not let any of the stones touch each other in the wax form. Do not quench to ‘cool in water’ with the crucible. Fast cooling breaks or ‘burns’ the stones and diamonds. Let the hot crucible ‘cool down’ on the cement floor or just return them to the cooling furnace. Have the investment reach and be secure under the stones, while in the wax. This way each stone will not wander around the wax as the investment is being poured, or you might just find the stones somewhere inside the rings shank. You’ve lost the stones and even worse, the ring is ruined!
   These are just a few brief of the setting tips for you to look over and be as a guide in the future. Any questions please submit them to “gerrylewy18(at)gmail.com” 

Detailed Diamond Setting Techniques

“Detailed Diamond Setting Techniques”

 ~ “these are tad difficult, so be careful!”

  ~ from the setting bench of “Gerry Lewy”

  • What is one of the causes of a “rippling or jagged” effect around an inside cutting edge in a Gypsy or Flush setting? How can this be avoided?  When an edge of a cutting tool (of any shape) glances over or hits a facet it will ride above that face. In turn, it will transfer the difference in angles to the tool and then to the gold. So how can the setter avoid these undesirable results? To keep cutting back is not the answer! What I do in these circumstances is to hold my graver securely and maintain an 1) outward and 2) forward cutting motions. This can be achieved by also putting your finger right near the cutting edge and with this will have a clean result. Do not let any part of the tool touch the facets while cutting the bezel inner frame of the diamond. If you do, you are back to the beginning. Try and avoid changing the holding pattern of your hand, let your ring clamp do the turning, keep your cutting hand in the same position and don’t change your cutting angles. If you are using a Flat #39 or #40graver, reshape the absolute cutting edge to be thin as possible nearest the diamond. This also will avoid the unnecessary touching of the facets as you are cutting along. Don’t lean too far on the inside cutting angle.

  • What is the correct filing angle to finish off a large claw? If you are using a Triangular file of either #2 or a #4 cut 20 cm in length you will notice that either side has a 45 degree angle built in. Simple? But why at this angle? The effect is that during polishing, the cloth wheel will actually brighten the sides of that claw. If the sides are vertical, no way can this effect be achieved. If you are using a “Pillar” file, you might not be filing at this angle continually. The hand does and can get tired for a few seconds so why not let the filing tool do the work for you? To achieve this filing stance, is to rest your ‘finger pad’ on the top-flat part of the Triangular file, this will automatically give the angle you so desire. Simple?

  • When drilling holes with a twist drill, I generally use only three sizes #.9mm, 1.0mm, or maybe a 1.1mm, no more and no less! No matter the size of diamond, don’t use a .8 mm or less. When you are drilling through the metal, heat builds up rather fast and over-heating takes place. Always use an oil-based lubricant. What causes the breakage? The hot twist drill binds and stops, but the motor still wants to turn. I then decide to activate the motor at a rather slower speed than a setting speed.

 Do you use a ring clamp when hammering a ring with a bezel?  If you do, you will most definitely notice that the ring clamp is absorbing much of ‘hitting action’. You should, from my experience, please use a ring mandrel. As you are hitting on a solid metal substance, for each direct hit will be non-absorbed and little of the hitting energy will be lost. Try it…..you’ll like it!

  • Do you use a saw blade when setting a major sized stone? Don’t laugh with this suggestion, I use it all the time. When you are finished make a bearing cut and attempting for push over the large thick claws. You will find only a part of the actual claw making the contact. You should not proceed in pressing over the claws any more than you have to. You just allow much too much stress in griping the crown facets, hence squeezing or worse…breakage! What do you do now? If at all possible bring back that claw just a tad to give more room to start the initial saw blade cut.
Lay your #4/0 saw blade on the “Bezel or Star Facet” and with care draw the cutting blade in between the diamond and the gold and then proceed with this cutting action till the #4/0 blade comes to a stop right at the girdle. This ‘stopping’ will be at farthest point or at the juncture of the metal where it meets the girdle. When you are using the saw blade try and extend the cut to just beyond the girdles’ position. If the stone has a thin girdle I would hate to see the gold squeeze that diamond. Once this line has been drawn, you may apply even pressure with your serrated, non-slipping steel pusher and make most of the gold meet the facets. Now you can proceed with the normal trimming or filing to suit your needs.

  • How do YOU pick up diamonds? When I was learning setting over 40 years ago,
my teacher taught me a few methods, one of which I will explain here. Grind up some charcoal from your bench-soldering block or burned wood and mix this composition with Bees Wax. This Bees Wax may be bought at any jewellery tool supplier. Charcoal is used as a substance that prevents sticking the diamonds to the wax, almost as a ‘quick release’ mechanism. I have seven little wax dobs of many sizes & thicknesses of this stuff at easy arms reach, if I lose one, there is another. For easy holding, I roll this wax on to a used large head bur, so the wax won’t slip off while in use.

  • What if the girdle is very thick, so now what? Many times I have seen diamonds with very thick girdles. So thick that there is a space between the bearing-cut and the stone in question. This is not acceptable in any circumstance. Supposing you “the setter” try another method of preparing the ‘seats’. I found a method of alleviating this problem, try and use a “bud” bur right at the groove. Start the grinding and press this slow rotating bur into the gold so the bearing matches the thickness of the stones’ girdle. This pre-selection of bud is very important. If the bud bur is too large, again you’ll have another “larger and wider” space to contend with. I suggest hand picking each bur that will be slightly larger than the size of the girdle. As each bud bur has a little point, I call this the “leading edge” or “guiding tool”. I will then very carefully place the “guide” inside the bearing cut and slowly allow the bud bur to make a wider horizontal cut of that claw.
 But how far ‘in’ would you go? You are only making the bearing cut WIDER, NOT DEEPER. Now that the groove has met your needs, you can actually push the side of the claw right up to the stone and have no space at all. I use this method regularly


  • Checking for security for loose diamonds..! I read in one major monthly jewellery trade magazine that is correct to use a pair of metal tweezers and grip the girdle and rotate the stone…duh? How about breaking off the girdle of that stone? I have just one word for you…DON’T.  My friend who used to be a diamond setter was setting over 1,000 stones one week and delivered his work. The uninitiated “quality control inspector” had no idea about breakage on thinner girdles on “VS-G” diamonds. That person used tweezers on every diamond, and complained that each one was chipped in two places. It was then that 1,000 diamonds were replaced at the company’s expense! If you have to use tweezers, please use the plastic version.

  • How can you break out CZ’s from “set in wax” casting?  I won’t go into how they break, they just do! That is not my topic to discuss at this present time but they do! The question is how to get them out. From many years of experience in this style of unsetting, you must use extra eye care. When you are tackling this
     stone while still in the confines of the gold, they have a great  tendency of
     exploding. What! Exploding stones? You bet they do, but if you don’t wear safety
     glasses you will be wearing the stones on your cheeks and in your eyes. I will use
     a ring mandrel to hold the ring. The reason being is that the wooden ring
     clamp absorbs much of the ‘impact of hitting’ from the hand held hammer. Not              
     to mention that it frees up one of your hands.
       Place the ring securely on your mandrel and seek out a broken bur that still has a sharp point.   With this end of the bur hold the point just 2 millimeters ABOVE  the ring. Now start hitting     the stone with your  small hammer. After each and subsequent downward hit, great
     amount of energy is given to that stone. The action is now like a “mini-pile
     driver”! The resulting impact causes the stone to explode and the need of “picking
     and groping” for unseen pieces of CZ’s in the gold is greatly diminished. For any         
     further removal, I would use a graver and not use a bur, as the bur will be worn
     down from the CZ on the "Moh's Scale of Hardness" @ 8.5.
            ~ For further information on diamond setting from the bench of “Gerry Lewy”.
              Please contact me at “gerrylewy18 (at) gmail.com”..”Gerry, the Cyber-Setter!”


How to hold a graver!


There is only one way to hold a graver in your hand. Should I repeat myself again? "Only one way to hold a graver". The graver tip must never go beyond the first knuckle of your middle finger! "Seeing" is better than a text explanation.
 But I think one or two explanations are needed here & now. The little finger literally prevents the graver handle from sliding away from the "holding area" in the palm of your hand. My thumb and forefinger are the only fingers that hold the graver shaft, the other fingers only keep the handle in your hand. These rules are ever so important in attempting to 'Bright" & "Rough-Cutting".

'Levels of Setting Difficulty"

 I've included only a few important setting techniques. YES, there will be times where a setter will make genuine use of many of these setting topics.
You will see only 3 very difficult & involved aspects of this Diamond Setting profession. In my honest opinion there are only three topics that are really not for the "faint of heart". They are the "Star-Cut", "Princess", square-stone method and the most difficult "Bright-Cutting with Pave"!
 The remainder of the 24 listed are interesting and not really difficult to learn.
 In the course of the next few months, I will attempt to describe how each level is nicely used & I don't hide anything!!!

Diamonds & Rubies in a wrist, name-plate!

 You will see just one of the numerous patterns I decided to use! This decision was brought about when viewing the many large spaces in between all of the stones. As I had a 'limited' selection of Diamonds & Rubies, you will also see where I placed the larger Ruby in the letter "S". The eye gravitates generally to the center of the 'name plate & letters', so why not place the biggest stones there?  I used a 'Flat Graver #40" (or Glardon #10) for this continuing "Bright-Cutting" exercise.
 For the background 'finish', I painted all of the letters with a very thick nail-polish & sand-blasted the whole bracelet at once. When the item was completed, all I did was to place the name-plate in acetone & let it remain in a little beaker in a sonic-cleaner..just for a few minutes & all of the paint was easily removed! As this area is deeply recessed, no 'wear or tear' will ever occur. Even if you slip while Bright-Cutting, those 'graver slips' will be covered over with the 'air-blast' of sand, great idea?