We've been dealing with the regular Round & Baguette shaped stones, but there is something more novel. Has anyone attempted to "Gypsy/Flush, set a Pear-shaped stone?"
This sounds too difficult, well it is just that, it's VERY difficult, but also very exacting!
I'd rate this project on my "Difficulty Scale" at a high number of 30+ out of 10.
The "Frustration Level" is => OMG! Way off the charts!

The Time needed to complete this project?.. your guess is good as mine!
THERE ARE NO SHORTCUTS in getting this stone set faster! If you find one, it isn't going to work in your favour, trust me!!!..:>(
This exercise is not for the "Beginner" nor even the "Intermediate" level in this type of setting.
This exercise is not for the "Beginner" nor even the "Intermediate" level in this type of setting.
What tools will you be needing? 'Everything that you have at your bench'.

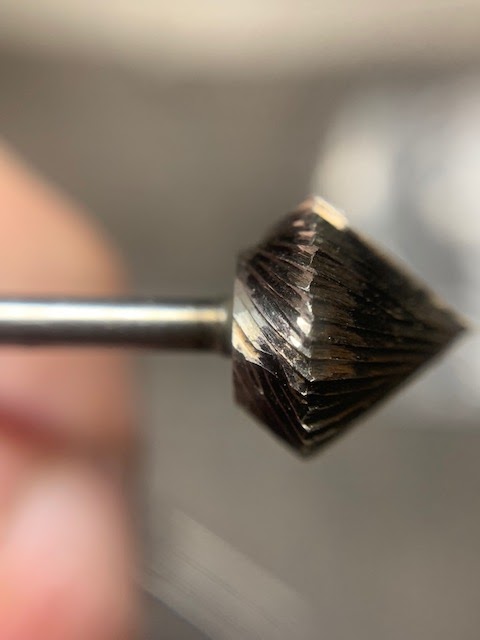
Round burs, large Bud burs, Reciprocating Hammer at a 'light' & then a 'semi-heavy' setting!

Flat graver #40 this will be used to initially carve out the basic shape into the dome-shaped ring.
(No leather-wooden ring clamp) I use a 'screw tightening' metal clamp (as shown) that will not allow any movement while reshaping or carving out the bearings in the "Gypsy" setting opening.
The many photographs will show what tools I use as I complete this task!
Notice: The stone been shown is a synthetic (very soft on the Moh's Scale of 6.5) Amethyst.
The polishing & cutting of these facets were totally mediocre. I'd prefer a thinner Girdle just for this project, but remember, that the selection is not always going to be 'picture perfect'!
I just wanted you to see that the most thick-girdled stone CAN still get set!

I'm looking at this odd-shaped stone and wonder if it can be set? My answer came in a .05 a second YES! All it takes is a bit of time and much determination!

Is this the most difficult shaped-stone that you can find? YES! Everything says it CAN'T be set, but let's see how it CAN!!!

You can see just why I use this "screw-tightening, ring-clamp". I don't want any ring movement while the delicate, setting process is in progress. I tighten the screw so very tight, then tighter still!

I drew a faint line with my ink-marker to created a centre-line for the point of the Pear-shape. From this line, I can visualize the centre for the Gypsy setting pattern & the stone.

To get more accurate positioning of the stone to the metal, I inked the surface. Then, I had my graver 'touch the surface' to let me know where the point of the stone will be.

This same marking process is used again, for the width of this Pear-Shaped stone!

Already I have a better viewing on how the stone will eventually sit in the ring. I now used my Ongletter graver #2 and dug a line into the metal and this is only for the Point of the stone, no other marking on this ring is necessary.

I now wanted to start the 'carving-out' the Pavilion-opening for the stone! I start with a bud-shaped bur with sizes of #2.25 => 2.50mm's. The size is not for setting, but to clear away much of the metal for this very odd-shaped stone!

For the lower section of the Pavilion and the "Culet", I'd use at least a #2.50mm bur, why so much bother for this drilling? I have no intention to have any part of the stone rest against metal that will prevent the setting process.

I've now opened the hole to 'almost' the size of the graver markings.

With my Flat #40 Graver, I cut a smooth surface on the inside of the rim of the hole. I need to know just exactly where the stone will be resting & fitting.

In this photograph (out of sequence) you can see where the large Bud-bur is cutting. The bur is cutting just at the edge of the hole. With this faint scribed line, I know exactly just where to cut.

Great care is needed now and I don't want to cut beyond the border of that line.

I put the stone into the hole just to see how I'm doing in regards to the carving out the metal. So far so good! AGREE?

This photograph shows some semblance of order in the carving process. You can see that the Culet is nicely being free from any metal.

I will use a round bur, only for the point of the stone. This point will remove any possibility of the stone-point touching the metal. If it does, whoops, broken stone! I will select a round bur slightly larger than the Girdle, in this photograph, the size is deceiving.
The size must make allowance for the Girdle & the Pavilion, under the point!

Here is the picture of the 'hole in the corner', only for the point of the stone. How deep? VERY DEEP!

Now comes the 'bearing cutting' that is to traverse all the way around the inside of the Gypsy setting. I'd make the carving into the metal, just as deep as the point is!
As you can see, I'm carving a new bearing to accept the faceting of the stone!!!

I'm trying to see if the stone 'might' fit yet. Remember that we are dealing with an insanely wide- stone Girdle. This is the main reason why the bearing MUST be made lower into the hole than normal stones.

Just another side-view. There is still much metal carving to be done!

As I placed the stone into the hole, I see some problems still 'yelling at me! I had to use my 10x power, hand-held loup to see where the facet corners are touching the metal. There are many!

As the hole is at a 45 degree angle slanted inward, the 'contacts of the stone to the metal' also increases as the depth of the stone is lowered!!!

Here are the continuing contacts from different facet corners. You can observe that the point of the stone stays in place. But I must get the oval curve of the stone further into the hole. Frustrating process? I'm not at all irritated, but I can see that soon enough the stone WILL GET SET!
"Time and success are now on my side"!..:>)

From this single, very odd-shaped stone sitting on my bench top.
Look at just what happened? It's now getting slowly set!

This stone is nicely sitting in the hole that has been prepared. The time involved took me so far many hours! Why so long? I had to slowly do the setting, as well, taking photographs to record this interesting event!

I'm examining every area of the stone to the bearings, as it's now finally in the Gypsy setting hole. This will be the very last time I can remove the stone for any further carving.
Now the pressure starts: I don't want the stone to break during the delicate Reciprocating Hammering process!

Here are a few questions you should be so very concerned about!
1) Are the bearings made wide enough for the wide Girdle?
2) Is the stone sitting FLAT & not tilted?
3) Is the point of the stone facing towards the edge/side of the ring?
4) How much metal is going to hold the stone?
5) Will I have enough metal to Bright-Cut?
6) Is the "Table" of the stone well below the edge of the metal?
7) Does the "Culet" of the stone not protrude through the bottom of the hole?
8) Is the ring the correct size that the customer needs?
9) Is the ring karat stamped?

You will notice here that the point of the stone is the very last section to be hammered. The curve and side-sections of the stone can be hammered at a "medium pressure". The point must be gently tapped! Why so? The point is the most delicate & fragile areas of any pointed stone..Emerald-Cut, Marquise, Pear-shaped & Triangular shapes!

Examine the stone with your loup and make sure that all of the metal edge is now resting, or sitting on the "Crown Facets".

Very light tapping pressure is now required to 'move' the metal over the pointed area! No metal must be squeezed down to the stone. If any 'squeezing' is done, there won't be any thickness of metal to eventually Bright-Cut!!!

Using your "Snap-on" Emery disks with a "Medium Grade" or grit. Contour with a #2 grit ffile the metal so it is now in a flowing form and to smooth the curves of flat area from the hammering processes.


The polishing & cutting of these facets were totally mediocre. I'd prefer a thinner Girdle just for this project, but remember, that the selection is not always going to be 'picture perfect'!
I just wanted you to see that the most thick-girdled stone CAN still get set!

I'm looking at this odd-shaped stone and wonder if it can be set? My answer came in a .05 a second YES! All it takes is a bit of time and much determination!

Is this the most difficult shaped-stone that you can find? YES! Everything says it CAN'T be set, but let's see how it CAN!!!

You can see just why I use this "screw-tightening, ring-clamp". I don't want any ring movement while the delicate, setting process is in progress. I tighten the screw so very tight, then tighter still!


This same marking process is used again, for the width of this Pear-Shaped stone!

Already I have a better viewing on how the stone will eventually sit in the ring. I now used my Ongletter graver #2 and dug a line into the metal and this is only for the Point of the stone, no other marking on this ring is necessary.

I now wanted to start the 'carving-out' the Pavilion-opening for the stone! I start with a bud-shaped bur with sizes of #2.25 => 2.50mm's. The size is not for setting, but to clear away much of the metal for this very odd-shaped stone!


I've now opened the hole to 'almost' the size of the graver markings.

With my Flat #40 Graver, I cut a smooth surface on the inside of the rim of the hole. I need to know just exactly where the stone will be resting & fitting.

In this photograph (out of sequence) you can see where the large Bud-bur is cutting. The bur is cutting just at the edge of the hole. With this faint scribed line, I know exactly just where to cut.

Great care is needed now and I don't want to cut beyond the border of that line.

I put the stone into the hole just to see how I'm doing in regards to the carving out the metal. So far so good! AGREE?

This photograph shows some semblance of order in the carving process. You can see that the Culet is nicely being free from any metal.

I will use a round bur, only for the point of the stone. This point will remove any possibility of the stone-point touching the metal. If it does, whoops, broken stone! I will select a round bur slightly larger than the Girdle, in this photograph, the size is deceiving.
The size must make allowance for the Girdle & the Pavilion, under the point!

Here is the picture of the 'hole in the corner', only for the point of the stone. How deep? VERY DEEP!

Now comes the 'bearing cutting' that is to traverse all the way around the inside of the Gypsy setting. I'd make the carving into the metal, just as deep as the point is!
As you can see, I'm carving a new bearing to accept the faceting of the stone!!!

I'm trying to see if the stone 'might' fit yet. Remember that we are dealing with an insanely wide- stone Girdle. This is the main reason why the bearing MUST be made lower into the hole than normal stones.

Just another side-view. There is still much metal carving to be done!

As I placed the stone into the hole, I see some problems still 'yelling at me! I had to use my 10x power, hand-held loup to see where the facet corners are touching the metal. There are many!

As the hole is at a 45 degree angle slanted inward, the 'contacts of the stone to the metal' also increases as the depth of the stone is lowered!!!

Here are the continuing contacts from different facet corners. You can observe that the point of the stone stays in place. But I must get the oval curve of the stone further into the hole. Frustrating process? I'm not at all irritated, but I can see that soon enough the stone WILL GET SET!
"Time and success are now on my side"!..:>)

From this single, very odd-shaped stone sitting on my bench top.
Look at just what happened? It's now getting slowly set!

This stone is nicely sitting in the hole that has been prepared. The time involved took me so far many hours! Why so long? I had to slowly do the setting, as well, taking photographs to record this interesting event!

I'm examining every area of the stone to the bearings, as it's now finally in the Gypsy setting hole. This will be the very last time I can remove the stone for any further carving.
Now the pressure starts: I don't want the stone to break during the delicate Reciprocating Hammering process!

Here are a few questions you should be so very concerned about!
1) Are the bearings made wide enough for the wide Girdle?
2) Is the stone sitting FLAT & not tilted?
3) Is the point of the stone facing towards the edge/side of the ring?
4) How much metal is going to hold the stone?
5) Will I have enough metal to Bright-Cut?
6) Is the "Table" of the stone well below the edge of the metal?
7) Does the "Culet" of the stone not protrude through the bottom of the hole?
8) Is the ring the correct size that the customer needs?
9) Is the ring karat stamped?

You will notice here that the point of the stone is the very last section to be hammered. The curve and side-sections of the stone can be hammered at a "medium pressure". The point must be gently tapped! Why so? The point is the most delicate & fragile areas of any pointed stone..Emerald-Cut, Marquise, Pear-shaped & Triangular shapes!

Examine the stone with your loup and make sure that all of the metal edge is now resting, or sitting on the "Crown Facets".

Very light tapping pressure is now required to 'move' the metal over the pointed area! No metal must be squeezed down to the stone. If any 'squeezing' is done, there won't be any thickness of metal to eventually Bright-Cut!!!

Using your "Snap-on" Emery disks with a "Medium Grade" or grit. Contour with a #2 grit ffile the metal so it is now in a flowing form and to smooth the curves of flat area from the hammering processes.