I was asked to write an essay on this rather interesting topic. I needed ideas from the "Orchid/Ganoksin" group of jewellers and this is just one of them!
From 'my few years of experience', here is what I found & as well as the techniques that will be 'carefully' explained.
Past history on this "demo-pendant": My two daughters gave my wife this round pendant that was bought from an upscale jewellery store. As you can see that these stones were of a 'mediocre quality', I think they were only 'white spinels'. I'm now replacing them with "Swarovski, Zirconia" stones, in my personal opinion is these stones are much better quality and of a higher lustre now for my wife now to wear.
BTW, all of my demo-pieces are using "Swarovski, Zirconia" as they have (I think) a "Mohs Hardness" at 8.5! (You can correct me via email if I'm wrong!)
What tools are needed for this essay/exercise?
1) Large round bur, this is to carve a 'round gallery' for the Pavilion of the stone!
2) Copper, or Brass pusher...but please, DO NOT USE A STEEL PUSHER!
3) Bud-shaped bur. The #006 bur is to make two bearings, on both sides of each claw!
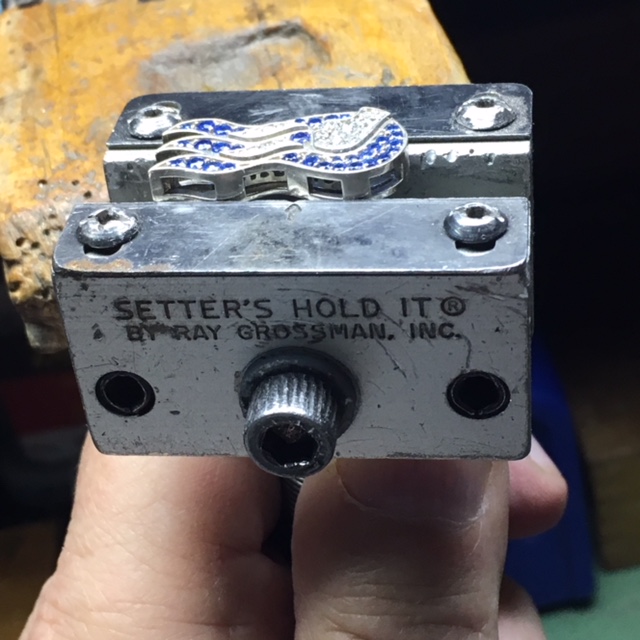
4) Ring clamp for your own setting project). For this demonstration, I'm using my "Shellac-Stick" as this demonstration is of a 'flat pendant'.
5) 10x power loupe. This is to be used for closer examination, other than your Opti-visor @ #5 power lens! I'm using my Iphone setting with the stronger 'close-up' feature on the camera, plus an additional 'close-up' lens attachment.
6) Pumice wheels of #180 grit, these will be in a Tapered shape.
7) Pumice wheel of #1,000 grit, (Pink coloured wheels) 'Tapered' shape as same as the #180 grit Pumice Wheel!
8) Cup-Shaped burs a.ka. #77B. The size of bur #012 is used this essay as the claws are only 1.0 mm. I always make my bur selection a size la rger, never 'the same as'.
9) Smooth jaw 'pair of pliers'. These are to be used in moving the two 'claw tips' together. These two claws must be opposing each other when finished!
10) Wax-dob. This is used to pick up the stone. Don't use tweezers, the stone might fly off 'by parcel delivery' and never to be seen again..:>)
Let's be honest, can you see the difference between these two pendants?..:>) The top photo is the 'store bought' and the one below, is after some serious modifications! As you can observe how transparent these 'white spinels' seem to be and with no overall shine to them. Just a poor quality of stones.
10) Wax-dob. This is used to pick up the stone. Don't use tweezers, the stone might fly off 'by parcel delivery' and never to be seen again..:>)


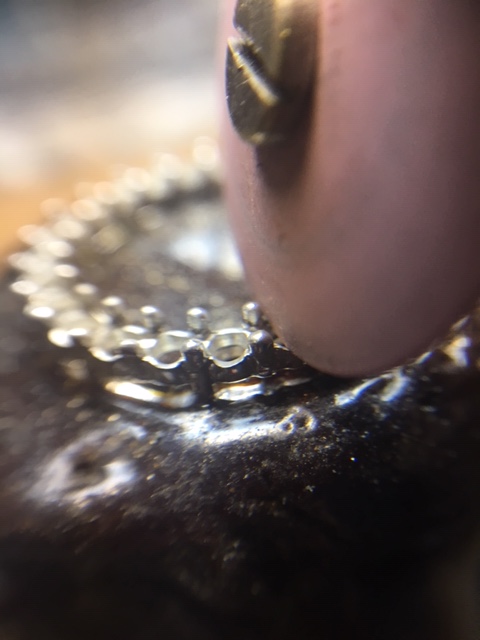
Here is a close-up of the original stones, you can see the 'uneven spacing' in between the stones, and the mediocre setting. The only 'saving factor' is the silver that the pendant that it was made with, and now let's look further.

Under closer scrutiny, you can see the bearings and the 'rough metal finishing. Let's look into the examination of this pendant.

OMG, this is what this jewellery store was selling? Observe the inside gallery-angle where the Pavillion of the stone should be resting against and the surface of the gallery.

I just couldn't believe the thickness of the girdle of this stone...:>( Would YOU sell stones like these? I really don't think so!

I saw little holes in all of the 32 claws throughout the pendant. I think the 'offshore' manufacturer attempted to reduce the 'metal-weight' at every possible opportunity.

I kept these 'poor quality stones' separate from my superior "Swarovski-Zirconia" stone inventory. I'm using my shellac-stick as this is the only way I can keep the pendant from bending while I was continually working on it!

My first cleaning step was to ensure that the inner 'opening' is near perfectly round and at an angle that is equal to the Pavilion-angle to the stone.
I really don't think this silver is at .925 purity (possibly .850 purity). The metal had a reduced '.925 silver resistance', (with my previous silver experience) this was a RED flag! While using my burs, the metal was not responding as regular silver should!

This is not the way to make a pendant, kindly observe the uneven finish along the gallery, enough with this. Let's attempt to clean the pendant for resetting with much more superior quality stones, agree?

I first attempted to use my Triangular file with a #4 grit, but this proved to be not a good choice of a 'cleaning tool'. There would be many striations (file marks) that will be remaining everywhere.

My next move will be using my Pumice Wheels of #180 & #1,000 grit wheels. On every setting item good or even what we see here, this process is a good way to start, ...again.

I'm now using a well worn, bud-shaped bur to clean the metal in between the two 'opposing' claws. A 'well used', or 'lightly worn down' bur, as it only skims along the surface then all is remaining will be a smooth & shiny surface.
If I used a Rouge (#1,000 grit) or my favourite Pumice (#180 grit) Wheels, I could have ruined the two claws, as they were so close together. I found that I needed all of the metal where possible, just for this 're-setting process'.

To re-cut the bearings to now accommodate the better quality stones that I now have, I ignored those old bearings then re-cut the claws with a #006 bud shaped bur.
Why not a round bur? I wanted to make a 'horizontal cut' and avoided the round bur. The round bur could have left me with an 'uneven' cutting groove.
On each 'opposing claw', I had to make 4 bearings, this was a very careful & deliberate process. If I went in further into the claw, I could have and weakened that one claw-tip. The end result could have been 'a broken tip' or even the 'claw'.
I had to re-cut, with the bud-bur right at the bottom of the 'gallery'. The 'older' bearings were somewhere near the top of each claw/prong! In this photograph, you can see what and where I was doing my bud-shaped burring.

I now have a few of the 'newer stones placed in. At every 5-6 stones, I start to secure each group of stones, why 5-6? If I dropped my shellac-stick, I wouldn't lose too many. If you look closely, you can see the 'opposing distances' between the two claws slowly starting to take place.

I lightly 'scored' the surface of my pliers, but not too deep as I didn't want the pliers to ruin the sides each claw. I'm only touching the very tip of the claws, nowhere else!

The pliers were originally 8.00 mm's wide and I then reduced them down to 1.36 mm's. "I must feel comfortable with them" while being used. I even use a pumice #180 grit wheel to further smooth the plier's tips! They 'grip' but never scratch the surface of the metal.

I'm touching the very top of each of the two claw-tips...'in unison'. As I want to have the two tips hold the two stones together. I'm not pushing the claws with any 'normal pushing tool, but with my pliers, I'm carefully bringing in the two claw tips further together and in this process, I'm actually securing two stones at the same time.

Those little marks were from when I 'removed' the white-spinels previously. Now you can see how level the stones' girdles are in their 'new home'. On a normal .925 silver, those marks wouldn't be so easy to make. I still think that this silver is only of .850 purity.

Although there is a space in between each of the new stones, now the 'spacing is equal'. You can again 'see the opposing claws are finally getting closer together'!

I examined the previous setting process and noticed that the claw-tips were of a uniform height. I didn't feel the need to reduce the height further, in other word's "if it ain't broke, don't fix!"
At this point, I took advantage of this, by now using my #77B a.k.a. Cup-Bur and rounded off the tips. I held the Cup-Bur at a 'slight angle away' from the stone. This is so critical as I didn't want any additional marks on the claws.
What size of cup-bur would I use on this photograph? For this demonstration, I was using a #014 bur, or in other terms; 01.4 mm's in diameter.
Why did I scrape & mark the shellac? You can see that I'm only rounding off one claw-tip at a time. When I'm starting to round off the bur tips, I might lose my place as all of these little claws look all the same.
As to remember where I left off, during my 'little cuppa tea-break', I won't forget where I last touched & which claw. Good idea? I use this method all the time and even today!

I don't know the exact angle in numbers, but making darned sure no edges of the bur is either touching the Table-Facet or the back-end of the claw.

Can you see the overall angle that my bur is being held at! Never hold any cup-burs in a vertical angle. If the angle is vertical, the cup bur would be sliding around the facets of the stones, but 'not shaping the tips'.

Even prior to removing the extra, soft silver pendant from the shellac, I'd give the 'claw-tips' a fine Red-Rouging. I'm concerned about any bending, as I'm using the shellac stick to 'stabilize' the pendant from any undue bending!

In this photograph, you can see that I'm directing my mini, low-heat torch to exactly where the heat must be applied. I want the flame to be set at 'low temperature' but not to 'burn' the shellac by getting the flame too close. If you see the shellac starting to bubble. STOP! Please withdraw from the heat, NOW!


I'm very sure you can see 'some difference' between the first and final finishing. There is just no comparison, agree?..:>)