Thursday 6 September 2018

How to use "Polishing Papers" for your gravers!

   In my many essays, I've touched on 'how to use polishing papers', but with very few details! 
In this essay, I intend to explain the grades or grits of paper to use, in sequence, "How, Why, Which and of course When!"

The difficulty of this exercise is only at a "6.5, on the Difficulty Scale of 10".

Let's start with the polishing papers and using the new grit numbers, for the same papers.

Shown here are a few of my (constantly used) gravers. In fact, one of the handles is 'colour-coded' as I will grab it within a moments notice and while not taking my eyes off of what I'm cutting. For your information, I use the "Rose-Wood" coloured handle specifically used for a Flat #40 graver.


If I can't exactly 'modify' any graver, no 'Bright-Cutting' can be done with ease! Remember, that Bright-Cutting is a near difficult task to start with, so why make it any more difficult than it is? 


 I've 'staged' these graver papers for this photograph & showing when these are to be used in a sequential order! The "Emery" papers shown are #240, #400. 
The remainder are my favourite 'Polishing' papers from  #600 up & including #1,200 grits. There is now a #2,000 grit paper, but this is too soft for what we're presently working on. 

The many gravers shown here were created for a (previous) gemstone setting class. Can you just imagine how long did it take me to grind them all? (Can you say 'days'..?) Then after the grinding was completed, I started the paper-polishing! 

 I must tell you a short, but a very true story! In one of my setting-classes, a student decided to polish his graver by putting his graver against a rotating (30,000 r.p.m.) polishing wheel! The sound of a polishing machine was not a part of my 'demo on graver shaping' & this totally surprised me..;>(

 I approached some members of my class to listen as to why he was doing this very dangerous act! He said, "I thought that this would be a faster method!" I told him in a very loud voice "If you this again, I will quickly escort out of the class and report you to the head-office as to why I'm throwing you out of the class." (I told him in no uncertain words.) "You should be damn glad that I stopped you just now, as you could have gotten impaled by that graver blade as it slams you either in your face, or abdomen". 


The 'Flat Graver #40' (shown here) has a thickness of the 'face' (not measuring width) of only 0.35mm's. Absolute total care must be given at all times & no errors are permitted, at any time in this exercise.

 During these recent years I 'found' an interesting & reliable blade, it is made in 'HSS', a.k.a. "High-Speed Steel". This company is now my favourite and I prefer these over any other makes on the market. The higher HSS strength is great as the point of the graver doesn't break off too often

 When the 'grinding process' has started, I make darn sure a little vial of water is within hands reach! If not, the blade will for sure get extremely hot and the steel will turn a ghastly blue or purple, what happened here? In one word, the steel got 'soft' and not worthy of any further use, pity!

In this grinding process....PLEASE USE AN EYE and FACE-GUARD, if not, the steel shards of metal will hit the Cornea's of your eyes, (let's not discuss the painful 'Operation Room' dangers here.)

Once you have your grinding finished, lets now proceed to use your #240 grit paper. Why not use the higher grits first? Either you use the correct 'sequence' of papers, or don't read this essay, simple as that! I started using polishing papers at an early age and found that this process is the only method! 

 In using the #240 Emery (not Polishing) Paper totally removes any shards of metal caused from the Bench-Grinding process. This graver is not to be used until we reach the #1,200 grit paper. This #240 paper is only a 'preparation' grade for the next (many) steps! This exacting process lasts for 30 minutes from 'start to finish'...OUCH! 

 Now that we are at the stage of #400 grit paper. Please use your 10x power loupe and examine the curved, or barrel-shaped sides of the blade. Keep rolling the blade on the 'surface' of the paper, why is this now so important?

 You need & must to keep the "Barrel-Shape" to the blade, this enables you to carve at a slightly curved and subtle angled surface while you are Bright-Cutting. This is so-o darned important if you don't do this you, will have a flat surface on this expensive "Onglette" side-curved graver. We prefer a flat surface only on a Flat graver, nowhere else!

 We are now carefully getting into the 'finer grits' of paper polishing. Again, please examine (10x power loupe) the steel surface at all times on the sides of your graver. Don't have any little scoring or lines on either side of the blade.

 Don't put too much weight from your hand/fingers on to the paper! I simply run the blade over the paper at a 'light-weight'. Take longer strokes, I estimate 3 inches or 75.0mm's in one stride!

We are now into the 'final' stages of polishing, this is where much more care is taken! The #800 grit is a remarkable paper, as it is smooth, but not smooth enough for me!

 When you are rubbing the blade with the finer paper, don't put too much finger-weight on the paper! If you do you will for sure ruin the paper with deep gouges and you might just tear the paper to shreds, YUK!

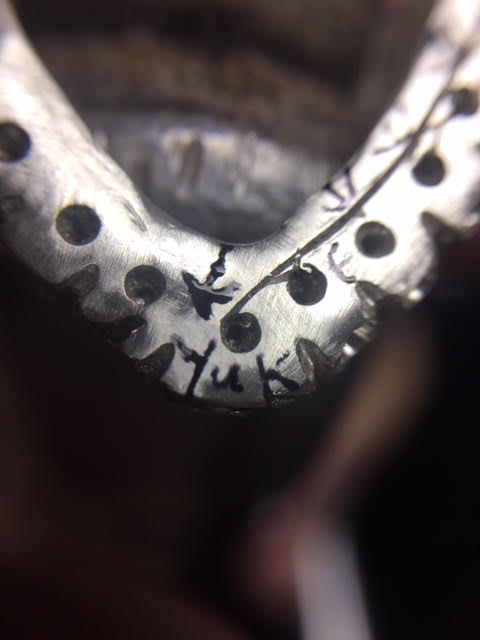
 Here you can see just how the paper is starting to shred, why? The graver blade might have been turned too far over on the side and the underneath sharp-edge has literally cut into the paper..not nice to have!

 In this photograph, I am using a wide soft-leaded Graphite pencil with a grade of #1 softness. This pencil lead will fill in the pores of the papers. This process literally makes the #800 grit paper equal to a #1,000 grit! Using an #1,000 grit paper, after the pencil rubbing, it will be easily transformed into #1,200 grit! 

How far along the paper would I rub this soft lead? I would run the lead all along the usable side of the paper-board. I need to watch what I'm doing at all times! I would just never allow a 'short-cut' by putting the paper on the side of my bench, just a very poor decision. Again why so?

 Not a good idea to put the paper on the side of my setting-bench, why is this? I have no or little chances of seeing how the graver is being cleaned.

In this photograph, you can see up close how this softcore Graphite pencil is being used. Upon this application of Graphite, I want to make sure that there are no areas of the paper remaining untouched.

The lower section of this photograph shows exactly how and why the lead is so important in the higher grits of the paper. I have other paper sticks with the same textures, again why? I might use the Graphite to the #600 grit and even #800, in case I'm not too pleased with the paper being selected. 

BTW, where did I get my many numbers of sticks? I went to the "Home Depot" hardware store and asked the attendant for some 'paint stirrer' sticks. The person in charge might not give you 8-12 boards, so I went back multiple (?) times until I had the just the correct number of boards to use for my papers.


I am showing you as an example the placement of a Flat Graver to the board. This graver has to be placed flat and holding the blade securely on the paper. With rubbing a Flat graver, don't let the tool  'rotate or rock' sideways on the paper. Here is the ruling: "3<=>4 inches, 75.0 mm's" for you!

You can see some scoring of the paper, what happened here? I leaned the blade over (by accident) and cut into the soft (#1,200 grit) paper! Don't worry, this will and can happen many times while you are in a hurry to get your setting done..fast!

 This is an up-close photograph of the Graphite Pencil lead, you can see just how wide the rubbing will be. I just measured the lead width, it is at 3.50mm's! 

 I sincerely hope that this essay has been of some assistance to you. I've touched upon some very important and basic 'notes & rules' for using your polishing papers. I did tell you in my opening remarks that this is not the easiest topic, but it has to be shown & explained in the greatest of details.

Other salient points just on "Bright-Cutting"
1) How to grind the graver? 2) How to modify the sides of the graver during some interesting cutting patterns? 3) How to discover & repair why your graver isn't cutting anymore?
Contact me at "gerrylewy18@gmail.com"

Tuesday 4 September 2018

Errors in using the 'Gravers' while cutting'!


 In my ongoing series of explaining how to use your fantastic Onglette Gravers #5/0, #0 & #1. These two gravers can 'make or break' the confidence of a beginner who is just getting started in gemstone setting. How difficult is this exercise? On a Scale of 10, I'd place this at 9+ on the Difficulty Scale.

 What is required are 4-5 years of graver manipulation! You should have the basic graver carving and understanding just what might happen if certain rules are not followed, and there are many..;>(!
BTW, if some of these photographs are not crystal clear, my apologies!

 Now let's get on with this essay!!
 What appears to be going on here? For the first few stone-holes being shown, the results are decent looking, then the cutting line seems to be drifting away from some of the lines of holes. Not nice!

With the "Singular Pointing Arrow", you can see that the rough-cuts for the beginning of making beads the metal cutting appears to be way off! A proverbial 'mess' in the making!


What happened again here? I was attempting to prepare a cut with my 'Separating Disk' to make little cuts for the Fish-Tail pattern to be initiated. I actually erred, why did I do this?

It is sometimes the basic level 'setter-in-training' can make the same mistake. Please be sure you are always aware of the pattern being created. Don't take anything for granted, even the slightest unnecessary cut now might be a major problem during the next few following 'cuts'.

In the second photo, you can see the graver cuts are not all against the hole for the stones.

The 3-arrows pointing to the beginning stages of a 'bead' are now so minuscule, no setter (even I) can prepare to set a stone! The mini-beads are so small, this section is now being wasted!

My graver cutting is in a straight line (for now) but the holes are not in line. This drilling was done in the wax stages. At 0.10mm's out of alignment, this is still too far away from the graver-cuttings!

This little area is so now difficult to repair, to say 'YUK' is an understatement. I would have my jeweller solder those grooves on the edge totally filled in and start again!

Now you can see how the holes are again, not in line. This is so-o important in these preliminary stages of cutting. If these holes are not in line, you can do either scrap the item or spend $$'s in a costly repair (soldering fees) to start again!

In this photograph, something happened here, what was it? This needs a total "solder-to-fix". The 'Separating Disk' cut into the wrong area again.

Mistakes in using the separating disk, I won't be using this method again! But now you can see just what can happen when care is not used! All of these "mistakes" were done on purpose.
 

 These little cuts were all created with my Onglette #1 graver and having the width totally modified.
Why so? I need to cut deeper, but never wider in these "Rough-cutting" stages. If the lines are straight and all of the beads are well formed, I would gladly forge ahead.

 I am using a 'greatly modified' graver, I shaved off most of the metal on both sides and it is down to only .03mm's in (the cutting) width. I created this very thin graver face, as this has to get me into the little corners of the metal that a wider graver-face won't be able to reach!


 But as I see it now, the chances of continuing further are not good.  Too many errors with many mistakes to make this an appealing "Piece of Beauty".

The forming of these 'beads' is now a thing of the past. This item is now getting closer to being 'scrapped' or metal-refined. As for what you can see, the 'cuts' are not good and not to be continued any further.

Here are a few photographs of the finished Fish-Tail pendant. These photos are 'eye-candy' for me.;)

This pendant took me only 2.5 hours 'start to finish'. The cubic zirconia shown are only 1.5 mm's in size. I could have set stones at 1.25mm's, (only if there were available in this city)!
 In another essay, I will explain the Bright-Cutting stages for making this pendant. I will walk you through the many rules of using the many Onglette & Flat gravers. You too can achieve this fantastic pattern with my help and assistance.

BTW, none of my 'setting with gravers' patterns is using any Computer Aided Designing (CAD) program.
 Gerrylewy18 (at) gmail.com

"Errors found in Gemstone setting."

  In these "Series of Failed Setting Techniques", I've attempted to make some 'setting-mistakes' and these results have been now photographed.

 I'm going to scrap these few items and have the silver refined. Why? The 'used' silver tends to develop pin-holes just in areas that you don't want any..(experience speaking here!)

 I bought an upscale book on jewellery designs and went through the pages, specifically looking at their Diamond Setting photographs. OUCH, these pictures stirred me to take a few photographs to show you! So what went so wrong? Literally, everything went wrong, is this possible?

 The setter neglected & avoided 'Burnishing the multitude of Beads'. I know how he separated the bead-bar in between the stones. He used an old roughy shaped Flat-graver to 'split & push' over the four (4) beads.

 The setter, with no respect to being careful, avoided improving the flat graver quality. He just dug in with his graver and no care was given on who would be looking at his workmanship afterwards! 

You can observe all of the stones were set FIRST! I stopped using this method over 35 years ago!
Now what I do is to cut the metal pattern FIRST, then Bright-Cut. Thus leaving a nice clean edge around the stones' girdle. What this setter did was also not bother to how the stones will be seating and many of them are literally all over the place. Not two of them are basically 'in-line'. 
Is this a testament to our professional ability & attitude?

 The amazing part of these two following photo's is that the 'upscale jeweller-owner' hadn't noticed anything wrong, pity! Sorry, I'm not permitted to divulge the name of this company & I don't like to have lawyers calling me..:>( 

To improve on this after I would have done the Diamond Setting, I would use a #006 bud bur to clear up any unsightly marks in between the beads. I would avoid any stone setting until the lines around the diamond hole are clean of any little lines from the graver cutting!

Can you see that all of the diamonds that were set are 'not in line'! How obvious is this great mistake?

There was no hint of this setter using his ''Bead-Burnisher" to just nicely 'round-off the beads' into little round balls. Out of a Scale of 10 for being a good setter, I'd give him a definite 4..(maybe)!
 BTW, Where is the "Quality Control" manager in this setting project? 


As you can see in these two photo's is that there is no angled faceting for the Pavilion of the Princess-cut stone. The little angles are not in line and the stone won't be sitting correctly, if at all securely!

 I saw these 'mistakes' and I want you to understand just how important it is to use your 10x magnification of your loupe. If the setter caught these problems, he would have made a better attempt & no problems would be noted here, trust me!

What do we have here? We have a girdle of the stone that is not sitting anywhere near the 'bearing' for the stone. The girdle just doesn't even match where the 'bearing cut' was made, again no angled-cutting for the Pavillion facets. Is this stone going to be sitting in this ring for long-term? Hardly or not at all!


 Can you see that these two stones are overlapping each other at the most delicate areas, the girdles!
The stones were secured with a flat graver carving a sliver of metal to hold the stone. This process is a 'temporary' second-option in holding, but not securing the stones.


In this better photograph, you can now see just how 'ugly' the setting now has become. All you see are pin-holes 'here & there' just making the setting look like an amateur tried their hands on it, yuk!


Under 20x power magnification, you can see again just how this stone IS NOT SITTING CORRECTLY!


Can you count the many (12) little 'wire-beads'...(as I call them) to secure the poorly set stones! 
Only three stones were of the same colour, the stone shown was '2 shades of a darker pink'.

 In the last photograph, you can see just how close to the edge of the bezel, is the girdle of the stone! One little attempt of polishing & the girdle would be overlapping the sides of the ring & gallery.

OMG, another two more stones overlapping each other, why is this? Here are a few reasons, the stones were picked long after the ring was created. I call this poor process; "Make & Find afterwards". All of my creations in past years were made after I bought my gemstones.

 This simple process allows the skilled jeweller, or the "Computer Aided Designer" to create his ring to match my stones.

  I have explored in detail how some setters think that no one will be viewing any of these errors!
Are these mistakes acceptable? I have other 'very descriptive words' for the reader, but they are not to be written, I'd just say that this ring looks ultra-disgusting!..:>(