Saturday, 3 February 2024

What is a "MILGRAIN Tool" & why is it used? - 9 photos.

  A "Milgrain tool" is used basically for ornamental designing. It is a rotating round wheel with little indentations around it's circumference.

 When this wheel is pressed against the fine edge of metal, the resulting pattern is similar to little 'balls' on the line of metal cutting.


 Here is an up-close view of this 'rotating wheel'.

 Some of these Milgrain wheels are made in France, hence the initial "F". The number 12 signifies the size of this particular wheel.


 For safe-keeping in case of getting damaged, its advisable to keep them in a container. The wooden handle is the only method used to hold it safely, while in use.
 

  Here is the country name embossed-stamped into the steel-pin tool.

 This internet page explains fully how and where this Milgrain tool is being used.


   For safety purposes, it's advisable to keep these delicate tools in your wooden box.

 Here are 6 sizes of Milgrain tools, these tools will give the user different sizes of these little 'balls'.

 This wooden box has room for duplicate sets of tools. If one favourite Milgrain Tool gets worn, there is another ready for engraving.


Friday, 2 February 2024

How do you use a "Bead Burnisher"? - 16 photos

 When I was an apprentice (circa 1960's) we had to make many of our own tools. The most important tool in our bench was the very much needed "Bead-Burnisher". 

 In todays market, we can now buy literally any size that's needed in a moments notice.

 Bead Burnishers now have dual purposes, namely pushing over mini-claws and of course 'rounding off' beads after they are secured over the diamond.

Diamond Setting is a very detailed and exacting process "where quality is paramount".

                          ====================================

 In this first photo, I will soften the steel bead-burnisher by using strong heat from a mini-torch. This must be done until it's red hot, not just warm.


 The continuing high heat turns the hardened steel RED hot and letting it cool down. Quenching it only makes it "hard" again.

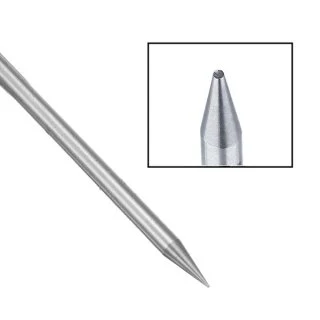
The Bead-burnisher is a tool that has a deep recess at the tip of the rod. Each rod has numbers embossed in the metal steel and this is used for identification purposes of it's size.

  Here are 12 burnishers prepared for all the exacting burnishing that will soon be done on silver or gold...or even Platinum.

 You can buy a container of only one size, if you wish. Why is this? Many times under a busy few days of stone-setting, that little recess or indentation gets worn down and is rendered useless. I think that this little packet is a great idea for you to have 'extra' burnishers.
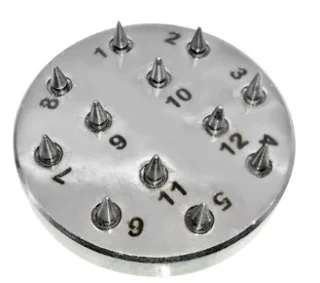
 In these two photos are two bead-burnishing plates for you to make your own burnishers. (Only if you have the time or patience)


  Remember, that all of the modifications or making a new burnisher MUST BE DONE DONE ON HEAT SOFTEND STEEL.
  What other tool in your collection of tools can achieve this high quality of setting? There is not one bead out of place after being used in setting. Only a bead-burnisher can achieve this level.


 In these next group of photos are from my library of 'saved pictures' where these burnishers were used.

    Instead of polishing away the metal-tips from your stones. This burnisher is the only (friend) you can have at your stone-setting bench resulting in the best results.

 There is no other item in our collection of  tools that will carefully 'move' metal over each stone be of equal size.

 
  This ring-top has 64 diamonds, there is no other tool that will help the setter to secure these stones.

  You will notice that all of these mini-claws are shaped equally. Your bead-burnisher is the only tool that will do this for you.

 When I saw this display of gem-setting, I knew that this was the epitome of perfection.

  Can you imagine setting these 104 stones then this is resulting in near perfection in the setting process?

  Each mini-claw has to be individually pushed over with the aid of the chosen bead-burnisher.
 
 HOW DO YOU CHOOSE THE RIGHT SIZE? Select a burnisher and place it over a mini-claw, the tool must NEVER LEAVE A RIM IN THE METAL. (This will take some 'visual' practice).

These are the only 2 tools that I used during this whole process of setting.


Thursday, 1 February 2024

"Let there be light, there was light and it was good!" - 15 photos.

 I'm not giving a lecture on the "Book of Genesis" about light, this essay is solely about lights on our jewellery benches.

 Two of the most important things at our benches are "POSTURE and BENCH-LIGHTING". Without proper lighting...'we would all be working in the dark', (pardon the pun).

 ==========================================

 In the previous century jewellers had only a candle to light their workbenches. These candles were situated behind a glass container filled with water. This water would disperse the 'beams of light' directly to the jewellers working area. Thankfully, we don't need this kind of antiquated apparatus anymore.

 Eons ago, jewellers used to make their own wax-candles by using animal bi-products called TALLOW. This wax was then 'hand-formed' around a long string.


 This is my Diamond Setting bench showing my '2-bulb' lighting system.


This is the correct position of the light source. I just found this photo on the internet and even I would be pleased with it's lighting position for my bench.


  Just for some extra illumination, I've added a portable LED light.


 All lights must have a minimum of a 'two-bar' system, why two? The minute flickering of each bulb is at 15cycles per second, our eyes can register this 'non-stop' flickering. 
 That is why there are two bulbs, as one bulb will cancel out the other flickering. For a better option is to buy a '3-bar' light.
 
Here is that 'three-bulb, desk-top' version that is quite safe on the eyes and has no sign of bulb flickering.

This is my two-bulb lighting system that sits in the centre of my bench.

 Here is a 'ceiling-held fixture' over the bench, you can see the 'two bulb' system. Each of these bulbs are at a mere 15watt illumination.


 With these strong 60w, or 100w bulbs, there will be still too much glare to the jewellers' eyes. This one bulb could be almost 'blinding' to my eyes.

 Here is a 'do it yourself' configuration, this is not for any long term, 'up-close' work.

 This is a 'one bulb' system that is a tad softer with the help of a 'shade' covering. But still not good for long time working for 'us' jewellers. This adjustable 'shade lamp' was used in 1911.


 With the advent of the incandescent light-bulb more chances for the jewellers to work longer hours in the days and then into the evenings.
 
 During the last century, a newer bulb idea came along, it was a 'hanging one bulb'. 


Wednesday, 31 January 2024

"The Crown" Jewels of London - 36 photos


 I wrote about "The Crown Jewels of Iran" two years ago. As I'm an Englishman by birth, I'm now going to be posting photos about the jewels of my country, namely England. 

 Originally I was very cautious in posting images of the royal families, in case of legality problems with the official 'His Majesties Printer'. All of the photos are now easily accessible from the Internet.

========================================================

  The jewels that will be seen in this essay are used during the Coronation events of the Monarchy. These have been used since early 1100A.D. additional pieces have been created since then. There are in excess of 100 objects on display in the "Tower of London" under the very watchful eyes of internal police.

 The "Cullinan Diamond" is in the tip of the shaft. 

 
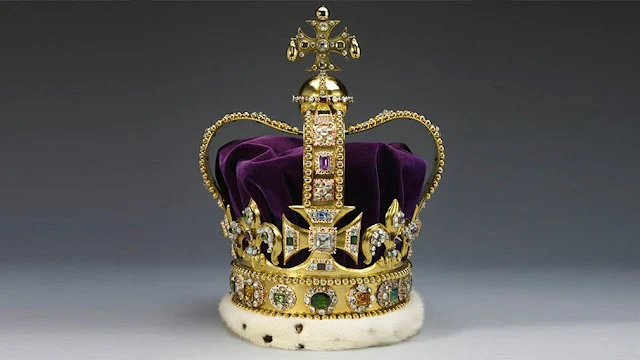
 This photo is an enlargement of "St. Edwards Crown" shown below.


 In todays market, all of the jewels are worth a sizable amount of $5.8 BILLION. This is only an estimate as we are dealing with 2,868 diamonds, 17 Sapphires, 11 Emeralds, 269 Pearls and 4 Rubies.

 I've just read that this number went up to 20 Billion (UK currency) at one time.


 This is the Imperial State Crown; it is used for State occasions and has a "Great Ruby" that was given to the the "Black Prince" in the 14 century.


The name of these two items are "The Sovereign's Orb" and "Queen Mary 2nd, Orb".


  Since there were no electrical mechanisms to keep plates warm for serving hot food in the earlier days. The best way was to create a plate warmer as seen here, circa 1820.


These 2 items are named the "Ampulla and Spoon".


 No, these two items (are not letter openers) but this is the "Hilt" that is worn around the waist and the Scabbard (sword) of the Jewelled State Sword ensemble.
This diamond encrusted  duo are named as "Hilt and Scabbard" of the Jewelled State Sword".


             This is the "Great Sword of State" with it's Scabbard.

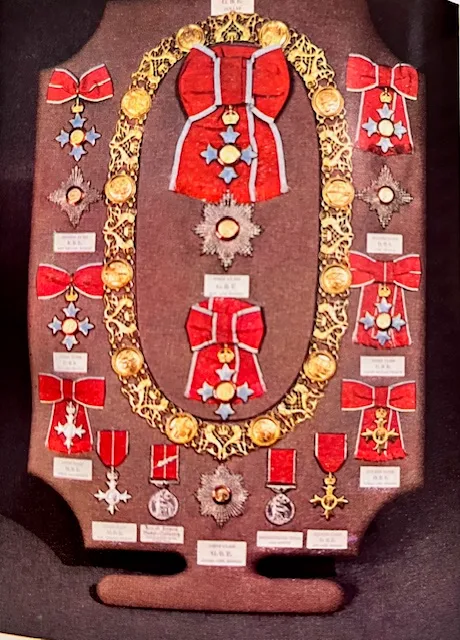
This is the "Insignia of the Order of the British Empire" it is worn as a complete set of adornments.

 
 For a 'good cup of strong British ale', these cups served this purpose. These were crafted in 1661  and made of gold-plated silver.

   This little dinner adornment is the "Exeter Salt" container.
 
This bowl is used to moisten your finger-tips during eating.

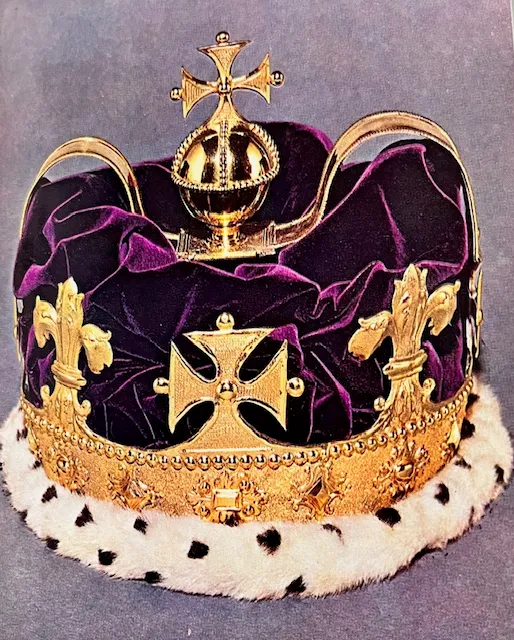
These are some of the Coronation crowns.
 This jeweller is one of the three people (in the world) allowed to 'touch' any of the 100's of items during any of it's repairing process.


This is a wine goblet that is to be used on festive occasions.

These are candle sticks, this where the long wax candle that can be inserted on the pointed top.

The large diamond is the famous "Cullinan Diamond" it weighs 530.5 carats.


 Upon sitting on the thrown, the newly appointed Monarch will hold this 'orb' in their hand.

 This tiara is made of Diamonds & Silver.


This is a close-up of the "Cullinan Diamond" that is named after the diamond merchant who originally found the stone.