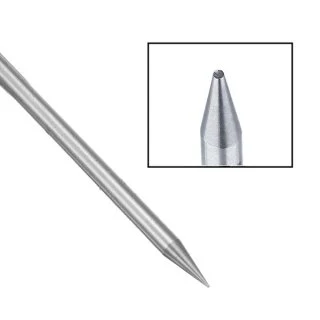
When I was an apprentice (circa 1960's) we had to make many of our own tools. The most important tool in our bench was the very much needed "Bead-Burnisher".
In todays market, we can now buy literally any size that's needed in a moments notice.
Bead Burnishers now have dual purposes, namely pushing over mini-claws and of course 'rounding off' beads after they are secured over the diamond.
Diamond Setting is a very detailed and exacting process "where quality is paramount".
====================================
In this first photo, I will soften the steel bead-burnisher by using strong heat from a mini-torch. This must be done until it's red hot, not just warm.
The continuing high heat turns the hardened steel RED hot and letting it cool down. Quenching it only makes it "hard" again.
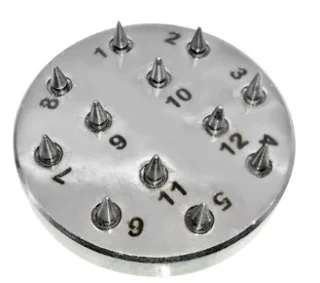
The Bead-burnisher is a tool that has a deep recess at the tip of the rod. Each rod has numbers embossed in the metal steel and this is used for identification purposes of it's size.
Here are 12 burnishers prepared for all the exacting burnishing that will soon be done on silver or gold...or even Platinum.

In these two photos are two bead-burnishing plates for you to make your own burnishers. (Only if you have the time or patience)
Remember, that all of the modifications or making a new burnisher MUST BE DONE DONE ON HEAT SOFTEND STEEL.
What other tool in your collection of tools can achieve this high quality of setting? There is not one bead out of place after being used in setting. Only a bead-burnisher can achieve this level.
In these next group of photos are from my library of 'saved pictures' where these burnishers were used.
Instead of polishing away the metal-tips from your stones. This burnisher is the only (friend) you can have at your stone-setting bench resulting in the best results.
There is no other item in our collection of tools that will carefully 'move' metal over each stone be of equal size.
This ring-top has 64 diamonds, there is no other tool that will help the setter to secure these stones.
You will notice that all of these mini-claws are shaped equally. Your bead-burnisher is the only tool that will do this for you.
When I saw this display of gem-setting, I knew that this was the epitome of perfection.
Can you imagine setting these 104 stones then this is resulting in near perfection in the setting process?
Each mini-claw has to be individually pushed over with the aid of the chosen bead-burnisher.
HOW DO YOU CHOOSE THE RIGHT SIZE? Select a burnisher and place it over a mini-claw, the tool must NEVER LEAVE A RIM IN THE METAL. (This will take some 'visual' practice).
These are the only 2 tools that I used during this whole process of setting.


.jpg)

.jpg)
.jpg)

.jpg)
.jpg)
.jpg)
.jpg)
No comments:
Post a Comment