Monday, 25 December 2023

Do you use pliers to set gemstones? Where & when => 24 photos.

 This latest essay has been on my mind for some many months! What do my pliers look like and where are they used? 

 (I've just been looking through my past essays and selected photos that had 'pliers' in the writing.) Let me show you what 'some of them' will do to help me to set gemstones. 

  This essay will enable you use these fine jaw pliers. Many of them were 'individually modified' on my bench-grinder for specific gemstone purposes. 


  These pliers have a serrated grooves cut in on them, for one purpose. These are to grip the metal when being used, the problem is that they will leave marks in the metal. (This problem is shown further in this essay).

  Here is another set of pliers that I use when I need to grasp the metal from another hand-angle.

If I feel that the serrated edges are too deep, I'd use an Emery Wheel to soften the markings prior to the setting process.


Here is a prime example when the serrated edges come in handy. I don't want the jaws to slip off when I need the utmost care in moving the metal over the stone.
 
  Why bend your hand or fingers when the modified plier jaws can do it for you?

 Here is another photo of when your hand, or fingers need to hold the claws without any effort.

 In these sample photos where another little pair of pliers will be necessary in bending claws towards the stone. I don't want to push the claws together by hand as two claws are meant to be 'moved together' in unison.

I have a smaller set of pliers to greatly assist me in this stone setting process. But I wouldn't dare use any serrated indentations in my plier jaws as the cleaning would be an immense problem.

 As these claws must be moved towards each other, utmost care is needed in dealing with diamonds of this size. (BTW, these diamonds were 0.25 points EACH).

 I had to greatly modify my new pliers as I needed a jaws that were thin in their uses. 

 Here are my large claws that were used with serrated edges. You can now see the errors in the setting, my job now is to clean these deep gripping marks left behind.

 Sometimes a good idea leads to major problems and these must be rectified immediately.

 In working with Genuine Emeralds, the utmost care is warranted. I could go at length in how these tips of the claws are not fully pushed over. As you can see the diamond on the 'far right' needs to be repaired. My pliers must be with out any marks on the jaws, or a full repair will start.

  DON'T EVEN THINK OF PUSHING OVER ANY CLAW WITH A "HAND-PUSHER".
I want a pair of jaws with a serrated edge to grab and move the claws together. 
These jaws MUST NEVER MOVE ON OPPOSING CLAWS. THEY MUST BE MOVED BOTH ON ONE SIDE.
 
As there are two sides on each "V" shaped claw. You have an opportunity of squeezing the "V" claw to a point and over the corner of the stone.  

  In this photograph, you will understand that I brought the 4 sides together and the corners of the stone will be nicely covered. 
 The claws must be remaining upright and not crooked, this is done with thin plier jaws. If you use serrated jaws, then you will have much cleaning to do afterwards.

 In this last photograph, I used a small handle pair of pliers. Very careful setting in your work is needed here! The plier jaws should be touching only the tips of the claws and making sure that all of the claws are straight and not out of alignment.


How does a "Ultra-Sonic Cleaner" clean? - 2 photos

 This fantastic machine is used in many professions, not only in jewellery. I learned that Dentists use them to clean dentures and including surgeons to sterilize their equipment.

 Just what is a 'sonic-cleaner'? It is basically a tank of water with 1, or 2 ultra-sonic sound emitting speakers located underneath the water tank.

 These sound emitting speakers, when they are 'turned on' are strong enough to vibrate the water, this vibration literally cleans anything while it's in the liquid. If there is a 'heating element' attached to the tank this will make the water vibrate that much better. 

 When the machine is activated, you can literally see the 'dancing of the water'. Some sonic-cleaners have two sound emitting speakers underneath the tank, this added-feature will make the water be 'excited'. I will show you my two machines that I use constantly.

 
  This small sized 'cleaner' has only one ultra-sonic sound speaker underneath the tank. The water level should have at least 1-2 inches of space from the tip of the tank.


Many errors seen in jewellery - 3 photos

Here is a troubling Emerald ring, why am I anxious to discuss this expensive Emerald setting? Where is the "V" claw on the Pear-shaped point?
 I would never allow anyone to wear this ring with no "V" claw protection". Even now I can see that 'the point' of the stone is damaged and as well broken off.
 The four claws have little symmetry to the finishing, as the front of the 4-claws has a sharp front edge.
 This is a 'poor finishing', why am I writing this? The front of each claw will 100% catch clothing. 

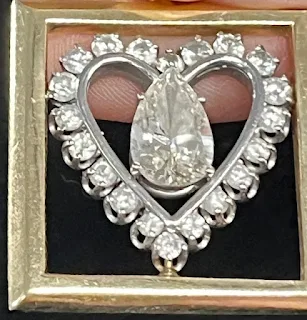
 I took a quick photo of a ladies' diamond pendant. I saw problems and asked, "where did you buy this diamond pendant?" "Oh, it belonged to my Mother and I wear it all the time", (I then kept my comments to myself).
 
 Just where is the "V" claw to protect the diamond? There wasn't any, plus the four very small claws are giving little ongoing protection in case the Pear-Shape diamond gets loose and falls away.


 I'm not criticizing these designs, but preventive measures and safety were not on the manufacturers "to-do" list.


ROUND DIAMOND DESIGN (pendant) - 1 photo

 This is a fantastic looking pendant for this gold chain. There are no mixing of curves in the design to any square pattern.
 The curves in the designing is just 'a wonderful exercise'. There is a full blending of texture and symmetry. 


Fancy-Cut stones - 5 photos

 In doing my 'mall walking for exercising' a few days ago, I saw a few photos on display kiosks that need a notes.
 As a Diamond Setter for the past 6 decades, I have seen some beautiful gemstone setting and here are some of them.


 On the point of the Triangular stones there are "V" claws. These are used for security and above all protection if the stone gets damaged. What I do is to "Bright-Cut" the inside edge of the "V-shaped" claw.
 

There are Triangular, small round and Emerald-cut stones, I had to take a few photos to share with you. 

 The "End-Bezel Setting" for the Emerald-Cut stone is filed and trimmed, as there shouldn't be any thick metal bars in holding the stone.
 The centre stone is set a higher-elevation than the two shoulder stones.

  Polishing of the Triangular-stone claws is required before the centre stone is set. I would even place this exquisite ring into a "Magnetic-Tumbler" as it's imperative that all claws be cleaned prior to setting.
 Once the stones are set, there isn't any chance to polish the claws again.

Jewellery mall posters - 3 photos

 Here is an array of beautiful "Pieces of Art" ornaments for your special lady. I'm at a loss for words to describe these beautiful creations, these photos speak thousands of words.


"My Diamond Setting bench" - 5 photos

 Many years ago my 'Diamond Setting Bench' was one of the featured benches in this 'Bench Book'.

  This is my current (2023-24) setting bench, I like to say "This is where my creations are born". 


  This is the photo of my bench that was displayed in the "The Jewellers Bench Book".


Post-Setting photos - 5 photos

 I relish in showing how uniform the mini-claw setting can be. It shows the correct way claws should placed against and over the girdle of the precious stone or diamond. 

 In these photos, 'polishing of the metal' is imperative and should not be postponed until after the stone setting. DO THE PRE-POLISHING NOW!


  The claws in this photo were completed in such a manner that there is not one claw out of alignment. Just a most delightful diamond-setting process.

 You see how nicely the Tube setting has been shaped, all you see is a faint line of metal. There isn't any thick bezel holding the stone in place.


 Here are an assortment of sizes of diamonds. This is Pave' setting at its best. There was no CAD involved in this creation. (CAD is another way of writing "Computer Aided Designing").


Baguette Setting (no diagrams) using 31 photos.

  In this extensive tutorial essay, I will 'attempt to explain' in the fullest detail possible how to set Tapered (or) Straight baguettes into a "End Bezel" ring.

The "Level of Difficulty is about 18, on the 10 Scale"

 In my previous essay, there were only diagrams explaining this very detailed difficult process. Thankfully, I found 31 photos of this same process, but NOT with any drawings.


 This setting process is the same for either a straight or tapered baguettes, the only difference is the shape of the ends of the stone.
 Make sure that the "Triangular file, #4 grit" filing across the end of the bezel walls is clean and no residual metal is remaining. (The Blue Sapphire ring shows this error) DO THIS CLEANING NOW!


 Into the two corners of the bar, at the end of the end-bezel there must be two little holes. These two holes will be eventually where the corners of the stone will sit, or rest.
 The only bur that is used here will be a round bur of #004, or a #005 in width.

 Using a bud-shaped bur, remove all of the residual pieces of metal that remains inside of the setting area.


 Select a grouping of stones for this exercise, the stones should be longer than the opening of the bezel. As this is so important as the stone MUST be resting INTO the end-bezel, not against it.


 The corner bezel points can be formed by a round bur that is slightly larger than the corner of the stone.


 Now let's get a bud-shaped bur and have that bud-bur create a partial-angle against the two parallel sides of the opening. This is where some problems might happen, read and read again my instructions.

 Clean out all areas of the inner walls. There must not be any metal remaining inside the bezel frame.

  In this photo is a sampling of my bud-bur collection.

  Hold your bud-bur at a 45degree angle that is the same angle as of your baguette pavilion.

  I suggest that the first angled cutting be as a guide in your Pavilion carving.

     Holding your bur at the correct angle as being shown here.

  I use my "Magnetic-Tumbler" often, as I want all of the metal dust to be removed prior to any stone setting. 
 
  Once that you are confidant to continue further, redrill those two holes deeper and INTO the base of the end-bezel. This is where the 'corners of the stone' will be resting for the 'tightening process'.

 I drilled an 'extra' hole as shown, why here? I don't want any 'slipping' of the rotating round bur to occur. This WILL frequently happen, and then you can 'join' the three holes together. DO NOT EXTEND THE NEW CHANNEL TO THE END OF THE BEZEL.


  You can now see that the three holes are now 'joined' together.

 At this moment, attempt to place the stone into it's 'new home'.

  Don't let your drilled hole go out of the end-bezel wall as shown here. WE ARE NOW READY TO SET THE STONE.


  Just as a review: CLEAN OUT THE FOUR CORNERS, CARVE OUT THE SIDES OF THE BEZEL, PREPARE A  SEAT FOR THE ENDS OF THE BAGUETTE.


 If you slipped during any round or bud bur carving, remove those extra marks with a Triangular #4 cut file prior to any stone setting. If you need to 'pre-polish' this bezel, PLEASE DO IT NOW, you can also use a Pumice Wheel of a "Medium" grit.

 The preparation of metal carving has now been completed, we're ready for the tightening and setting.
 DON'T USE HAND-TIGHTENING, YOU WON'T HAVE THE STRENGTH in your hand to do this.

  
 I prefer to use my Reciprocating Hammer to tighten the two end-bezels, but use a 'gentle level' of hammering.
 Why do I use my steel mandrel (as seen in my photos)? This is because I want a sturdier base for the ring, leather tipped wooden clamp only absorbs and renders the hitting power nearly useless.
 I start the hammering in the centre of the bezel and then tighten the remaining spots. Your hammer-anvil must never touch the front of the 'end-bezel' wall near the stone.

  I normally rotate the hammer-anvil to get a 'wider contact' to the end-bezel frame.

 You must hammer metal FLAT but not squeezing the metal down flat.

  You must try and avoid setting the stone on an angle (as shown here).


 When the 'securing' has been successful, just move the hitting anvil all along the surface. The bezel metal must remain FLAT.

 This Amethyst (soft stone) setting is now completed and all that remains is to use the 'split-lap' in polishing all of the necessary areas. Once that you have removed all of the metal dust particles then you can solder the centre stone setting.

 File clean and polish where needed. Your Baguette Setting is now 'thankfully' finished.