When you are dealing with extra small diamonds, (as I was a few days ago). Some of the diamonds were smaller that 1 millimeter, they were 0.0075. Now let's say I dropped one stone amid all kinds of setting tools. What would YOU do? I would get irritated, but the blame would be on me in not keeping my bench clean and organized.
I would always keep my bench "Ultra-Organized", as now being shown in this essay in being neat and orderly.
To avoid any sort of calamity, I check my clients gemstones for any tell-tale breakage everywhere! If not, I would & could be monetary responsible for not seeing it first hand.

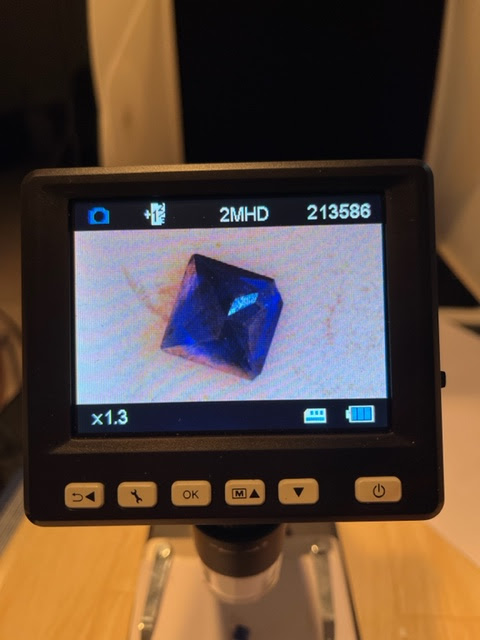
Here is another view at 40x power of the same stone. Your 10x power loupe just doesn't work too well.
This little assortment of "Flake Shellac" is my great friend in holding unusually large items used in stone setting.

This 3-inch diameter disk is what I mean by using this "shellac". All I do is gently heat up BOTH, the shellac and the large disk, and VIOLA! I'm ready for setting. If you don't heat the disk, then the disk won't bind securely to the shellac. The result will be having it literally fall off the wooden stick.

I really prefer this method when I'm working on large and cumbersome bracelets. I'd put the wooden disk into my ring clamp. The shellac-stick don't always work in this situations. YOU MUST RE-INVENT YOUR NEEDS.


Here is my favourite "Inside, Ring-Holder", this is the most intriguing tool in my bench. I'd be totally lost without it, as I've had this for the past 25+ YEARS!!!

Wooden ring clamps are great, but using an oversized wide ring shank. This is what every setter should buy. As you can see that this is well used.

Honestly, why use an alcohol lamp when you can use this mini-torch? I went to our local "Home Depot" here in Toronto, Canada and found a wide selection of emery-burs


For those often used burs and wheels, I put them into little "peg-board" trays. Noting is left inside my bench.

Here is a prime example of being "Ultra-Organized". Your time is so precious, why waste it looking for those mini-diamonds that you dropped?

As I never use any microscope, I have an array of "readers' and my "#5 lens, Opti-Visor".

Ahh, these are my 'friends', as each of them belong in their own container.
There are Pink wheels at #1,000 grit. Both with a Flat and Tapered edges, the other colours are dark Blue, these are at #180 grit. Then in the center, or my "Snap-On" emery disks with a 'Medium' grit.
I will never mix up my wheels, as this could cause problems in searching for the right wheel & grit texture. Again, "Your time lost, is money wasted"


Instead of having a multitude of bur-pads where the burs might fall out all over your bench, OUCH! I have only the most well used bur-containers. These special bur holders slide open and each bur can be replaced when not used.

These are my "wax, stone picker-uppers". These are all hand-made, how are the made? This is quite a simple procedure, just mix charcoal with a wax mixture into your warm hand, VIOLA. You now have one of these for your task of picking up large or small stones. I will insert a bur into the oval shape...DONE!

Here are my gravers each with coloured coded handles. Why is this? With my peripheral vision, I can locate any handle and its usage, just by the coloured coordinated handle. Instead of taking my eyes off of my setting, I can now see which 'graver' I need. Sometimes I put markings on some of them as well.

My "dearest, polishing-papers". What is a Diamond Setter without this vast array of papers?
They are all in my corner of my bench.
They range from #140 grit all the way up to #1,200 grit. I've written about these previously, but I just want to have you see again, they should be put aside from your working areas.
Don't have them all over your work area, I only have a few papers that I need at a moments notice. Namely, the #800-grit POLISHING PAPERS, as when I'm Bright-Cutting, I need them to polish the graver while I'm setting my diamonds.

THIS IS NOT WHAT YOUR SETTING WORK-BENCH SHOULD LOOK LIKE. Need I say more?
.jpg)

Here is a close-up photo of most of the required burs in the process of Diamond Setting. From the "Twist-Drill" to all sizes of "Round" burs. (#003, to #014). YES, at times I will be using these non-stop. If you don't have the correct sizes, how can you make decent work?

LASTLY, here is the chart of all of the shapes, names and sizes of burs that are available in your
tool-supply store. I can't and will not mention their names as I have my preference here in Toronto.
I use the ROUND, CUP-SHAPED (77b) with the BUD SHAPED and of course my favourite H.S.S. 45 degree BURS. These are used mainly in setting large round diamonds, or gemstones.
Please don't get confused with the Straight-Edged Setting burs.

There you have my reasons why I MUST KEEP ALL OF MY TOOLS "NEATLY ORGANIZED".
Hoping that you learned a few things from this tutorial essay.
Gerry Lewy. Gerrylewy18 (at) gmail.com
.