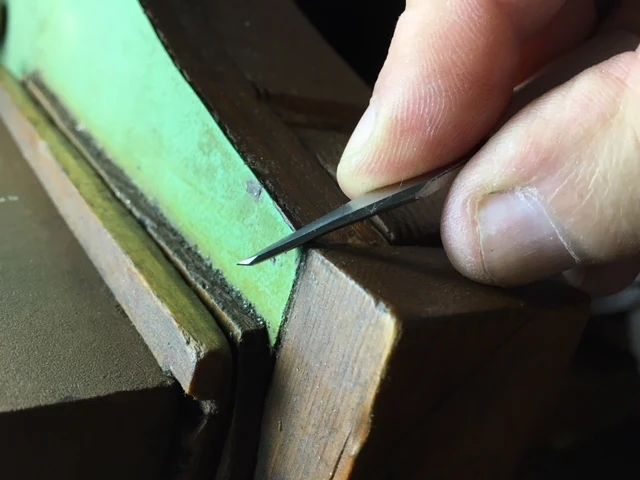
We've all seen videos with (simulated) "Fishtail" metal cutting. I think that this hand-cutting will be a great essay for you to view and see which 'teaching process' is the best?
All measurement are in the METRIC system. In Canada, and in many countries the Metric system works best.
These are the basic metal cutting tools that I used in this 'Fish-Tail' demonstration.
I use only two shapes of blades. They are a Flat graver of #40, and two Onglette gravers #1 & #2.
Here is the heart-shaped pattern that I use as it's nearly ready for my metal sculpturing. This will be a extra-long tutorial essay!! Grab yourself a large carafe of coffee and enjoy.
For easier holding, I prefer to put this item on my shellac stick.
This is my Flat graver, the "Glardon" width number is #12 other companies use #40. Same width, but using different reference numbers, don't be too concerned.
This Onglette #1, graver has been made thinner for only one main reason. The reason is to cut narrow lines as shown below, I name this process, 'rough-cutting'. This cutting is the beginning of all the lines within this 'heart pattern'.
Once the graver has been 'modified' to begin the cutting, then we can start to cut a line right at the edge of each hole.
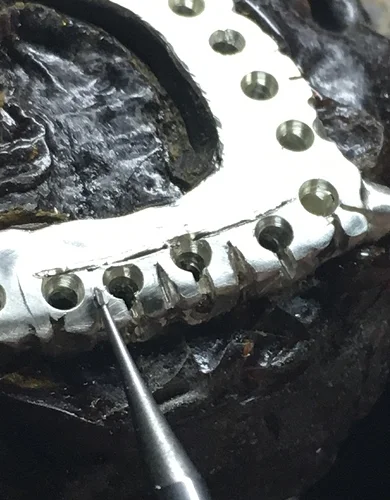
Right after this important line has been cut, the very next step is to cut the separation of the metal as shown. This is the beginning of the "Fish-Tail" pattern, I will use a fine bud-shaped bur. I suggest a Bud-shape #003, but nothing larger, please!!
This is the optimum length of the Onglette graver in relationship to the palm of the hand and fingers. The 'adjustable, wooden handle' contains the graver (of ANY LENGTH) the blade length can be altered to fit your hand.
There will be many uses for this 'ultra-thin Onglette graver'. Actually wherever there is a wide enough section on this "heart" for this graver to be used.
Here is a great example of using this thin graver. An Onglette of #2 (#2 width is too WIDE) will remove too much of the 'working areas'.
Here in this photo is my 'Flat #40' width blade. The 'face' of this blade is still great, and it will get into minimal areas for the 'cutting process'.
As additional information, I'm showing the wax forms before casting. If additional maintenance is needed before casting, then do it in the wax stages.
When cutting the 'rough-cutting' lines, the graver MUST ENTER EACH HOLE. If the graver misses the hole it will leave a 'sliver of metal' at the rim.
The only method in removing this sliver of metal is to get your Bud-Shaped bur of #3 width and it will GENTLY remove that remaining metal.
The centre (round bar) was only for the casting processes, as I wanted the flow of metal to reach both ends of the 'heart'. (To have it removed, can be the decision of the user).
If there is too much metal remaining on the inside of the two sections I will use my FLAT graver and cut the metal at an angle of 45 degrees. It looks 'nice, shiny & clean' when completed.
These are the only two gravers that I will use in this metal-cutting project. Every graver has been methodically shaped with a tapered point. I don't want huge pieces of steel of the graver interfering with my 'line of site'.
This is the up-close view of the front of the graver. Two screws on the handle 'double-secure' so that the graver won't move while I'm cutting into the metal, as this could be quite dangerous.
There will be times where the inside of a curved pattern needs to be cleaned. I avoid any filing as there could be file striations remaining on the metal from this delicate 'shaping-process'.
With your Onglette graver #2, I shaped my blade to cut only on one side. That side will "Bright-Cut" a smooth line along the metal as where it's needed.
All of the required cutting cannot be done in one session, therefore "Bright-Cutting needs to be worked on in many sessions. This is a very delicate process, don't rush!!!
Always use your 'Thumb-Guard', this will prevent injury to your skin.
Instead of filing 'extra metal'. I chose to incorporate the 'extra metal' into a new design. Here are the results, interesting?
Many times the inside of the 'heart' is not completely aligned with the outside of the pattern. This occurs sometimes, and we must overcome this obstacle by recutting the original shape where needed.
Here is the final recutting without any soldering of holes, or random filing. I just used my imagination!
I extended the 'fish-tail' pattern and making it more pronounced to almost touching the 'line of cutting'. I used only the Onglette graver #1.
Instead of a graver #1, the other option is to use a Bud-Shaped bur #3.
As you might see that the cutting is NOT AT THE HOLES FOR STONE-SETTING. This will cause much concern further on in your Bright-Cutting sessions.
REVIEW: Have the first line of cutting right against the hole for the stone-setting.
With a 'Bud-shaped' bur, cut deep from the hole to the edge of the pattern.
In this photo, is an ongoing process of cutting into the metal. Much care should be given all through this long process & procedure of "Fish-Tail" cutting.
As a better example, the cutting-line is exactly where the cutting SHOULD & MUST be. There must not be any deviation from this cutting rule.
ALWAYS KEEP A RESERVE OF GRAVER BLADES at your disposal. Just in case one blade needs to be resharpened at a moments notice.
THIS IS AN IMPORTANT CUT:
With YOUR FLAT GRAVER #40 cut a flange from the 'line-cutting' to the 'outside edge'.
With your Onglette graver #2 with it's polished right side, cut a Bright Cut where your "Rough Cutting" just took place.
ALWAYS USE YOUR THUMB-GUARD as the 'underneath' of the sharp blade might cut into you finger-pad and cause serious injury.
When all of the lines and subsequent cuttings has just taken place, this is what the "Heart-Shaped, Fish-Tail" pattern should look like. WONDERFUL!!!
Now you can start to set the 22 gemstones.
I found this ring sitting in my 'casters office' and asked for a silver ring. I then 'saved' the ring pattern by making a rubber mold of it for posterity and future uses =>like now!
Here is a slight variation of a "Fish-Tail" but with a little change upon the theme shown below.
I keep a collection of 'ready-to-use' gravers' in my bench. If I need to stop and repair one graver, the time being wasted is expensive and it detracts from my 'train of thought'.
When the 'rough-cutting' with your Onglette graver #1 has been completed, it's now the time to start the 'Bright-Cutting' processes.
Engrave an inverted "v", so it looks like this => 0^ 0 <= pattern in between the two holes. This pattern will create two new 'beads' that will hold each gemstone.
With the inverted V shape, you can see the triangles starting to look like 'beads'.
A MAJOR ERROR occurred in the bottom left corner. There is now 'extra space' and this should have been rectified or repaired in the wax form. See why there now is little, or no opportunity in fixing these problems?
When the small holes are made to accommodate a stone, the 'elongated triangle' will turn to be a little pin or 'bead'.
1) Start to Bright-Cut the metal down from the Two Beads towards the edge. 2) Then afterwards, Bright-Cut the long line around the two curves.
These little triangles are now 'healthy looking Beads'. All of the flanges have been cut gingerly and with great detail, the final outcome is that the finished design looks similar to being seen here.
All of the stone setting is the very last thing that should be done.
On a Scale of Difficulty of 10, I'd rate this exercise at a 30+ to 50.
Errors can easily occur and much practicing is required. Even writing this essay was not an easy task!
The editing in my writing and displaying of photos all in sequential order is the ultimate challenge in writing this essay.
For your information, this tutoring-essay has taken me an estimated 8 hours to put together. I attempted to keep the technical language as easy to read as possible. FINISHED AND COMPLETED, wow!
Gerry Lewy


.jpg)

.jpg)


.jpg)
.jpg)
.jpg)
.jpg)


.jpg)
.jpg)
.jpg)
.jpg)
.jpg)
.jpg)
.jpg)
.jpg)
.jpg)
.jpg)
.jpg)
.jpg)


