Thursday, 9 February 2023

The many uses of "Pumice Wheels"

 Although there are many hardness and shapes of "Pumice Wheels". The most desirable is the #180 grit as shown in this display. Instead of using a Triangular file of #4 grit, the cleaning wheel keeps all marks of the filing to a safe minimum. Hence, less cleaning from any "Tripoly & Rouge" polishing wheels. In fact, much to return to the original fine edges can be acquired from the use of "Tapered & Flat" Pumice wheels. 

 There is even a #1,000 grit Polishing Pumice Wheel, these are sold in conjunction with the #180 grit wheels. Their colouring is a great idea, as they are only Pink in colour.

 For edges around the setting areas, the need for a fine-edged wheel is far superior, now there is no need for any Emery Wheel or "Pillar" & "Triangular files" with #4 cut. The Emery wheel is too aggressive for any delicate sections near the diamond setting areas.

 These pumice wheels only enhance what is already there, not ruin it.

 Other needs for this cleaning process are prior to the actual setting procedure. It removes many aberrations that may occur while in the casting stages. Once the stones are set, it is really difficult to remove any of the extra flakes of gold. These pumice wheels may be used prior to, or post-gemstone setting.

 BTW, again note, all of these 'Pumice Wheels' come with 'Flat & Tapered' edges. When they get worn down they can be used on the inside of the rings.

 
 These "Snap On, Emery Disks" are of #220 grit (as shown). 


 These are the #1,000 grit, Pink, Polishing Wheels

  Here are a few uses of the Pumice Wheels during my 'ring cleaning'.

 The "Tapered" rotating #180 grit wheel is so easy to use. No cloth polishing wheel can get into these minute areas.

 Here is the Pink #1,000 grit doing its work without ruining the tips of the "V" shaped claws.

 Instead of mishandling the finished tops of any ring, I will rely upon the Pink wheel to assist me.

 In this photo is the rotating "Snap-on" Emery wheel. There is no need to use your Emery stick, why? You just can't see what is going on, you can easily guide the wheel yourself.

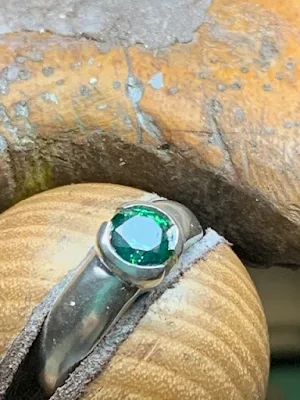
 Finally, here is the 'almost, worn down' Pumice Wheel #180 grit, removing any marks prior to the setting of your diamond.

 Hoping you now fully appreciate these Pumice Wheels of both grit textures.
Gerrylewy18(at)gmail.com


Where were YOU in 1961?

 Where were you in 1961? 

 I knew exactly where I was, I was learning to use my Onglette gravers even in those formative years. I was gaining experience in cutting designs on very 'difficult & extremely hard Brass' as this was the starting of "my 9 years of apprenticeship". Computer Designing wasn't even a glimmer in anyone's eyes, but 'we' had to learn every step in Onglette cutting.

 To make things more difficult, I had no idea that I had a "Learning Disability", namely being Dyslexic. That's why those '9 years' took so long and tedious for me. (Enough with my history).

 Here is the proof of the "Brass Cutting". My teacher said to me "If you can't do it right the first time, DO IT AGAIN & AGAIN" and I did many times until I got it done. He reported my progress every week to my Father, (z"l).

------------------------------------------------------------------------------

This first brass plate was solely on 'controlling the graver' 100% of the time.


 This second plate was the start of some very intricate graver cutting. Remember that all of this cutting was years before "Computer Aided Designing" aka CAD.

 I had to learn & ensure that the holes were not drilled through the metal, and I had to make darn sure that the graver didn't slip and ruin any new pattern. 

 Every line had to be 'just a perfect cutting' with no slipping of my hand and the graver. I had to ensure that the Milgrain wheel was applied in such a way that it gave it a 'nice finished look'.
 There were even many months of learning how to use a "Bench-Grinder" and holding the graver to the Oilstone. When I finished my own graver, my teacher always gave me his set of gravers to grind for him, without burning the steel.

  I had a difficult time with this strange pattern, there was no 'rhyme or reason' in what I was doing. But graver control was done according to my teacher's requests. I did succeed through the 9 years of 'fun'. 

  Now after 60+ years, you are now seeing what was then literally impossible, is now second nature to this "Diamond Setter & Author".

BTW, this is my 224th tutorial essay. Hoping you appreciate my earlier years of training.

Wednesday, 8 February 2023

"Sharp as a Razor" reprinted from "MJSA -2017"

 As this one essay was printed in 2017, it still needs to be written into this blog in 2023. Instead of using "Lewy" I'll be using "my" or "I" as needed.

=================================================

  I have dedicated my life to perfecting the art of setting stones. And through my studies, I've learned the importance of having a nice, clean edge on my settings and the right tools needed to achieve that.

 In my practice, I rely upon a series of gravers to do my cutting work, with some modifications. "Tool suppliers sell good gravers, but they are so very thick".

 In order for them to be suitable for my cutting work, I need to greatly modify them.

  I start with a standard #1 (or #2) Onglette graver and start the shaping process with my bench grinder. Because of the amount of metal, I must remove an estimated 50% of the front of the graver metal that is to be greatly modified. I will grind away metal from the tip (or front) of the graver. 

  When the graver looks sufficiently shaped, I will use my oilstone to refine the cutting edge and also any sharp & rough edges. If this blade is still too wide, I'll take it back to my bench grinder to refine the cutting point more.

 I will spend about 50% of my time working on the bench grinder and an additional 50% on my oilstone, making subtle changes and watching my new graver angles. This process will take me about 20-30 minutes nonstop. If needed, I will keep going from my bench grinder to my oilstone repeatedly. I WANT ONLY PERFECTION. 

 This graver is akin to a 'razor blade' as only the front of this graver will come into contact with the metal or stone.

 Once I'm satisfied with the shape of this new graver it will be used for Bright-Cutting along Channel Settings, Pave Settings & Gypsy Setting walls.

 After every two or three cuts into the metal, I will stop and refurbish the front of the graver. As noted, I WANT AND DEMAND A SURGICAL INSTRUMENT.

==================================================

  Tool Suppliers can't make these specialized tools, only Diamond Setters have that technique.

 (I remember once that a jewellery store owner requested that I travel down to his store from Toronto to Tennessee to help him. I looked at his gravers and not one of them was put to his bench grinder, why? He hadn't bought one).

 Here are 14 recently archived photographs with explanations that I'll be using for this informative essay.

----------------------------------------------------------------------------------

On the left is my untouched graver along with 9 gravers for various cutting needs.


 I use this particular graver company for their 'high-speed steel' metal.

Here is my bench grinder for all of my graver-shaping.


 In this photo, I'm removing any unused section of the graver that goes into my adjustable & extended handle.


 I prefer the 2 screw handle, why? In case one screw gets ruined I still the remaining screw to keep it usable.

 As you can see my graver blade has been greatly modified for my metal cutting.

 In my collection of tools, I have 12 handles each with its own gravers.

This is my oilstone that I keep within reach of my left hand and it is continually kept moist with a 'light viscous' oil. 

Here is the 'before & after' width of my cutting blade.

 Here are my assortment of Emery & Polishing papers. These keep my gravers in pristine cutting condition. The grits range from #240 Emery to #1,200 Polishing.

 This "Right-Sided Onglette" graver is very important in my "Bright-Cutting" in this Bezel setting.

 This particular #600 (Polishing grit) is the first of many 8 stages in paper-polishing a graver. 

 This photo shows how a modified "Right-Sided" graver should look for metal cutting. BTW, only the "right side" is highly polished, (if you are right-handed.
 
  I hope that this essay was helpful to you.


Are your a repair shop or wholesaler? PLEASE READ THIS ESSAY.

 At every jeweller's bench, there comes a time when you have to repair a large diamond that was previously set into an Engagement ring. 

 Here are some very useful techniques that should be followed. These same techniques have been discussed in various trade magazines over the past many years. 

 I'm not copying them but instead, I'm using my own 60+ years of diamond-setting experience.

===============================================

 Here are some major problems (using my rudimentary diagrams) that are usually seen on a client's ring.

1) "Thin or worn claws". This ring top has only weeks remaining before the diamond will fall out. I suggest a "full retip" on the other tops.


2) "Broken claw tips". I personally ask you to remove this broken claw and then 'supply & solder' a newer claw.


3) "Unfinished & unpolished claws". Please have all of the claws polished on the sides and outside before setting the diamond. Once the stone is in the 4-claw head..forget it!


4) "Hooked claw tops". This is not the correct way to set a diamond. Remember that you are working with a multi-thousand-dollar gem.


5) "Lifted claw tips". Tell me where is there any security? The answer is nowhere. Either you press the claw tip down onto the stone or reset this gemstone.


6) "No bearing claws". There is no 'bearing' for the Pavillion of the stone. Every diamond must be well placed in its own claw.


--------------------------------------------------------

 What should a diamond that has been properly attended to have? (These notes have been written from my own experience).

1) The claw tip must be tightly pressed down & secured onto the "Crown, or Girdle Facets" of the diamond.

2) The claws MUST have smooth tops and not have any rough areas to catch the wearer's clothing. This will eventually cause a loosening of the diamond.

3) The claws must be thick & strong enough to hold the diamond for many decades of continual use.

4) The 'inside of the claw' must have the same angles as the diamond.

5) All areas of the diamond head must be highly polished prior to stone setting.

7) If the head of the ring is a 'two-piece' construction, the soldering joints must be strong and not just held in place.

8) If the head has a 'peg' underneath, then all touching of the head to the band must be 100% secure.

9) The wedding band must be highly polished prior to the soldering of the head.

10) Are all of the 'trademarks, karat stamps & sizing' being imprinted on the ring?

11) Is the weight of the diamond notarized before being set? If not, the appraiser will ask you to remove it for an accurate appraisal form for his and YOUR records. How important is this? (I could go on for hours).

12) The 'colour of the diamond' will be greatly affected by the colour of the metal. Another reason why the diamond must be given to your appraiser loose.

Monday, 6 February 2023

Design names of heads for Engagement rings.

 First of all, my apologies, the individual photos are blurred and not in 100% focus. This copying was from a single page that I found laying in a "pile of diagrams" in my home office.

 Basically, these photos are now a '3rd generation' and I've done the best that I could under the circumstances to keep them in focus.

 The "claw setting inscriptions" are difficult to view, from my own experiences, I will endeavour to describe the correct names.

=================================================

This is the page that I found for everyone and for you!

This name is "4-claw head, with a soldering peg". 

This is a "Double 4-claws, with longer claws".

This is a "4-claw, 'V'-shaped style" setting. Basically used for 'Princess-cut' square stones.

This is a "Full Bezel" setting. Be careful, as about 25% of the stone is covered with the bezel, pity!

Another name for this style of setting is a "Half Bezel". Much more of the diamond is exposed.

This is named an "End Bezel", this setting is only used with square stones.

 I learned that there are two names for this setting: "Trellis" or a "Lucida". Remember that much of the work is in the polishing that is prior to the diamond setting.

This is a "Tension" style of setting. Much of this diamond is nicely exposed.

 I'd name this ring top a "Bead" style setting this setting is Bright-Cut. You could use CAD (Computer Aided Designing) in creating the four mini-claws. The Milgraining effect could be used after the setting has been completed.

This is an easy name. It's an "8-claw Setting". Pre-polishing must be done prior to the diamond setting.

 This has a long name, ready? "4 claws in a Basket setting, with added diamonds". 
 
"Double, 4-claws in a Double-Frame, Basket setting".

"Four-Claws in a Flat-bottomed, Double Framed setting"

 Now you can increase your diamond-setting vocabulary. I hope that you enjoyed this 220th tutorial essay.
Gerrylewy18 @ gmail.com