I know there is a lengthy and very popular essay on "Florentine gravers" that is posted on this blog. I located additional and very important photos for you to view.
The original "Florentine" essay was posted on September 29th, 2018. To view this important essay, just scroll down to the first of 500 tutorial essays.
When you are grinding the graver on your bench grinder please use a beaker of water to keep the blade from over-heating. If the blade turns to a definite brown colour that means the steel is softening and thus becoming difficult to return to the normal steel strength for engraving.

The price quoted is in Canadian dollars (plus the 13% Provincial & Federal taxes). $21.41. The "STRT" represents a "Straight" liner.

Both graver blades are with '6 lines', but each is of different widths. ("E.C. Muller" is the 'best' engraving blade to buy, if you see this brand name 'go for it').


Here is a magnified view of the 'two liners' being shown above.
The "width' represents how wide the actual blade is, meaning that there is no less number of lines. For every 'line-cutting', the engraver has a choice of a 'wide cut' or a 'narrower series of cuts'.
These numbers embossed into the blade are all that the engraver has to see.
Each of these two blades still has '6 lines', but now either a 'wider' or narrower' blade width.
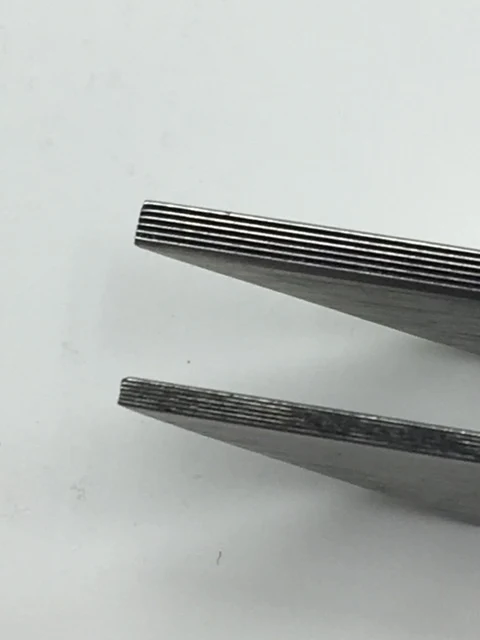
Here is a prime example of 'how & where' the blade is being chosen and 'why' these numbers are so important to the engraver.
The 'number of lines in each cut' has a direct reference to the width of the 'cuts' the engraver has to be concerned with. (this is a very technical study of line-cutting).

After I set the stone, I chose to use my "liner" (Florentine graver) just to give more 'visual interest' to the silver ring.
The method that I used is to engrave a 'cross-cut'. The first cut is deep, then the second cut is at a 90-degree angle, but this second cut is not too deep.
(Hoping that this is not too confusing to you or to the beginner).
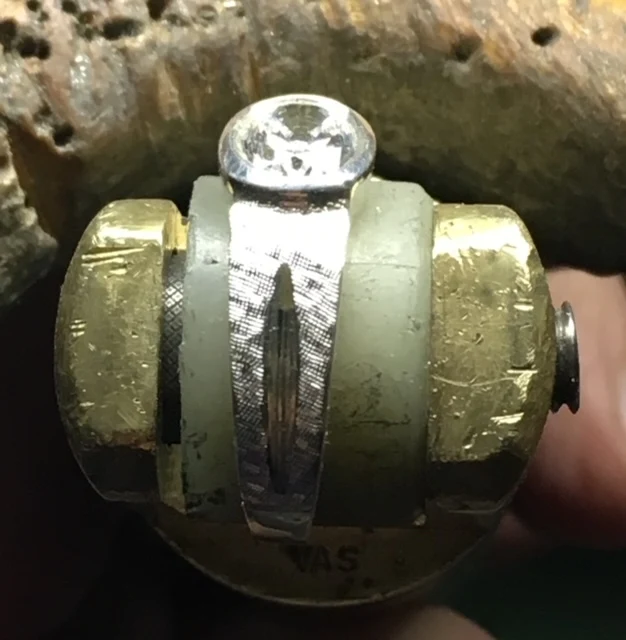
This photo displays a ring that has not yet been engraved. The option is up to the setter and the clients' wishes on what is required.
--------------------------------------
Before the engraving is to start, the 'centre groove' should be highly polished with Pumice Wheels of #180 grit and then #1,000 grit (Polishing) wheels.
If any polishing with a cloth polishing wheel is done after engraving, the "Florentine" effects might get rubbed-off in the process. I've seen this on many occasions and it is a challenge to 'repair'.

Hoping this additional topic on engraving gives you a better understanding of this interesting engraving effect. Gerry Lewy.
No comments:
Post a Comment