Monday, 3 June 2024

Where would you use an "8 inch, Triangular file"? -4 photos

Triangular files are a great tool for 'cleaning and finishing' your stone setting. After this manoeuvre, the actual polishing of the metal starts.
 The tapered file allows me to give a contour to the metal. I can easily see where the file will be touching on each stroke. 


 The 'tapered edge' gives you much to work with the inside of the Channel Setting. You can place the file point and carefully proceed to push the file along until the file cuts the metal evenly.
 With a "Pillar File", all it has is a straight and thick edge. You need to find out where the file is touching.
 
  I marked 4 lines on the handle of each file, representing grit number four. Two lines show me the grade of the texture. I then don't need to stop and examine each file for the texture, every minute, as time is so precious while stone-setting.
 

  The length of these files is 8 inches and the length is suitable for my hand.


Which hand-piece is suitable for Stone Setting? -11 photos.


 This essay might be repetitious from my previous (May 6th) topic, this essay is only for 'gemstone setting'. 
I will never promote one tool supplier over the next, I'll only give you MY REASONS why each are more worth your while in buying.


--------------------------------------------------------
 When I'm holding a smooth handpiece, I don't want the 'button' to interfere with my hand. Why? This button will grip my skin and cause me much pain when it suddenly clicks closed.
 I can see that there is no 'flex shaft' on any of these four handles. It will give you little or no motion during the setting processes.


========================================
 This handle is great for any extra movement, always use a handle with the 'flex' attachment. I still use this handle as a 'back-up'.
          =============================================
 When, and if you don't have the 'flex' attachment, the 'micro-motor' is the really the 'best' route to take. I use my 'micro-motor' continually in gemstone setting. It's my 'best route' to take, as it gives me 100% total freedom of movement.
====================================================
 This the full length of micro-motor handle and power cord. As you can see that your fingers are just at the edge of the rotating bur. My rating is at 10 out of 10. My own power unit is the same as seen here.

========================================================
 This photo displays the "Reciprocating Hammer" as there is no need for any 'flex attachment' during the setting process.
 I'd give this powerful handpiece a definite "10 of 10".
======================================================
 This lightweight, battery operated mechanism is good when short bursts of usage is required. I'd frown on long durations as there could be overheating and battery draining just when you need it the most.


=======================================================

 This is the epitome of luxury while you are working at your bench. It has a built-in Rheostat in the bench-top motor driven apparatus, as well as having a foot-activated speed control. I'd give this a rating of 10 out of 10, if not higher!

============================================ 
This handle is not suitable for gemstone setting, why? You need a key open up the swivel jaws to tighten the bur. Plus there is no 'flex' attachment to be seen and freedom is definitely very limited.
===================================================
 This 'bur-locking device' on the handle could snap on to your fingers and cause much skin damage plus could be very dangerous. 
 Not to mention there is no 'flex' attachment, there is also very limited hand motion leading from the motor cable to the rotating bur. BAD CHOICE!
==========================================
I wouldn't suggest this handle for gemstone setting!!!
 The handle has a definite weight problem, it's very cumbersome for long periods of gemstone setting. 

400th essay => new uncut gravers - 9 photos

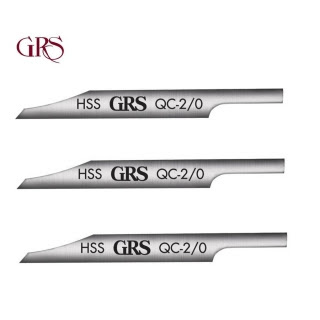
 For this 400th essay, I'd like to explore "new gravers". These blades of steel are your absolute 'best friends' at your bench.
 This essay has nothing to do with aspect of gemstone setting, on the contrary, it's all about how to be made aware for buying these blades.
 I'm not in the position to promote any tool supplier, some photos had their brand name attached. I will make your buying trip laden with more information about which graver to select and why, agree with this scenario?
==============================================
 These gravers are short in length plus the front face is too thick for detailed cutting on narrow designs. If you are not familiar in grinding your own blades, then stay with the 'shortened blade' as shown here.


---------------------------------------------------------
 These gravers need to be shaped into a fine point on your bench-grinder. "Glardon" are a wonderful company with these blades, plus there is sufficient length for many, many months of metal cutting.
  If you are engraving patterns into metal, I suggest buying different shapes of blades. If your tool supplier have "HSS" (High Speed Steel) blades, buy them, Why? These blades have a longer bench-life as compared with the (softer) Carbide steel.

--------------------------------------------------------------
 The length of these gravers are the 'correct' length for every 'setting' application. I use these blades continually, so why not you?
 As you can see that every blade is composed of "HSS", High Speed steel. When I buy new blades, I will buy only this tensile strength.
                                         =======================================

  This photo is of a FLAT graver and has a shape for my (special) Diamond Setting. I will shape the very tip on my bench-graver. BTW, every graver MUST BE MODIFIED after being purchased.

 There is little reason for me to buy these thick 'Flat' blades. The problem is that during the grinding there is a great tendency for the steel to overheat during the shaping process.


=========================================
  In modifying this blade, the chances for me in using an Oval blade was few and far between. I'll stay with a FLAT , or an ONGLETTE shape for 100% of the time.

===============================================
 Here are 12 of the 'best gravers in town' If you can buy these 12 blades as a set, please do so. You will be much more happier with your purchase, trust me!

 If you are not experienced in shaping gravers yourself, then buy these graver blades as they are. 

 Modifying (shaping) gravers is one of the most difficult experience in learning gemstone setting. It took me only 6 months to learn this 'skill'.


Thursday, 30 May 2024

Which weight scale would you use and why? - 9 photos

 I have three (diamond & metal) scales, each one have their own purpose for my gemstone setting profession.

 My Diamond scale is just what it is, it's a scale just for weighing diamonds. Accuracy is at 3 decimal places. My other 2 scales just won't be that accurate, that's why I needed three scales for 3 different applications.

 This "Diamond Accuracy" is rated at 100% as my diamond dealer once weighed my diamonds on his scale and 'we' both shared the same stone weights. Interesting results.

 1) You can see what these 5 stones weigh in ounces. Is it useful? Depending on your needs. As this is highly portable, I can easily just put this into my shirt pocket.


 This 'diamond scale' had metal (gram) weights built in. Some pieces of jewellery need a more delicate weighing system, this is due their small size. 
   
  These 5 (synthetic) stones weigh 2.10 carats, two decimal places is more than sufficient.


 For lighter pieces of jewellery, this same diamond scale is 'better than great'! For detailed accuracy, it shows me weights into 3 decimal places.
 On larger scales, these delicate weights might not be useful and the scale-weights could be fluctuating wildly. This actually happened during this photo-session, yuk!

==========================

 2) The scale for metal is also for gold & silver with an accuracy to 0.01 grams. The one I'm showing is battery-activated and is quite portable between my work-bench and office. In fact, I keep this scale INSIDE OF MY BENCH.


  This silver (gold-plated) casino disk has a weight of 61.1 grams. I can easily reverse the cover into a container for jewellery, this feature is good to have.

 3) Lastly, my first scale that I ever bought was never good for gemstones. This weight-scale is primarily for metal, and only for metal. This metal-weighing scale has a distinct feature of being accurate to ONLY  2 decimal places.

 For metal, this is great for many purposes. BTW, this weight is 2.59 ounces.


   This same disk comes in at 73.6 grams. One decimal place for grams is not totally accurate, insurance appraisals need a more accurate reading.

 For some countries who use "DWT", or penny-weights, this measuring system has a nice feature. BUT, this scale is not good for gemstones, as I know from first-hand experience.

If I overlooked some features for these three scales, my apologies!


My Pave' apprenticeship-training, circa 1960. => 9 photos

 This was my "apprenticeship training" for Pave' setting!

 How many Diamond Setters (today) can create Pave' beads on flat metal? They leaned upon using "CAD-created metal (mini-prongs) beads" instead.

 In the earlier years of my apprenticeship, circa 1960 A.D. I had to explore the basic bead-setting techniques that my teacher himself used. He then showed me the route of using only an Onglette graver with the 'front point rounded'.

 How many of today's setters use the Pave' raising of beads? I believe that this method is slowly getting 'forgotten', and I intend to keep this skill alive.

 "Times have indeed changed...but thankfully, not forgotten".

 If not for these blog essays, this technique might very well get forgotten, in future years.

        ==========================================

  I still have the 'brass plates' that I practised on, as 'these plates' were the beginning of my career in Diamond Setting. Brass is a very hard substance and difficult material to practice. To learn on a softer material (silver) wouldn't give me a chance to experience what 10 kt. gold would be like in those earlier days. Jewellery in 10kt was the 'normal gold alloy', as 14kt was saved for the more expensive clientele.

 I succeeded and 'the rest is history'.

 During those earlier days, I learned how to cut & shape Onglette gravers. And you my 'great blog readers', can buy a new graver without experiencing the method of graver shaping. Today you must use a rotating disk laden with an abrasive to shape the graver. All I use today is an oil stone for the face of the graver and 'polishing papers'.

 You just can't learn how to shape your gravers, if you buy them already shaped by your tool supplier. I spent literally 6 months, practising (every day) learning how to shape gravers on a bench-grinder and an oil-stone, just for my instructor. Because of those long months, I now think of this task as 'second nature'.

This brass plate is still on my bench after 65 years.  


 I had to learn what a Milgrain tool was, and how it worked on metal.

  My next lesson was how to cut into the metal corners 'without slipping'.

 These brass plates remind me of the many earlier weeks that I wanted to give up, but my Dear Father, (R.I.P.) said "get back to work next Monday, start again & keep learning".


 These two little stones were the very first stones that I ever set. Imagine doing this on brass?


 I went on further to cut squares without slipping and ruining the corners. Remembering that this was back in 1960. Brass is a very unforgiving material & I learned some unsavoury language when my graver accidentally slipped. 

 Those little '4 dots' were the first 'beads' that I ever created. There were so many rules in using a graver in creating beads. Even placing the brass plate unto a shellac-stick and preventing the plate from falling off during the 'rough cutting' was a new lesson.

  Once that I mastered the 'bead making technique' my teacher instructed me to keep doing this 'basic, bead making'. He had the wisdom in knowing that one day I might be teaching this skill to others. How true he was!

 In learning in 'how to control the graver', was the most difficult task that I had to learn.
 
  How to cut 'parallel lines' and again not in slipping was my most challenging task. I wonder how many jewellers and setters had to maintain control their choice of words in their apprenticing years?
 

 "Apprenticeship is a main ingredient in learning a new profession". You just can't learn by reading new techniques from a book, as you can't interact with written text.
 My blog is good for you, as I've 'walked those roads myself' and know the problems you might have. If there are any questions, please mail me at 'gerrylewy18@gmail.com'.


Sunday, 26 May 2024

Why YOU MUST ALWAYS measure your "Princess-Cut" Diamonds - 16 diagrams & photos

This is one of the most serious requests I will explore. Why must the "Princess-Cut" diamond be carefully measured always before setting the stone?

 Every stone you find will be fraught with multiple widths and lengths. The measurements might be off by as much as 1-2 mm's at best. This is due to the stones being 'cut by hand'.   Only 'perfectly cut stones' being shaped automatically by CAD designed computers, or polished by lapidary machines. These will be great to set by any Diamond Setter.


In cases like this 'precious stone', the facets are equal on all of the stones' sides.


  After taking measurements throughout the stone at the Girdles. It's time to decide where the widest edge is.
 Then at the 'long edge' I'd paint lines on the table Facet, as further shown below. These lines will be as a guide where the length of finger will be.

  I found that there was 11.69 mm's (width) and then 12.02 mm's (for the length).

 This photo now shows why taking measurements is so essential prior to setting a "Princess-Cut" stone. If I reversed the location, the stone would look 'off balanced'. 


 Thankfully these measurements are now correct on all 4 sides. This will be a true "Princess-Cut" stone with no problems for deciding which side to use.

 Here is a sample of measurements on a 'square stone' there could be 4 measurements. Lets see what must 'we' do in this case and then to make this stone look good in the setting.


 If you examine a gemstone with multiple sides, let's now look at a 'parallelogram'. That is a stone that has 2 'long sides' and 2 'narrow widths'. What happens if the stone is set more wide than long?
 The answer is to first measure in millimeters and see where the "long" is on the stone.
The long angle MUST ALWAYS BE INLINE WITH THE FINGER.

This is just what we're aiming for. (Please excuse the exaggeration of measurements).

 But what happens if the RED edge is not 'long',  the diamond will look too wide. ALL OF THE RECTANGULAR DIAMOND FACETS SHOULD BE INLINE WITH THE LENGTH OF FINGER.


 BTW. As an example, lets look at these Girdle facets. The Facets are so very thick, that I'd shy away from setting this stone because of the thickness of the stone in general.
 
 Why would I hesitate in using this particular stone? There are 'corner facets' missing and if any added pressure is applied on them, "Good-Bye stone"!


I measured this stone as a good example and look at what I found? Two measurements with one (nearly perfect) square stone.

 I didn't plan or arrange the numbers for this display, but this is what can happen at your setting bench.

 BTW. There will be little problems with Diamonds. With semi-precious stones the measurements need to taken at every section of the Princess-cut stone.
 Is this time consuming? In my estimation, nothing is lost if the many measurements are accurate and then the ring will look absolutely 100% GREAT.