Here is a nice assortment of photos that I used for this project. All of them with a few exceptions of waxes were all "Computer Assisted Designed', aka "CAD".
The 'double-8' were stones set and polished prior to soldering to the main plate. I painted the metal first, then cleaned the extra blue paint.
I used a "bead-burnisher" to push the mini-beads down and then securely over each stone. There were only two mini-claws on each stone.
The same 'bead-pushing' process was also for the pink-coloured stones. The number 8 was gem-set separately, as I had to polish the metal before soldering.
I had both of the disks placed on my bench-peg just for the photography.
I painted the "card suites" and the paint overlapped, but I repaired it afterward.
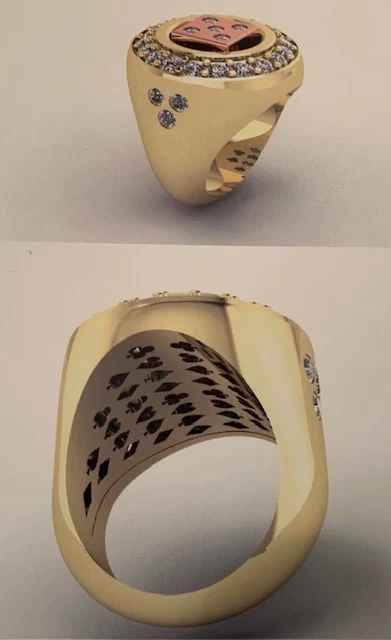
My CAD designer cut out a novel "pattern of card suites" underneath.
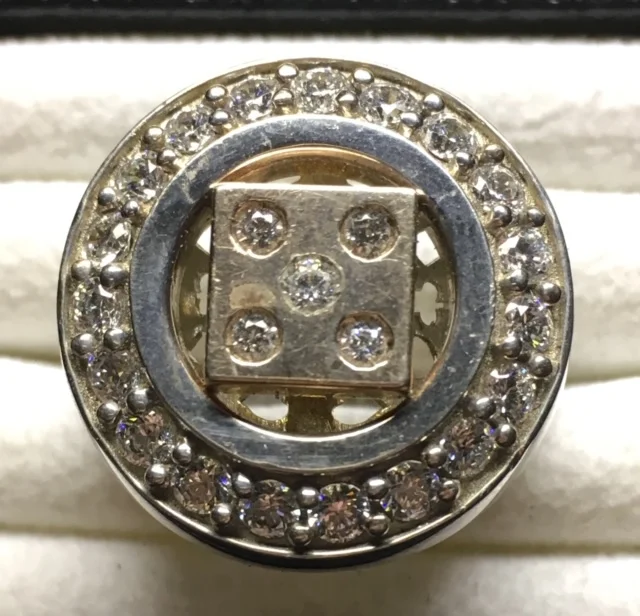
What a cute way of showing a dice within the circle of white stones?
Here I thought of inserting three stones that were bead-set into the side of the ring.
Here is a bracelet plate containing four card suites.
By the way, for your information, the dice in the key chain actually rotate. HOW DID WE INSERT THE ROTATING DICE?
The round disk was actually two pieces. I devised a method of sandwiching the two halves together holding the pins of the dice. Then the dice could easily rotate.
It appeared that I Gypsy-set the center white stone...NO! I just used mini-beads in 4 places inside the bezel.
Once the main plate was set with the coloured stones, and then highly polished, the bracelet was soldered and attached.
This numbered disk was put inside a key-chain holder device.
Here are the waxes of a man's ring with the main plate and the wax pattern insert.
I wax-melted the Azure plate, then I filed any extra wax. I did this just to see how everything would look when it would be joined in metal.
These were cuff links, and a rubber mold was created for me. 
In this photograph, you can see the highly polished frame cleaned before soldering stone-set #7.
This was just an idea of how multiple waxes would look together.

Another view of this interesting key-chain.
Would you believe that this one piece is actually a 4-piece construction?
After many successful designs, some of these patterns were only ideas. I used wax just to see if these novel ideas would work or not. Those that didn't work to get off of my bench were then discarded.
MORAL OF THIS: If I couldn't get the idea to work then why waste my CAD fellow's labour, money & time.
BTW, (All of these patterns are copyrighted)


No comments:
Post a Comment