Monday, 4 March 2024

Bright-Cutting holes in silver & waxes - 38 photos

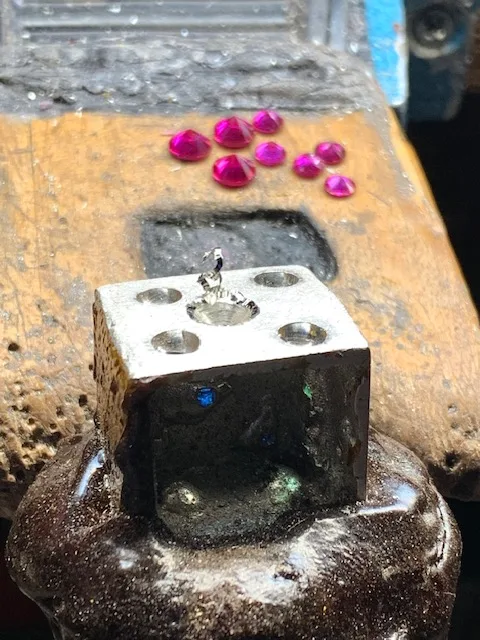
 It's the 'Roll of the Dice" when these holes are accurately configured, or Bright-Cut.
=========================================
 The only graver-tool that I will use in this exercise is a Flat Graver, #40. All of these cuttings were not with any "Computer Aided Design" (CAD) assistance.

  The "Rate of Difficulty" for this project is 8.0 out of 10.

When you select the stone size, or colour. It's easier to also decide where each stone should be located. Each hole should be drilled to the exact size of the stone, from this the Bright-Cutting will then commence.


 The most difficult aspect of this cutting is to have a good-to-great skill in using your Flat-graver. (This project is not for the absolute beginner).
 The first is to open up the hole to accommodate the Pavilion of the stone.


 If the stone is too deep, then please select a much shallower stone. This could be a major problem if the metal is too thin for any Bright-Cutting.

 If the dice is small then select a smaller stone, it isn't appropriate to have a large stone in a small dice.
 Everything has to be in proportion to the size of stone and the dice.

 All three of the holes should be uniform in size to the stone.
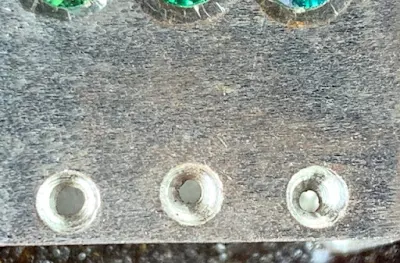
It is advisable to have the stone(s) sitting lower from the surface of the metal.
 
  All of the borders must be equal to each other. I'd use a 'pair of dividers' to measure the distances from the girdle of the stone, to the edge of the dice.


 This is a bad stone selection, no comments further here!

 For this display only, I made a variety of mistakes in the the metal cutting. YUK!
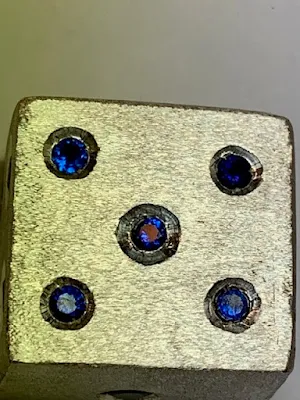
 Many stone borders were Bright-Cut too narrow or even too wide.

 The stone sizes were accurate, BUT there is a 'rippling-effect' in the metal cutting.
  
  This is a '2 of 3' in cutting, the borders are nice plus the stone separation is also good. The stone border on the left is not fully acceptable, pity!

  I'd prefer if this stone was set much lower, with this 'stone-sitting' the chances of a good metal cutting is minimal.
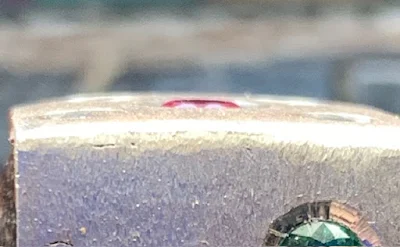
 The stone selection is not too good, as the Table of the stone is too high to the surface of the dice.

  This is to show the flare of metal is being created during the "Bright-Cutting" process.


  This is another photo of the 'sliver of metal' around the hole of the stone.


  Here is the Flat-graver doing it's cutting right at the edge of the hole.


 This is the epitome of Bright-Cutting, the metal is 100% BRIGHT. Remember, that all of this cutting is done by hand and not by CAD.

 I used this hand-held, mini-polishing shaft to highly polish the metal.


 This is 'near perfection' as it comes in regards to the stone-to-hole borders, Bright-Cutting and spacing.

 I used my Onglette #1 graver to create a 'little hook' to secure the stone in its setting.

I laid out the sizes of stones with the shading of each of the stones. The Blue stones were a bit difficult to deal with.

 This is the size of the dice in proportion to my box of burs.

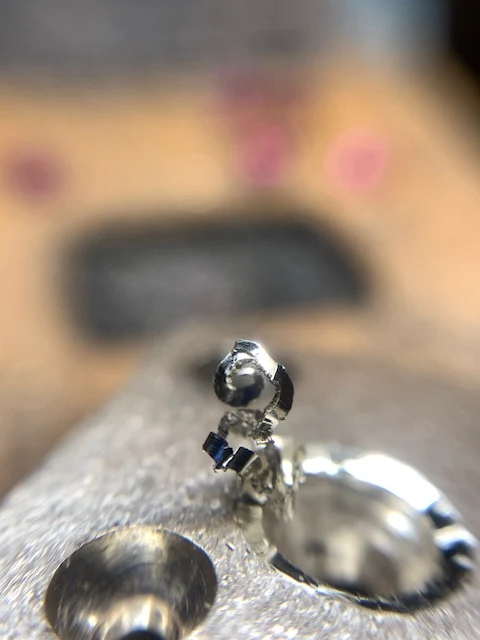
  Here you can see the little 'hooks' in the metal to secure the stone.

 This is the ultra-close-up of these 'hooks' as they look.

 Bright-Cutting is NOT the most easiest thing to do in Diamond Setting, as it takes much practice.
 
 Anyone can set Genuine Emeralds in these dice, BUT THEY MUST BE SET LOW in the metal.


 If these stones were set lower, as the 'walls of the cutting' could have been much wider.  

  To achieve this skill of Bright-Cutting, all it takes is a FEW YEARS OF PRACTICING, then a few more years to improve this new skill.
 
  This is why all of this setting has taken me ONLY 14 YEARS to learn and perfect.


      ===================================================
                                                  (and a few) WAX DICE

  With these few (roughly) carved waxes, then off to the caster they went.


'Metal Gemstone Pushers' (for your hands) - 14 photos

 The following "hand-activated, metal pushers" are famous with pushing metal against & over gemstones. In this essay, I will briefly explain how to use them in Gemstone Setting.

 In this close-up photo of using a round bur to make a recess that will cover a claw to be 'gently' moved. It is advisable not to make the hole too wide, or even too deep, lest it could be not operable.
==========================
 In preparation of a 'pushing tool', the front-face needs to be indented with a hole larger  than the size of the claw. This recess will fit easily over the tip over the claw(s).
The hole can be created with the help of a round bur, I don't approve of a large tool face as if it was made larger I wouldn't be able to see where the claw is being used.
It is better to 'shape the tool' face just slightly larger than the hole in question.


 There are two metals at our disposal, BRASS as well as COPPER, Steel is on the bottom of my 'to use' list.
 I use different 'shapes and sizes' of handles for easier identification at a moments notice.

 If the need is to use a Steel pusher, then the 'face' needs to be prepared for the 'pushing' to take effect.
 I would use a "Separating Disk" of  3/4 inch diameter to cut little grooves into the steel face. This will eventually grip the claw and prevent any slippage when being used. This will only have a 'textured' face, but it shouldn't be made too deep into the steel.


 I always keep my three "coloured handles" kept separate for easier identification in my setting bench. A 'freshly-contoured, soft metal face' is the most important aspect of using these pushers. 


 If the hole for pushing is getting too worn, then stop and re-drill the hole 'when and where' needed.

  It isn't required to have a very long pushing 'blade or post' but it should be long enough for it to sit comfortably into your hand.


 There are times when the Copper or Brass face needs to be used to bend a long claw-shaft. I'd use a rectangular-shaped pusher, this will be much netter than a steel-face tool.
 We need to have the metal moved, but no little marks remaining on the claws.

  This Copper pushing tool is so badly worn, that it needs to be completely refurbished.  
 
 Brass doesn't need to be repaired too often, as it is quite a hard substance and resilient to being worn as often as Copper.

  I'm hoping that this tutorial-essay helps you with using these 'metal pushers'.

Friday, 1 March 2024

Using "156C" and "HSS" burs - 12 photos

 Burs are our 'tools of the trade', what would we do without them? We work with them and they work with 'us'. In this essay, we will honour them midst all of their complex designs
                         ==============================================
 These amazing "HSS" High Speed Steel burs are ALL cut...one at a time, by hand! That is by an operator at his designing & cutting wheel.

  I used my "156C" bur or 'Under-Cutting' bur on the Gypsy setting ring. The letter "C" means that it is made of (softer) Carbide steel. These teeth are made much closer together than the HSS cutting bur.

I used ONLY  the thinner setting-bur 156C to create a thinner bearing for the thinner Girdle. This is just for creating a delicate resting place for the girdle of the stone.

The HSS bur will cut a very wide bearing and eventually not giving me any luxury of quality setting.


 In this photo, I used two bur styles & shapes, why? This ring warranted two different styles of burs. I never relied upon one style of bur, together my gem-setting results was made easier for me.

When these burs have worn down, it's too expensive to repair any of these burs. Just discard them and buy a newer bur. The HSS bur can be repaired by recutting the teeth.

 In preparing to set these stones, I use a "156C" bur. These teeth have to ability to create only a bearing needed to set any stone as being shown here. For this 'ring project', we are only concerned in making a little groove for the Girdle of the stone.
 The HSS bur will give you a wider cutting bearing, I'd stay away from these burs. We need only a thin & delicate groove for this stone.

 Many times I found in my past projects, I had to modify and alter the bearing to allow for a thicker girdle. I used a slightly larger round bur to make these subtle modifications and adjustments. 

 These 156C burs are relatively cheap to buy from your tool supplier.
 These 'specially cut' HSS burs are a different matter, for a box of these burs as shown in this photo could reach well into $150.00 or more. 

 Compare the cutting teeth array on either of these two styles of burs. They might look the same, but their uses are are so different.

 Here is just one HSS bur, examine the number of teeth. Then on the above photo closely compare the "156C" tooth structure. The purposes are all so vastly different.
 As an active Diamond Setter, I have amassed literally many hundreds of burs.
 
 
 You just have no idea when particular bur is required. Thus having almost 750 burs is quite normal in this highly specialized craft.

 There are two shapes of these 156C burs, each one is still very in stone setting.
 The thinner bur in the center of this photo is quite good for preparing a seat for the stone. While the bur on the near left is used primarily for the Pavilion of the stone.
 The larger bur is cut at 90degree angle, while the thinner bur is cut at 70degree angle.

 When you need a sharp edged bur, buy a packet of 6, instead one at a time. When the teeth get worn, "Good-Bye" and discard it. 
 You can see where the soft Carbide steel is on a short life-span and the edges of the teeth are now showing signs of wear.
 
 I'm hoping that this 'introduction to burs' has been a good help to you. (Gerry Lewy)
.