Saturday, 29 April 2023

Why I PREFER a "Digital Microscope" for my blog-essays? (57 photos)

 The answer to my opening title is quite simple, it's because it was readily available in our local tool supplier and I NEEDED IT for my 'online training'. Here are many examples of why I used it for the past many years.

 This fantastic Digital Microscope is just a phenomenal gem-setting device. It can take me where no 10x power loupe can go.
 
 BTW, the stone being shown below is 1.5 mm in diameter.


  I can quickly inspect if any metal beads are not covering any stone. 
I can see 6-7 stones at once.
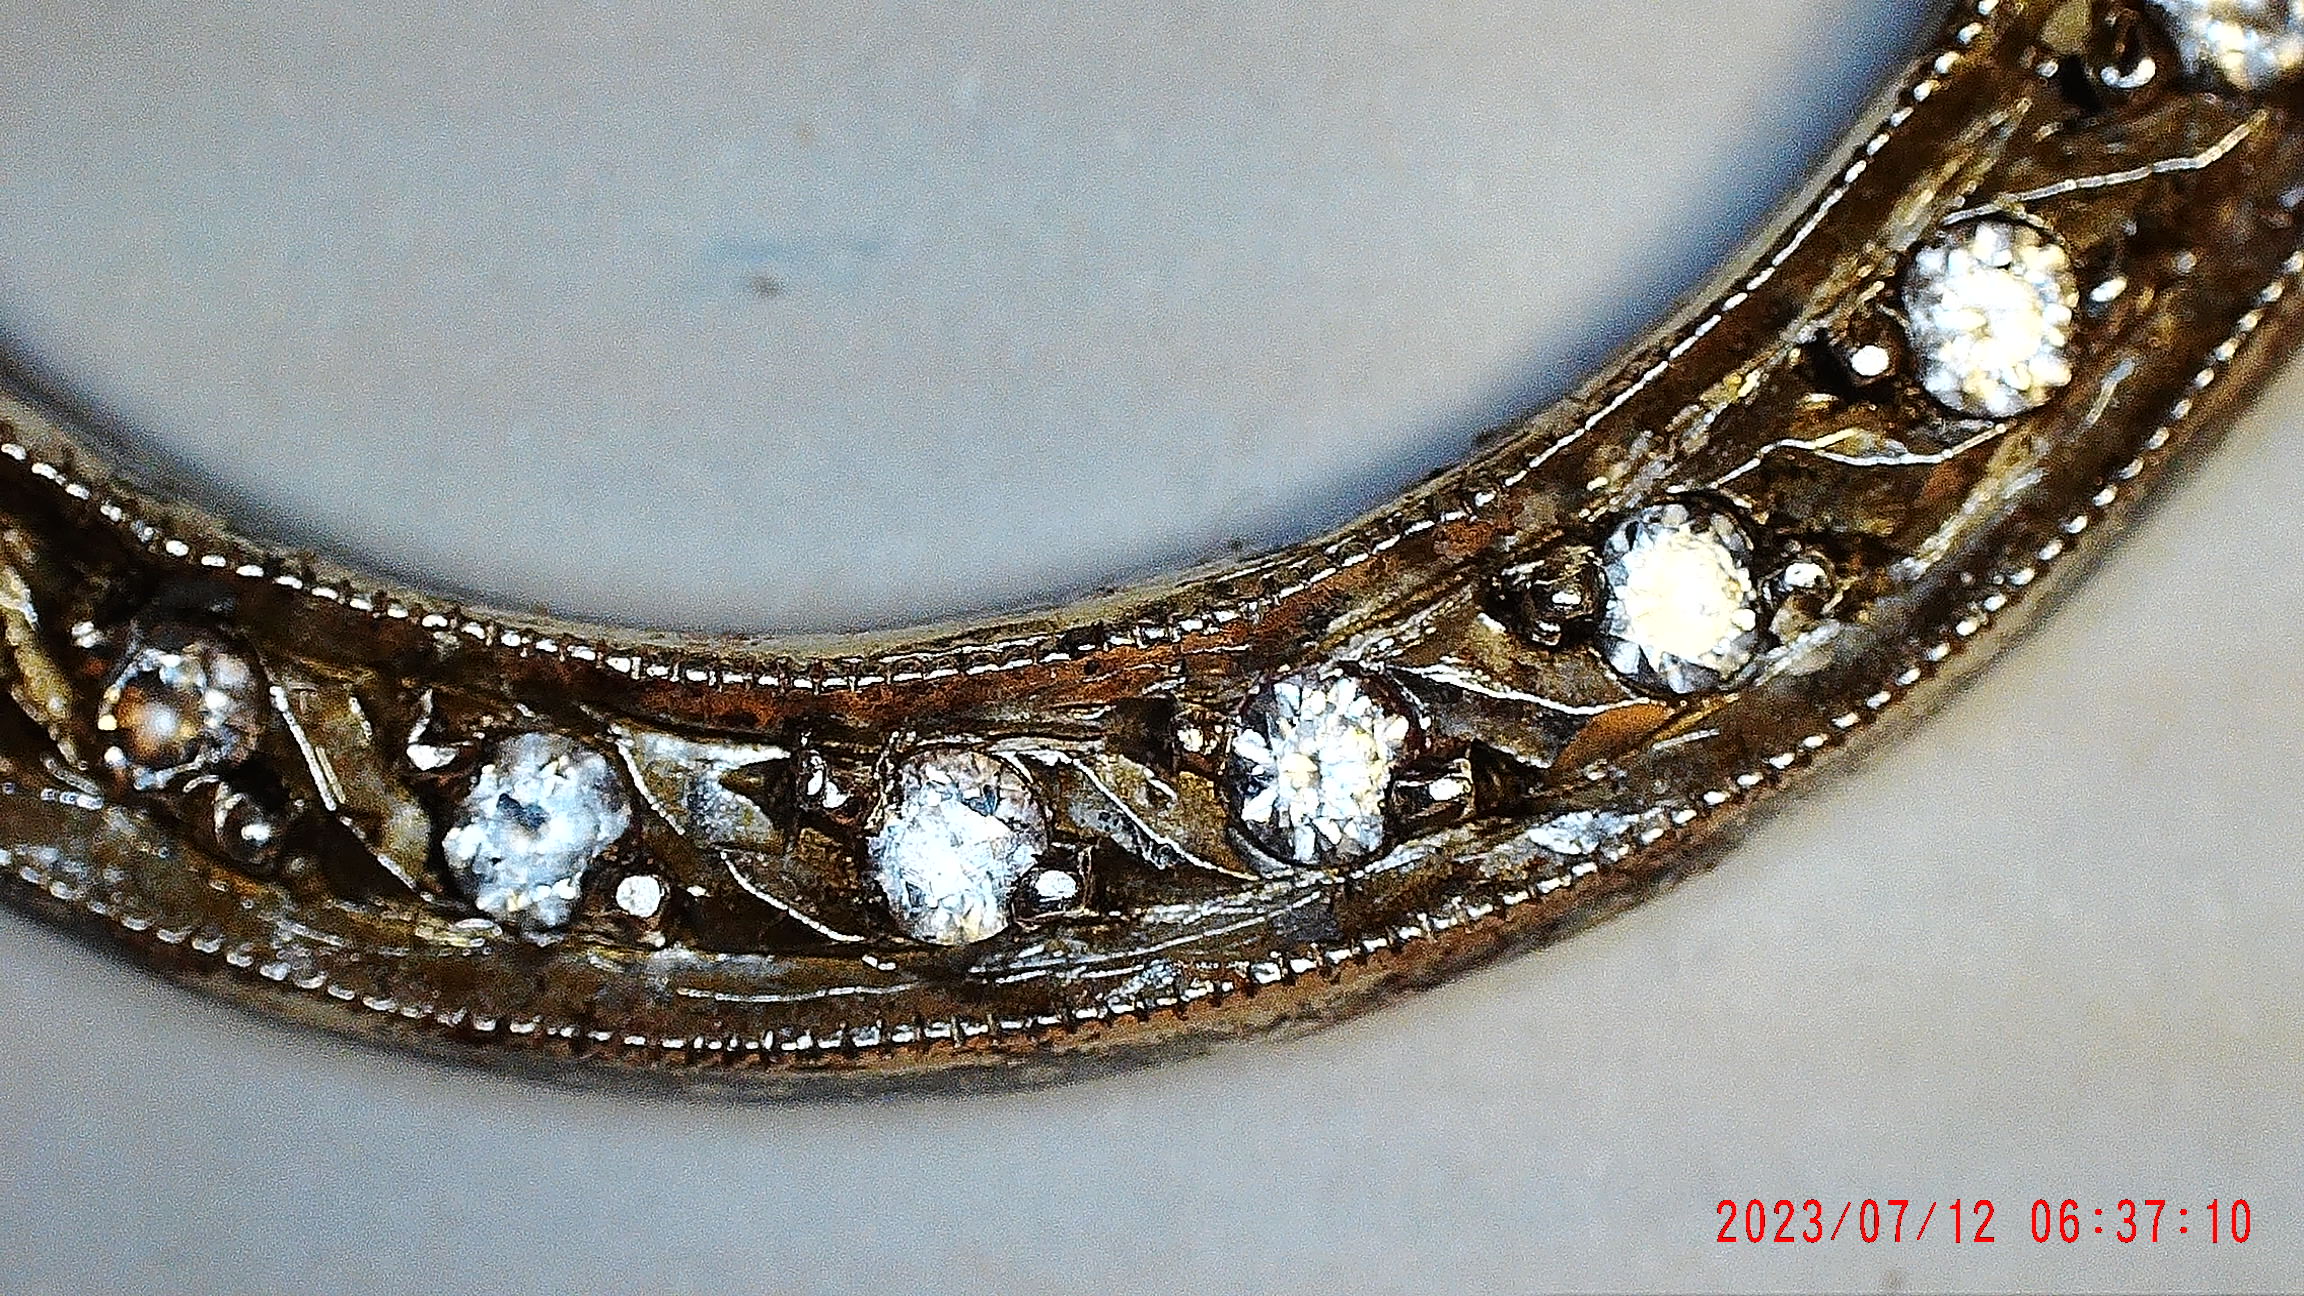
 These stones are 2.5 mm in width and with these close-up views, I can now see the stone setting.
 
 Originally the Heart-Shaped pendant was only a flat surface after casting. My Onglette gravers and I made this engraved "2-Bead" pattern.

This is a "FISH-TAIL" design, all of this cutting was not completed with CAD.

  On a "Brighter" side, here are Onglette gravers that my "Fish-Tail" cutting requires. The thin graver is 0.33 mm in width while the wider (on the left) is 01.75 mm. How sharp is the thin graver? This can cut your finger in seconds.

 This is a cutting wheel showing all of the minuscule particles of Corundum.

 This photo is of a #1,000 grit (PINK) Pumice wheel. I wanted you to see the pores of the wheel that no 10x power loupe sees.


 The small round bur is a #005, or 0.05 mm resting against an 11.0mm round bur. I need to know and see what is the condition of the bur teeth before any serious drilling is done.

 What seems to be a small area on a completed "Princess-Cut" stone, here is my filing that I just completed. YES, I will examine my filing with my Digital Microscope every time that it's needed for closer inspection.

 There are diamonds here at 3.0 - 3.5 point sizes. I can see that one stone is of a 'brown' colour. This one stone could have been set, but with my scope, I avoided the setting process.
 In my examination of gemstones, I can now see 'inclusions, or defects' in some of the diamonds seen below in the assortment of stones.

This 1/2-carat partially cut diamond shows the preliminary facetting that is taking place.        

The range of diamond sizes is from 2 and up to 10 points, and showing all colours & qualities.

 This is my toothbrush that I use to remove any metal particles from my work.

  Are you ready to guess what this pattern is?.... it's MY finger pad. 

 At 220x power magnification, this is what a ballpoint pen writing looks like.

 This photo shows just how valuable magnification is good for gemstone setting and even a 'watch-maker/repairman.

This is just another collection of diamonds.

 These are my new and 'untouched' #0 and #3 Onglette gravers. They have widths of 0.33 and 1.74mm.

  This is an up-close photo of a regular ballpoint pen.

 This a diamond of 0.50 carat in size, how do I know? This is the diamond that my Father polished in Belgium, circa 1934 A.D. 
 He didn't finish it, as he wanted to let other stone polishers see the unfinished "Faceting" that will start after the "Girdling" process. 

 In this second photo, you can very easily see the starting of the Facetting. The Diamond Facetting is now being seen on the "Crown and Pavillion" facets.

  My 'specialized' microscope displays the 'mediocre' sheen on the Onglette graver.

 This picture demonstrates just how important it is to have excellent diamond-setting tools. The angles were created with an oilstone and a 'bench-grinder' that can be bought in any hardware store.

  In this particular photo, you can see an improvement from the many polishing papers. I will use an average of 6-7 grades of paper to achieve these results.

  As I am a perfectionist in my tool preparation, this will give me equal quality in my diamond setting. I do not use any machine to assist me in my metal carving.


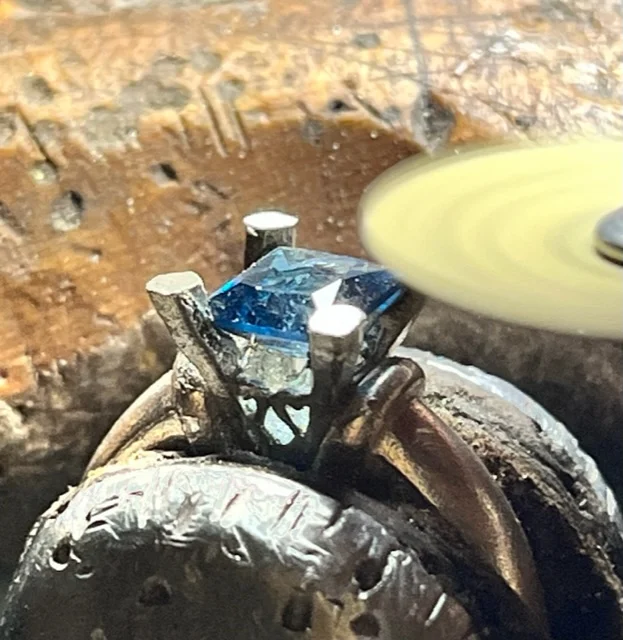
 This blue Princess-Cut stone is 6mm square. The claws measure a mere 1.54 mms in width.

 With my Digital Microscope, I can almost see the image of my face on the cutting side of the graver.

 Close examination of the 'front face' of the graver is not required. I will be using the right-side edge to do the metal cutting.
  I always inspect the Bright-Cut inside rim around the stone. With this microscope, I can inspect all of the finishing cuts.

  With my 220x power magnification, I am now able to view various 'edges' around the many beads. Those 'edges' were caused by a small Bead-Burnisher.

 The next two photos show the wearing of the teeth on my HSS bur. These can be repaired by using a Corundum wheel to individually recut those damaged teeth. 


 These teeth are badly worn and only under this 220x power magnification will these problems be seen.
 This is also a HSS cutting bur but it is so badly in need of being repaired, I chose not to, as I can purchase another bur and save my time. I wouldn't have resolved the problem if not for this microscope.
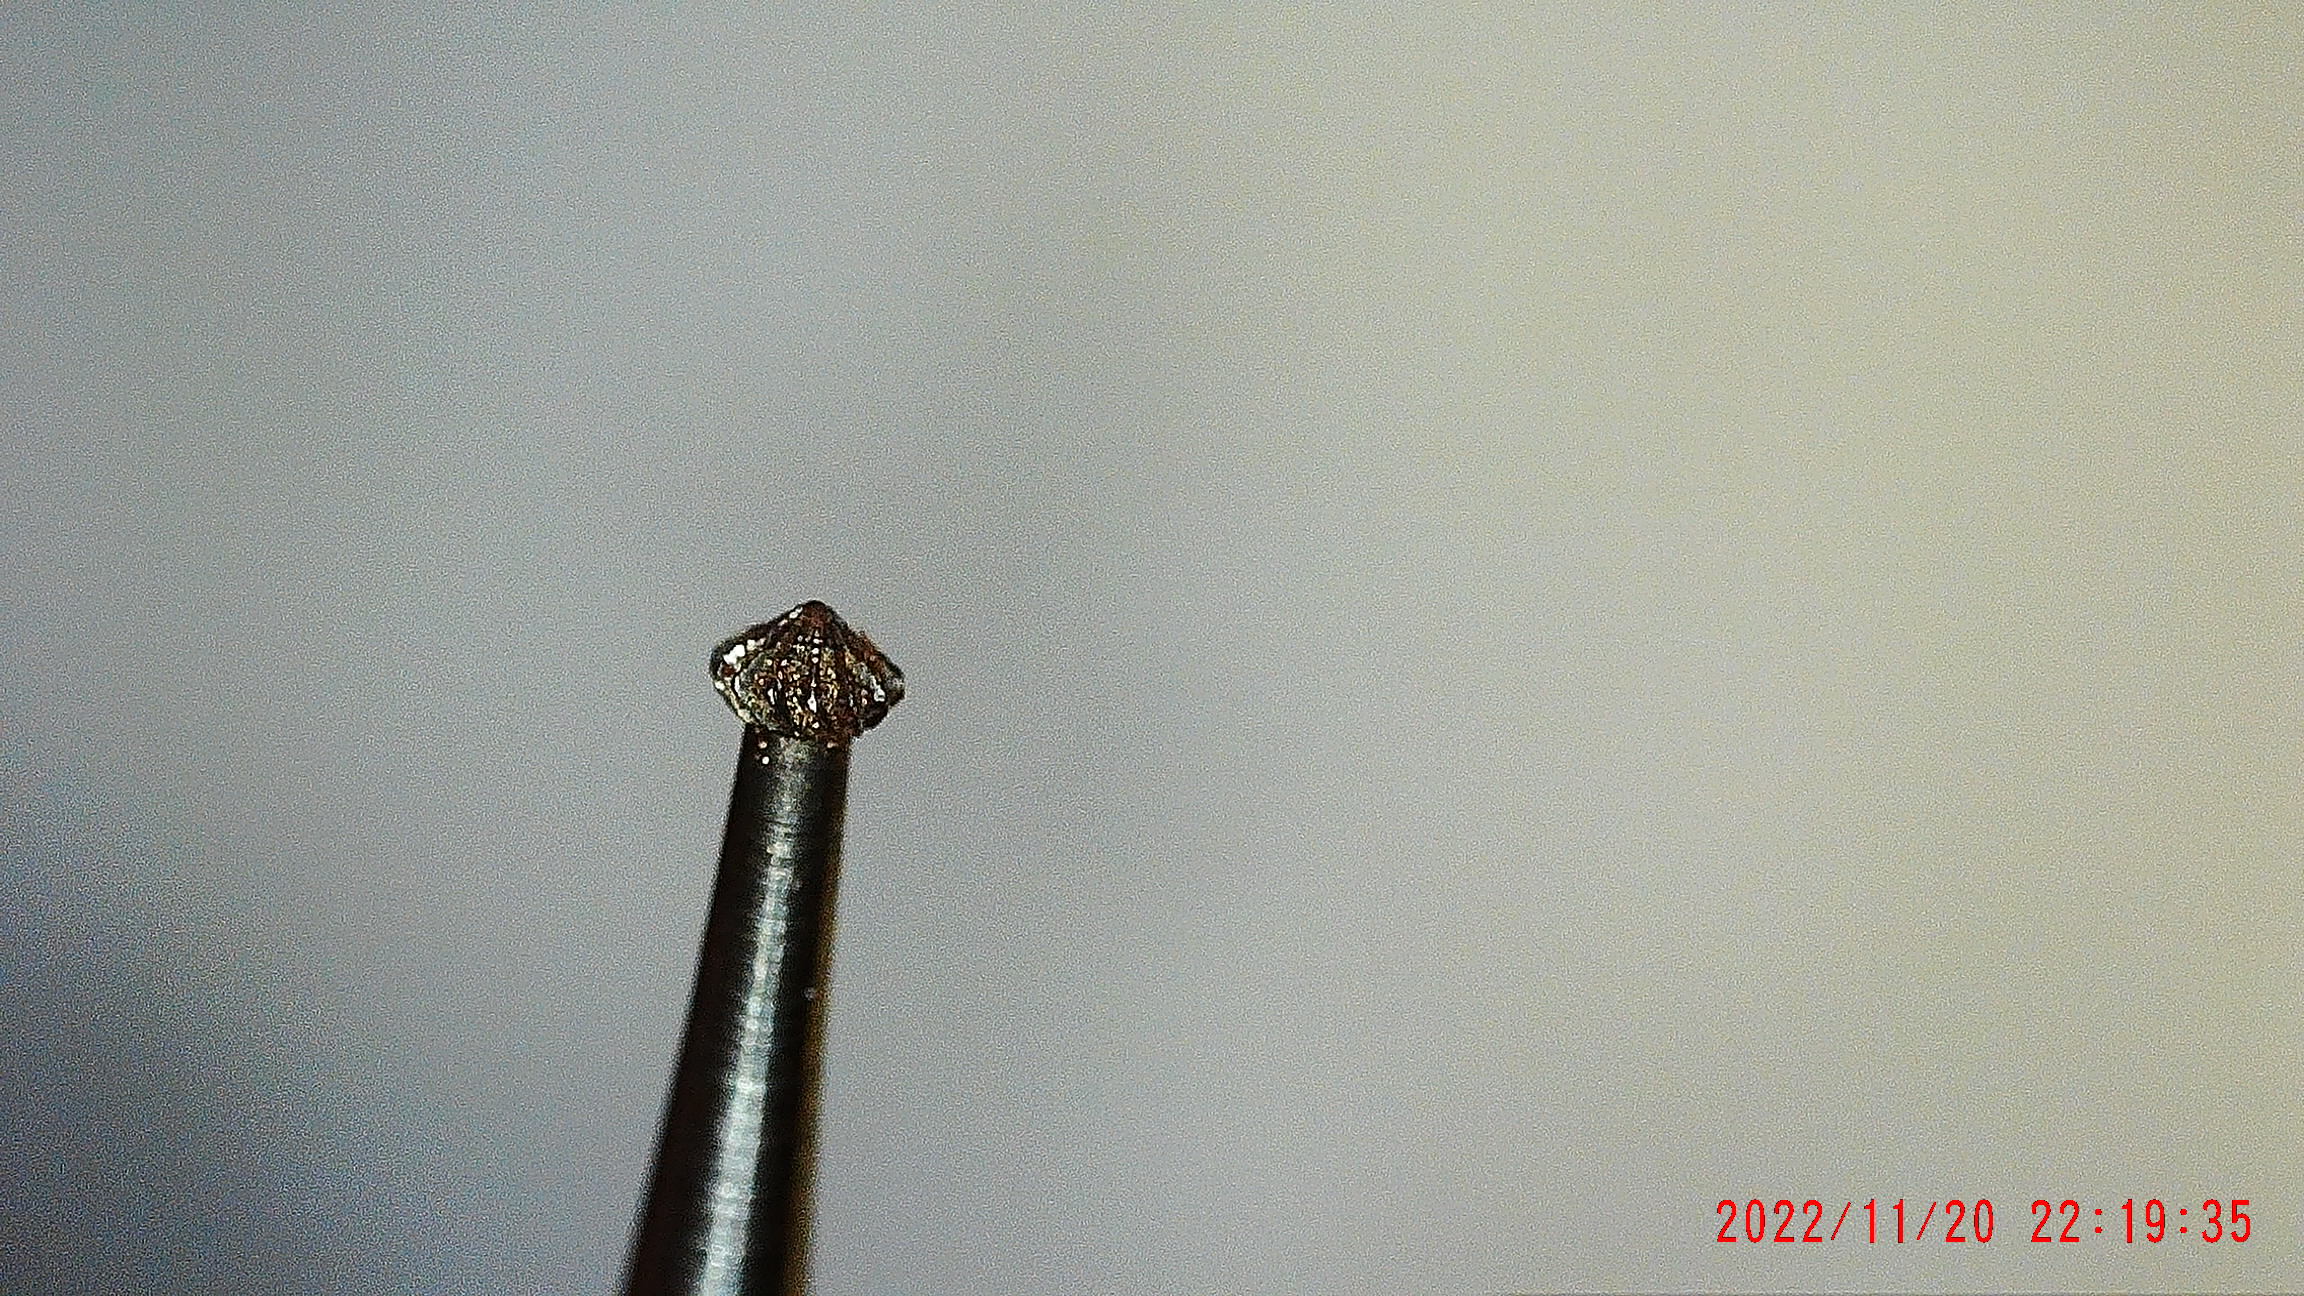
     I can now closely examine the CAD-created burs and check for any errors.

 When the simple 'Bright-Cutting' around the inner edge has been completed, all remnants of metal MUST BE REMOVED.

 In my estimation, a 10x power loupe is nice, but this Digital Microscope is better as it saves the images seen and put onto a USB.


 This watch's movement measures only 10.33mm x 14.25mm or the length of my thumb-nail.

This Platinum watch case was last worked on "6/3/65" or June 3rd, 1965.

 This bracelet was assembled in 1963, my 10x power (handheld) loupe wouldn't 'save' the viewing. This microscope did it for me with no questions asked.

 I can see that one or two beads are not against a diamond. Can you see which ones they are? This photo was taken at the highest magnification of 220x power.

                    For a quick review of this microscope.

 The maximum power that it has is about 220x power which is stronger than the basic 10x power loupe. With this apparatus, I can download any of my pictures and transfer them to my 'three computers'.

 This USB module has a capacity of 128 GB, which is more than enough for any of my writing needs.


 This screen enlarges every detail that I put under the lens. I examined the condition of my beads and the quality of the burs before using them.

 The numbers on the right of the screen "119488" are the available photos still to be used. This library on the 128 GB still allows a further 119,488 images. Now put those images on your iPhone!

I can (today) even buy 256 GB at the same size as the 128GB USB.

 This is a Pumice Wheel of 180 grit and you can easily see the 'pumice particles' in the wheel.


 These emery disks look like 'dinner plates' under the 220x power microscope. For your information, these emery disks are actually #180 and #240 grit.
 
 This 220x power magnification for me is 'beyond words'. I can view any discrepancy in my Bright-Cutting or make sure that my 'beads' are over the stone. 

 I put my Onglette graver under the lens and instantly saw the full lettering on the side of the graver.
 
 This microscope just fits easily under my bench top. For me, it's another gem-setting tool.
 When not in use, I can just put it aside and further under my bench. This is so handy, different from the 'insanely large and expensive' scopes being on sale these days.

 At 220x power, I can easily view the Bright-Cutting and the Bead-Setting with no difficulty.

 I can as well adjust the illumination before taking any photograph.
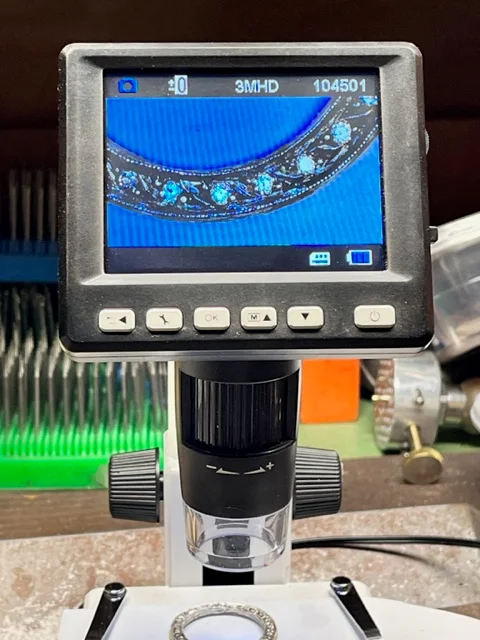
 With those numbers being shown on the right, you can see that I've been very busy taking photos, agree?
 I hope that you, the reader found this Digital Microscope worth your time reading about it.
Gerry Lewy "gerrylewy18@gmail.com"

Thursday, 27 April 2023

Unbelievable history of the "Princess Diamond", 13 photos (worth reading).

 I read recently about the history of the "PRINCESS-CUT" diamond and felt that it's important for "us" to read and learn. This article is a reprint from the diamond company named "RareCarat.com".

 I was awestruck by how Mr. Arpad Nagy, created the "Princess Cut" diamond.

See this link   https://www.rarecarat.com/education/shape/the-princess-cut


Sir Ernest Oppenheimer, Arpad Nagy and Harry Winston were friends in the diamond business.  https://en.wikipedia.org/wiki/Harry_Winston   

Oppenheimer and Winston asked Arpad Nagy to join them in business but he chose to move to Belgium instead. Subsequently moved to London, England. Finally moved to the USA but spent summers in Toronto, CANADA.  


 Ernest’s son was the late Harry Oppenheimer  https://en.wikipedia.org/wiki/Ernest_Oppenheimer

The Oppenheimers were of the de Beer’s Diamonds fame.

================================================

 The Princess cut is not in fact made for a princess - it was actually created in London, England in the 1960s by a diamond cutter named Arpad Nagy (he called it a ‘profile cut’). Arpad set out to create a fiery and brilliant alternative to the round diamond we all know and admire.

 Now, one of the biggest pros when it comes to princess-cut diamonds is the value for money in an engagement ring.

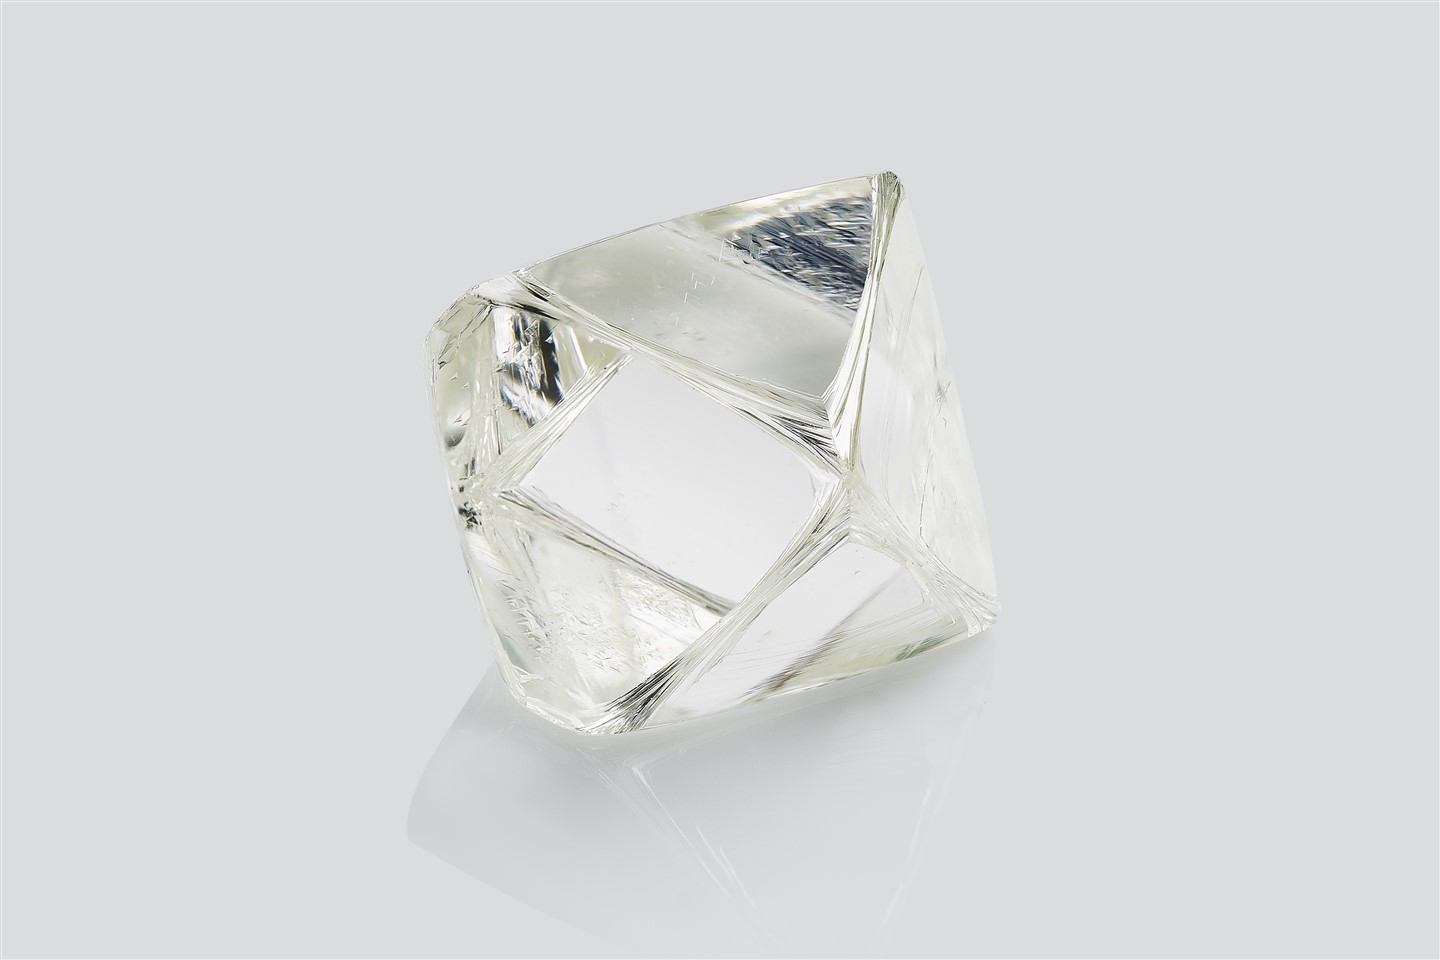
octahedral habit of natural rough diamond

 A rough diamond looks like 'two pyramids' joined together. Fascinating description? What happens when you cut it right across the middle? You then get two 'upside-down' pyramids. What shape is a princess-cut diamond? You now have an 'upside-down' pyramid.

 This matters though, because the diamond cutters end up getting much more 'yield' out of a rough diamond if they cut it into a princess-cut diamond. For example, a 1-carat rough stone like the one above might give you .40 carats of round diamonds, but the same rough might get you .50 carats of 'princess-cut' diamonds!

 Because the square shape of a princess cut is so similar to the natural shape of the rough diamond, very little is wasted. This then translates into a lower price for the client.

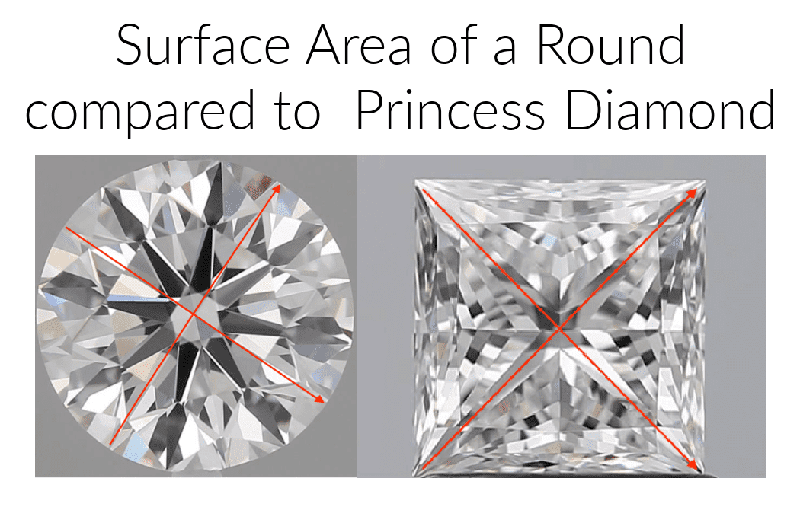
surface area round princess (1).png

  The square shape can also give the illusion of being a little bigger than their round counterparts, simply because from corner to corner a princess-cut diamond is spread just a little wider than the diameter of a round diamond shape.

 One thing to bear in mind though; once that princess diamond sits in the claws of the ring setting will hide a little bit of that extra material.

Princess Cut Symmetry

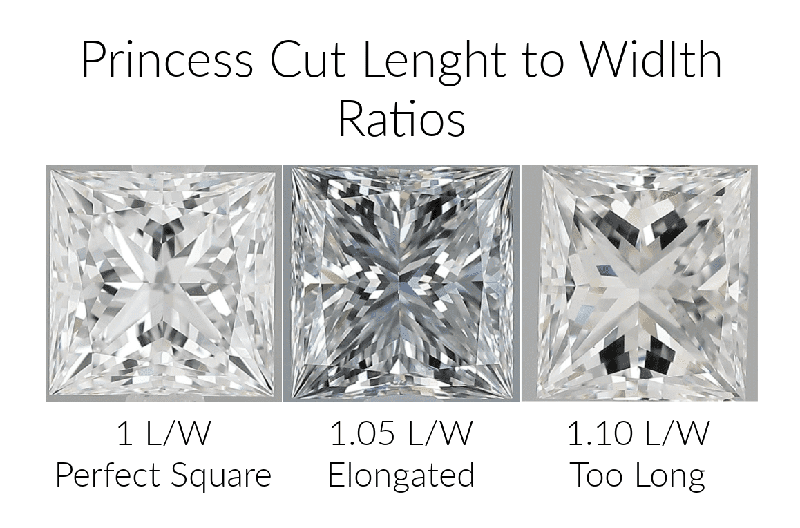
 Speaking of measurements and symmetry. Let’s admit that princess cuts with uneven sides or unequal proportions are, ... ‘unpleasant on the eye’. If you look below, you’ll see what I mean:

princess l_w (1).png

The 1:1 ratio princess cut makes the wearer pleased to wear this gemstone. The ratio 1:1.05 ratio princess makes me feel like I’ve stood up too quickly, and my eyes are taking too long to adjust to reality…and that reality is not appealing to the eye.

To avoid "The Upside Down", picture yourself drawing an imaginary horizontal line across the diamond. Are the facets on the bottom and the top halves of the diamond symmetrical? 

Cut for Princess Shape

 So where do princess-cut diamonds stand in relation to our all-important 4Cs? Let’s take a look, beginning with the most important: cut.

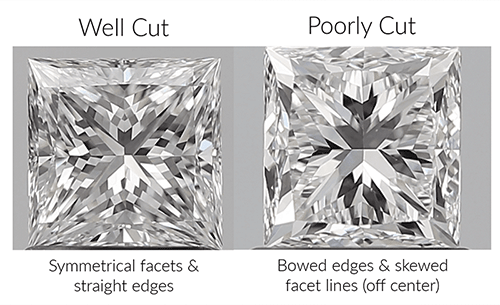
A well cut princess diamond compared to a poorly cut diamond

 Since the "GIA" don't grade cut for any of the fancy shapes (that's everything but the round), you won't see a traditional cut grade on the report. So we look at the polish, symmetry, proportions and overall look of the stone (that's why pictures are so important here) to ensure it's cut well. They will make sure the facets are properly aligned and not misshapen, the corners are sharp and not chipped and the outline is square and not 'bowed'. You can use the above image to help you with your search, but seeking the advice of one of their graduate gemologists is the best help can offer. 

Princess Cut Chevrons?

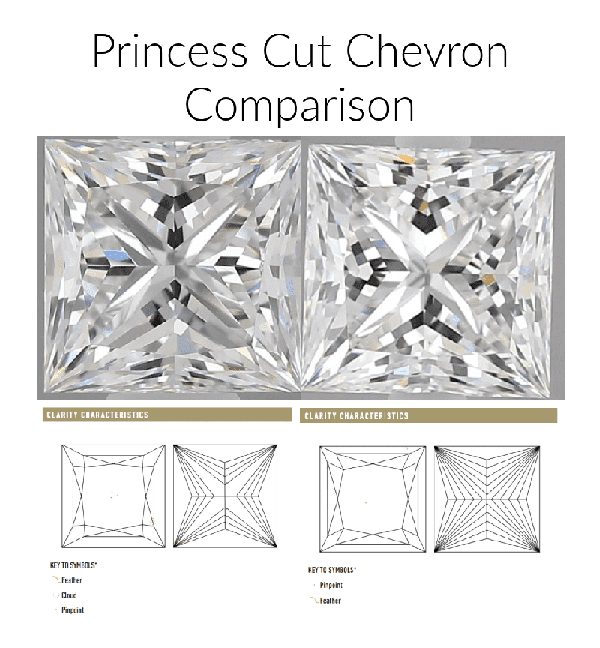
 Another aspect of diamond cut to be aware of when it comes to princess shapes are 'chevrons'. Very simply, a chevron is a type of facet or ‘step’ cut into the sides of a diamond. The number of these chevrons actually impacts the look of the diamond.

 Fewer chevrons will mean that your diamond will have a 'better feel' in terms of sparkle. This is because there is more space between the facets and therefore the light takes longer to bounce around from one to another. More chevrons mean more facets which of course means that the light jumps around in that stone at a much faster rate, making it much more sparkly (and giving the stone a sort of ‘crushed ice’ look);

 The number of chevrons you want is totally up to you. You just need to be aware of how they will affect your diamond aesthetically. Here is where you can find the chevron details on the report.

pc chevron comparison (1).png

Princess Cut Color and Clarity

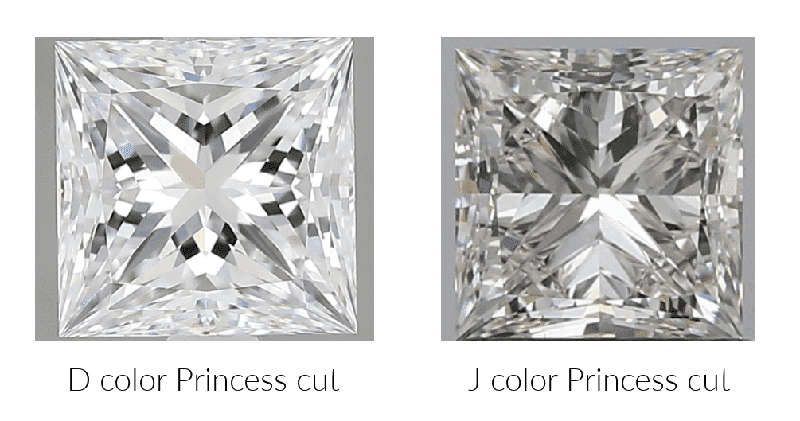
Finally, let’s discuss two other aspects of quality; colour and clarity. In terms of colour, I would go for the ‘I’ colour or better. If the stone is on the larger side, go upward towards ‘H’ or even ‘G’ if you can. As with round cuts, my advice is to stay away from those ‘D-F’ colours unless you feel very strongly about them. 

A D color princess cut being compared to a J color princess cut diamond

 Going warmer than a ‘J’ colour could be problematic, as princess cut diamonds tend to hold on to colour slightly more than their round cousins. That being said, if you like a warmer tone in your diamond, or plan to have a rose or yellow gold setting. The choice is yours to make.

 Clarity-wise, princess-cut engagement rings tend to be more forgiving regarding imperfections than their emerald or Asscher-cut cousins. You can look a touch above the SI2 mark - around the VS1 – SI1 mark for the best value. That being said, you need to be acutely aware of the locations of any inclusions, especially if they sit in the corners where the princess cut is the weakest (and therefore more prone to chipping).

Study the plot of the stone extensively on the grading report, and as always (and I cannot stress this enough, ever) - look at the stone in person if possible (or at the very least with high-definition photographs from the seller.

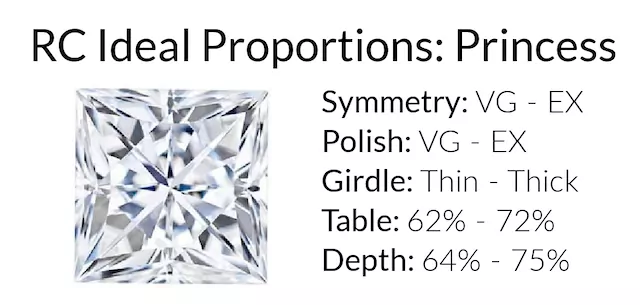
Ideal princess.webp

==================================

My email address is: gerrylewy18@gmail.com

Wednesday, 26 April 2023

Setting a Princess-Square stone in a Round Stone, '4-claw' ring. (33 photos)

  In all of my essays about setting a square stone in "V" shaped claws? I thought of an idea and here is a 'scenario'.

 A jeweller needs to set a Square "Princess-Cut stone today, but only has a 4-claw/prong head that was intended for a Round stone. Will he, or she say "Sorry, you have to wait until I create a ring for this stone". That scenario is now 'ancient history', I'm going to make your life easier by reading this essay along with many helpful (32) photos.

                   ======================================

 I have a series of square stones to use as samples; 5mm, 5.50mm 6:00mm and a large 7mm Princess stone. The ring 'sample' was designed for 6mm, but during this exercise, I'll decide which stone size is more suitable. 

 For a ring that was originally made for a Round stone, there are many further challenges in setting a Princess-Cut stone.

 Here are the stones that I will be demonstrating with this 'sample' ring.


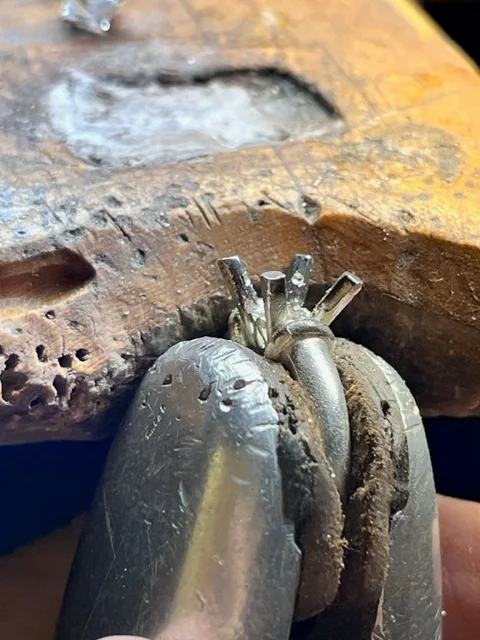
 The very first thing I do is open the claws further apart, why is this? I need full & complete access for my burs to get into a small opening.

This 5.50mm stone is too small and so is the 5.50mm as well. The result is that the 4 claws must be completed with ALL being finished VERTICAL. 

 I chose a 6mm stone, as the ring was created just for this size. I like the blue colour as it will be easier to see during this 'colourful' and descriptive essay.


 What size of round bur would I be using? Some stones either CZ or Diamonds come in widths that are never uniform. The easiest method is to lay your bur along the side at the widest Girdle thickness.

 The 'optimum' width of the bur shown is the smallest of the two.

 In this photograph, you can see different sizes of burs, both of them are not to be used. They are simply just too large and could simply ruin the new claws.


  I feel more confident in using the 2 burs on the far left. I will use these smallest burs in another setting technique to be shown further in this essay.


                        THIS IS VERY IMPORTANT!

 Look at the angle of my handpiece, as it's starting to drill into the clawI want the stone to sit into the claw(s)!!!


 You must be very sure that the 4 little holes are at the same height on all of the claws. If not, your stone will not be set correctly and will end up being crooked.


 These two burs are of no use to you in this important drilling of holes. They are just too LARGE, if you use them, you'd be ruining the claws!!!


 I would use a pair of dividers and make (darn) sure that these holes are equal in depth in all of the 4 claws.

Just to repeat this rule, hold your handpiece steady, as these holes are too important to mess around with. I would use a slower speed on your bur for this important & initial drilling. DON'T SPEED as it will give you many problems.

 WHY GO SLOW ON YOUR DRILLING? A faster rotating speed of your round bur will have your bur be slipping & cutting all around these delicate claws.

 The next steps are to have your same small bur and make an 'oval cutting', why and what for? The simple answer is, this is where the Pavillion facets under the Girdle will be than resting against. 
 
 Understanding that every bur-carving has a definite and long-lasting purpose.

The second cutting is for the "Girdle" of the stone, this cutting should & can be extended outwards from the claw itself. 
This 'wide bearing cut' is for BOTH 8 sides for the Girdle.

 If you see that the downward corners of the stone are not deep enough into the claw, I'd ask you to recut DEEPER INTO THE CLAW...AGAIN...!!!
 
  This is just what I'm writing about, I'm very pleased with how this is progressing and you?

    For a trial, I suggest that you place your gemstone inside the head of the ring. This will give you an idea of just how evenly spaced your 4 claws are to the stone.

 Make sure that the 4 claws are fully at the corners of the stone. With your pair of pliers, move each claw independently and examine this carefully, as I did for this photograph.

 EACH CLAW MUST BE IN LINE WITH THE POINT OF THE 4 CORNERS OF THE STONE. 
Again remember, THERE ARE NO SHORT-CUTS IN GEMSTONE SETTING.


        THIS OVERALL DIFFICULTY SCALE is "25+, out of 10".
  Make very sure that the corners of the stone sit into the 4 claws.

 I am not bringing in both claws at once, "but only one claw at a time". One jaw will do the moving and the opposing plier jaw will do the supporting the 'moving claw' action.
 The 'moving action' is only from above the Girdle, and not anywhere else.
The end result is that the point of the Square stone is being nestled into the claw.

 DON'T PUSH THE CLAW TIPS TOWARD THE STONE, please use your pliers to do the individual '2 claw moving method'.

   Remember all of the individual claw carving with the small round burs a few minutes ago? It's all been so worthwhile, all 4 claws are in line equally.      


 Rotate the ring and then examine in all of the 4 views, that the Culet of the stone is in the centre of the 'head'. Not to mention that there must be equal spacing of the claws.


 You can see that all 4 claws are now touching the stone EVENLY at the Girdle-Facets and the Pavillion.
             ------------------------------------------------------------------------------
 If you see that one claw is crooked, use your 'fine jaw' pliers and have that one claw moved backwards and you can now (carefully) reposition the stone.
Those 'deep claw' holes will now contain the four corners of the Square stone.
 Your 'moving' is done ONLY at the top 25% of the claw tip.

  From my perspective, only 3 claws are in complete alignment. The fourth claw at the 'top left' is not well-centred. Use your 10x power loupe and observe this problem.

           (This step needs much practice for the beginner).

 Use your 'Snap-on" Emery '240 grit' wheel and shave off much of the top of the claws until the claw tips are just ABOVE the Table of the stone.
 
 If you use a course #1 or #2 grit file, you could be moving a claw out of alignment, also known as a WHOOPS! DON'T USE ANY TRIANGULAR FILES ANYWHERE. I suggest that you experiment with 'synthetic stones'.
 

            "CLAW TIPS IN GREATER DETAIL @140x power magnification"
 
 I honestly prefer to "File to Trim, the 4 claws". A simple rounding with a "77B Cup" bur of the claws is not for a Square stone, why not?
 
 You, nor I should mix the two finishing touches, as a Princess stone is full of square angles and has NO rounded finishing.

 I used (on these claw tips) a Triangular #4 grit file, which has a fine smooth texture when completed.

 I use pumice wheels of #180 grit on both 'Tapered and Flat' surfaces to remove any striations caused by filing.

  I attempted to have you see just where the Culet is located, it should be in the center of the 4 claws, no matter which view you have.

 You can here see the softer filing that I used. I removed all of the outside corners leaving only a curved surface and no sharp angles, anywhere!
 The claw tips must never be higher than the "Table" of the stone.

  I had my filing leave a flat front facet to the claw that was touching the stone. This will have the "claw tip" blend into the angles of the stone.
 Those broken corners are not broken, there were just remnants of water remaining after I cleaned the ring.

 Rounding off of the corner claws DO NOT BLEND IN WITH THE ANGLES OF THE FACETS OF THE STONE. So why use rounded corners? aka. YUK!

 In closing, I'll leave you with my personal tastes and you can make your own decision 'on any finishing touches'.

 I only wish that I could sit beside you and 'guide you further'.
 I know that we all must experiment on our own and be educated on how to make this ring a "Wearable Piece of Art".
 Sorry for my greatly detailed essay as there was so much to write.
gerrylewy18@gmail.com