Here is an assortment of 10 stones all of different shades, but we will only select & use 5 for this essay.
All of these Channel Setting essays that are in this ongoing blog were not CAD (Computer Aided Designs) unless mentioned. These essays were created by this author-instructor-Diamond Setter.
The Level of Difficulty is at 8> out of 10.

With a round bur, it is necessary to 'counter sink' and remove any pieces of metal that are remaining after the twist-drilling. I would even pre-polish the inside and outside of the ring at this point. Once the stones are carefully set, all that is needed is a light ROUGE polish.

With a Bud-Shaped bur, but what size would you use? I suggest a bur that is smaller than the stones that will be used. The placement of these holes will be exactly where the round stones will be positioned and set.
In this photo, I 'scribed' where each stone is to be set. There should not be any guess-work in this positioning of stones.
This has to be well planned and choosing the same size and shading of stones throughout this new Channel Setting.

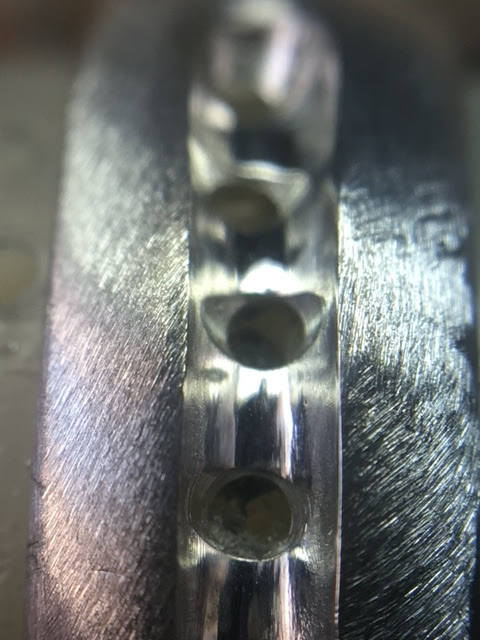
Once the holes have been drilled, the next step is to open the holes to accommodate the selected stones.


To continue with this 'opening' process, the next few steps is to drill the holes to have the Pavilion cleared for inserting the stones.

I would use a Pumice Wheel of #180 grit and buff the inside of the channel even before any polishing is to take place. Both steps are very important in creating a new channel.

This channel opening is too narrow to accommodate any of these thick girdle stones. In this case, the channel should be made 'wider in the width' of the setting.

This is the completed polishing of the channel opening. You can see how clean it looks now.
If the stones on the average, are too large in thickness and width, I would suggest looking for a new batch of smaller stones. If failing this, you could have many setting problems and ruin the ring.

Here is one major problem that I just saw, the 'bearing for the girdle' is not where the genuine stone will be sitting.

The bearing of the girdle is almost the same thickness as the bud-shaped bur. This is exactly the correct size.

This stone is still overlapping and not for an easy setting. REPEAT: THIS STONE IS TOO THICK FOR STONE SETTING.

When the stone is prepared and adjusted correctly for the channel wall, there won't be any further problems. This a 'trial & error' process.
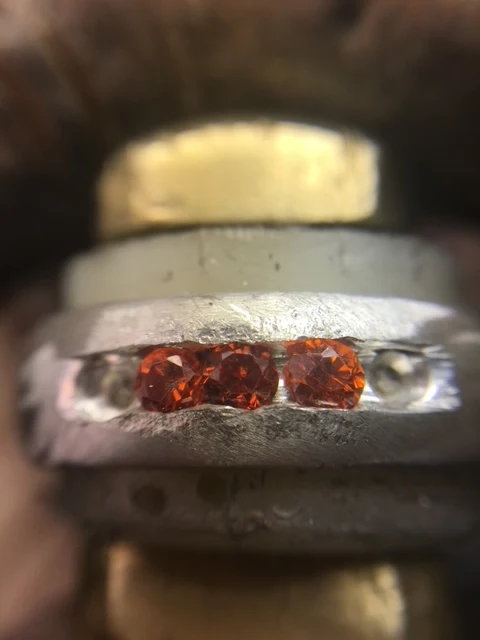
This stone can be properly set as the girdles aren't overlapping the channel opening.

"This is as good as it gets!" Lets finally proceed with the stone setting, agree?

When the 'bearings' in the metal are holding the stone(s) in place, it is a good time to set all of the stones.

In setting these genuine stones, always pay attention to the stone isn't crooked. Once that the stone is set crooked, (it's a disaster in the making) and difficult to repair.

Keep all of the shades of the stones uniform in colour and sizes. There must not be any deviation on these shades.

Here is one little problem, there is a space and this is not acceptable when dealing with many stones.
HOW DO YOU AVOID THIS PROBLEM? The only method is to create a seat for the stone (prior to setting) longer in the channel wall than what is required.
Then a stone can easily be moved and avoiding any spaces that might occur.

This essay was intended to explain that sometimes problems will occur and I gave you a few solutions to them. "I'll never say just fix them", but this essay gives solutions on how to repair these problems.
No comments:
Post a Comment