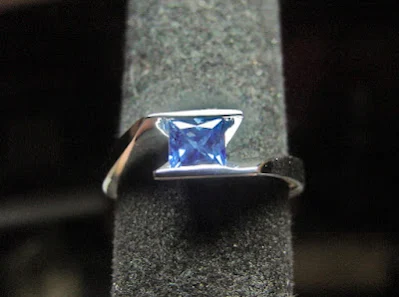
This tutorial essay is primarily aimed at the 'Intermediate Level' of Jewellers & Stone-Setters. The Level of Difficulty is 8+ out of 10.
As you prepare this project always wonder why you are hammering on a mandrel? I'll explain this in a few words, "security" and having the delicate stone sitting "tight" in the new ring.
I always have the end of the steel mandrel secured against my bench, why? The mandrel is not light in weight, 'it seems to get heavier' during the setting process.
Not only will the ring sit tight on the steel mandrel, but it will also give you that extra 'hand freedom' in hammering with your Reciprocating Hammer.
If you started to hammer in a ring clamp that had leather gripping in it, you would never get the bezel or end-bezels set tightly.
While on a steel mandrel, the hammering action will never get lost as it would be on a soft ring clamp. By the way, I had one hand holding my iPhone and the other hand holding the Reciprocating Hammer.
In this photo, I wanted to have complete "stone-security and safety" while it's being set.
This is the exact 'stone weight and size' just for the Gemstone Appraiser. There was no need for any 'replacement costs' to be shown in this essay.
The very first thing I was to do was to prepare the ring for the 'Pavilion'. This ring was not just 'open the bezel-ends and drop it in'. It had to be carefully 'handled and prepared' for setting.
Once the stone is carefully secured in its new 'end-bezel', I'll start to do the gentle hammering.
The hammering was not done in a ring clamp, but on a steel mandrel as previously mentioned.
With the utmost care in not endangering any area of the stone, I started the slow hammering process. As I'm always writing. "THERE ARE NO SHORT-CUTS IN DIAMOND OR GENUINE STONE SETTINGS".
During the earlier stages of this setting, I started at the centre of the Bezel frame and worked outwards toward the end of each bezel wall. I did this equally on both sides of the two walls.
Just before the stone was tightened, I explored to see if the stone was not moving inside the bezel walls. There was no rocking or any unwarranted movement while it was sitting in the ring.
If the ring was within the 'normal parameters' of sitting ready for tightening, I proceeded further.
I would start the hammering process ever so GENTLY.
With the Optivisor, I'd check and make sure that all areas of the Bezel walls are 'on and against' the stone ends.
REVIEW OF THE CUTTING & PREPARATION OF THE BEZEL WALLS.
The inside of the bezel walls should be clear of any pieces of unwanted metal. This Bluestone can be a very costly mistake if anything happens to the precious stone!
=>This is the most delicate area of this whole setting process. <=
Not only should the Girdle of the stone be accepting the metal but also the Pavilion.
The 3 'scribed lines' on the Bezel wall, indicate where the stone will be placed. There is no need to 'extend or show' the 'lateral drilling' into the walls any further than what is shown here.
These two holes are where the Corners will be placed, all of the subsequent drilling will be done in between these two points.
Before the stone has started to be worked on, estimate how wide the walls should be opened. Just a little note for you, when looking from the top of the two walls the stone should at least be overlapping half of the width of the Bezel walls. The idea is to have you see how much metal will eventually cover the stone on either side.
DO NOT FORCE THE TWO WALLS OPEN. This is because you might damage the walls in the process or leave irreparable marks on the metal.
ALWAYS PREPOLISH THE INSIDE OF THE TWO WALLS. There is no possibility of doing this after the stone has been set.
The 'REVIEW' notes are always important when I'm writing my essays. These might be redundant but nothing has to be ignored. I rather write 'double instructions', rather than you might take my setting notes for granted.


No comments:
Post a Comment