Lets suppose that you have a large cluster ring to set. What will be the problems in doing this project? How will you secure the 19 stones and what tools would you use & where?
This interesting essay will answer many of these questions, just as if I was setting this ring again.
======================================
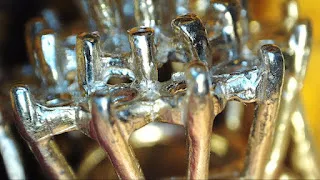
All of these stones have only "1, or 2 claws holding each stone". This is not a major problem, but can be a challenge at the best of times.
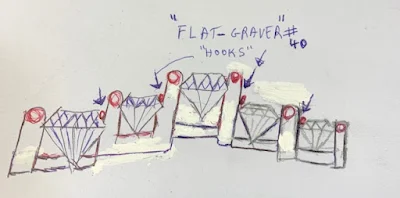
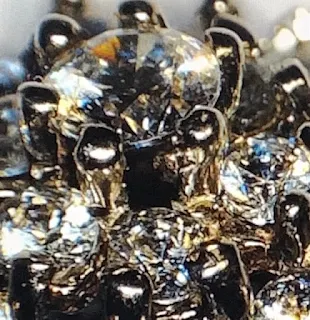
Inside of the claws, as seen in this photo, I've used my Flat Graver #40 to create a wire 'hook' to hold these stones in place.
This is the position of where the 'wire-hooks' are being created.
By this process, I've secured each stone with these hooks and not one stone will get loose.
These 'hooks' are too small resulting in having the stones get loose, or even lost.
It is best, if the center stone is set first, this way the lower levels of stones can be secured easily.
These two sizes of 156C (Carbide) burs can be used in this cluster ring/pendant.
This is just where the placement of the 156C bur should be placed in the cluster-top configuration. Word of the wise, DON'T SPEED UP YOUR MOTOR, JUST GO EASY.
You can easily see how the bur is cutting, it is in a near vertical position.
Never go shy on buying your burs, each size will be needed pertaining to the size of any stone.
Metal pushers on these clusters should be made of Brass or Copper, BUT NEVER OF STEEL. Steel pushers will leave many problems in the cleaning stages and will leave many problems in the final cleaning stages.
I'm using my FLAT, Pumice Wheel #180 grit to clean any casting or filing marks
everywhere that are being seen.
In between the claws I'll be using the same #180 grit to clean inside the many grooves.
With a Flat-Faced Pumiced wheel, I usually clean any remaining filing defects before proceeding further.
With the "77B, Cup-Bur" round off the claw tips as soon as you can. Don't lean the cup bur beyond the 45 degree angle, keeping the bur nearly vertical, if you don't do this, you won't get the 'ball effect' that you are looking for.
In this photo, the cup-bur is held in a near upright position.
Before any further stones are set, clean the outside claws prior to any further middle row of stone setting.
The inside of any of the setting holes, I will use a Bud-shaped bur to clean any casting metal remnants before any stone goes in.
You can see the many casting defects not attended to in the cleaning stages, get rid of them NOW before proceeding further.
Its advisable to completely prepare your setting projects before any stones go in.
All of the mini-defects need to be completely cleaned, before the first stone goes in.
If the center of the holes needs to be cleaned out, I suggest you to do this (again) NOW! Its much easier now than waiting while you are starting to set any stones.
At this juncture of setting, this is exactly where the little hook from using the Flat Graver is being created. That metal is now resting just above where the Girdle is.
Here are the "two slivers" of metal that are holding the stone in place.
On my Cup-bur pad are a number of older and well-used #77B Cup-burs. If any of them have 'worn or rounded edges', refuse to use them as they are not working anymore.
I use my "High Magnification, Digital Microscope" to closer examine the intricate setting areas. A loupe is good, but I need a 'larger over-view' in these setting areas.
You can now see where the little 'hook that is at the base of the center stone claw. With your Gem-Scope make sure that the 'hooks' are sitting ON THE STONE, but not always against them.
This is my where my 120x power is in action. At times this Digital Scope can go up to 200x power when needed.
The following 2 drawings explain in detail where these 'hooks' are placed.
This technique of securing stones is rather easy, once you get used to this novel idea.
I've been doing this "alternate stone-setting & tightening" for the past 65 YEARS. It has given me the opportunity in saving much labour and time.


.jpg)


.jpg)


No comments:
Post a Comment