As this long essay came from my tutorial archives, many of them are are not in sequential order. At least these instructions are still again made available for your learning.
For your archives, you can print or save this long essay for yourself at 'no charge'.
With each photo is a detailed explanation of the "how, when & why" in my tutoring.
=======================================================
This gents ring was originally a flat plate with only the holes acting as a guide.
I prepared for setting by drilling 90% of the width for each selected stone size.
Once done, I chose to 'rough-cut' as seen in my previous tutorial essays, It is here that I choose to do my temporary metal cutting in using an Onglette graver #1.
Once that the rough-cutting has been successfully planned, I'll use my "Right-Sided" Onglette graver #2 and enhance the pattern further.
On the outside line, I will and must create another thinner line as a border or as I say a 'picture frame' around the whole pattern.
The corners must be truly cleaned and with no errors in the cutting. I could even use my Pumice wheels and do a 'touch-up' just to make the whole ring top to look clean.
This is my favourite graver handle, it has two screws in the handle in case one screw gets worn down. This will leave with me another remaining screw to tighten the graver blade.

This is the correct placement of your graver in your 'cutting hand'. The graver must not exceed the first knuckle or your hand will become tired in the many hours of metal cutting.
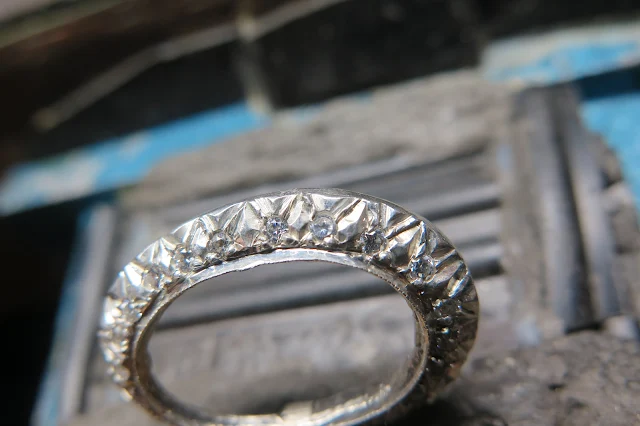
I've been using this silver pattern for many years, as it contains the "Fish-Tail" metal cutting technique.
I'm using my "Bright-Cutting, Onglette #2" graver to cut into the metal. The metal is so well shiny that the image is reflected back to the line of cutting.
This is my "High Speed Steel" Onglette graver with all of the necessary identification details. Please avoid gravers made in other 'foreign' countries always buy from a reputable supplier.
When you are doing your metal carving, always wear a 'thumb guard' as the base of the graver is quite sharp and could very easily cut your delicate thumb.
When the rough line of cutting is done, the next step is to use your bud shaped bur #2 (as shown) and cut just up to the line being seen. But please don't go into that line.
I don't like to keep my stones to be kept lose on my bench-peg. If I loose one stone, I'll be wasting my time looking for it, then I keep them all in a plastic bag for safe keeping.
Keep your graver edges clean & shiny at all times, especially at times for this cutting exercise. If you chosen a flat cutting surface then use your Flat #40 (width is very important) Graver to do your delicate cutting.
To make your #4/0 Polishing Paper extra smooth, I use a soft Drafting Pencil to rub the soft lead into the pores of that paper. The end result is an additional softer paper this could be even smoother than a #6/0.
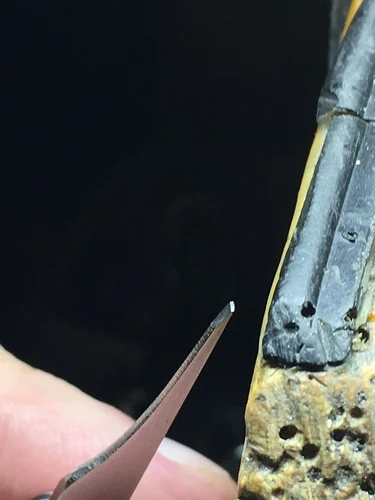
This is my Flat Graver #40, you can see how thin it is in the 'front face'.
To avoid any mistakes in the metal cuttings, I will use my Bud Bur #002 width and remove any extra remnants of metal shavings. In doing this process NOW, is saving feature, its literally not a good idea to do this after the stones are set.
I usually carve the silver 2-3 times in wanting to have the metal cut DEEP. The curves are somewhat difficult to manage, please be careful in doing this procedure.
For this photograph, I showed how the curl of metal looks during the cutting process. Taking care is so important, keep your graver sharp at all times.
Keep your 'necessary tools' together in your bench and not having too many laying around.
This Fish-Tail design has officially 2 large beads to set each stone. I used a "156C" (Carbide) bur to under-cut the stone where the Bright-Cutting took place. In between the two stones was filed smooth with a Triangular file #4 to create a wide "V" as seen this photo. I as well, used my Flat graver to Bright-Cut any areas.
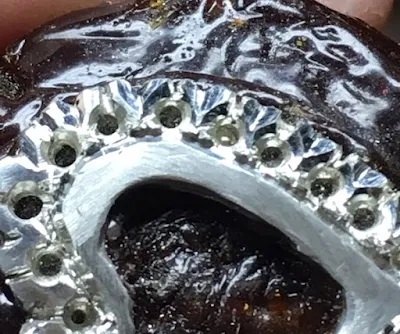
This Bright-Cutting is like a shimmering mirror as light is bouncing off of the wall of cutting. The graver shape and its cutting must not have any defects on the graver surface.
That 'black line' is not black, but a reflection of light bouncing back to the viewer.
A very sharp graver point can do what no poorly maintained graver can do. That is to cut exactly where the point should be. What you need, is what you should be getting.
Don't forget to use your rubber "thumb guard", as the graver-cutting will cut into your finger-skin by accident....From my early experience, a severe "OUCH" will occur.
If there is enough room make another line of cutting, don't leave it alone. But there is room for a second line of cutting as shown here.
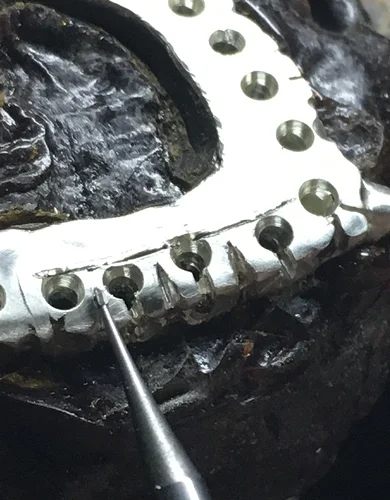
To clean out the in between areas, A rotating "Krouse" bur will do the job nicely. What this bur does is to widen the area sufficiently in a downward cutting motion.
What are these little triangular cuts are doing? This is and easy answer, these are just the beginnings of beads for the stone.
You can see at the point another triangular cutting. I used this to rim any unwanted metal for the joining of the two lines of metal. When fully trimmed, I'd literally cut that unwanted metal away with a graver.
The bud-shaped bur will start at the outside of the heart and gently proceed to just short at the 'line of rough-cutting'.
These are my (limited) choice of cutting tools, no more and no less! I don't want to mess around searching for tools that pile up in my tray.
Always maintain a polishing paper to be ready for a moments notice. Never second guess if the graver is going to work for you. IT MUST WORK WITH OUT ANY HESITATION.
I prefer to open the hole at least at a 90% percent opening. As when I'm starting to do the metal cutting, I don't want to remove any important metal.
The oilstone is not there for the fun of it. It is one of the most important tools on any setters bench. I keep it well oiled, at all times.
Where the 'rough-cutting' along the inside edge, is where you must Bright-Cut the metal. This metal will be turned into beads for future stone setting.
The inside curves should be trimmed into a gentle prepared accurate curve.
As shown before the Krouse bur is fine, but the graver cutting is BETTER, agree?
These are my collection of gravers, the lengths are of no importance as they can be regulated when whey are in the graver-handle.
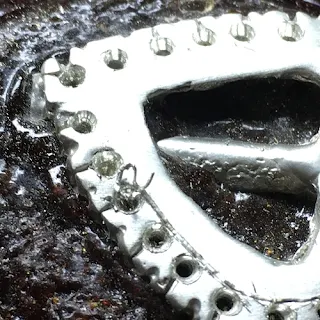
Once that the stone has been set, I need two wire-beads, or hooks, to securely hold the stone in place.
When I had an opportunity in supplying a multitude of gravers to my students. This was my collection prior to the bench-grinding processes.
When the gravers are being used a slither of steel is remaining in and on the oil-stone. This steel must be removed as soon as possible, but how is it done?
Get a magnet and run it over the layer of lighter fluid. This fluid suspends the metal shards and the magnet just lifts up the steel particles with no effort.
This photo has a short & sad history. I made him a pair of cuff-links from a CAD pattern. The young friend wore then for just a few weeks while being a lawyer. Then he died, so sad, I keep his memory alive by showing you when Bead-Setting can be used.
This is the bench-grinder reshaping the well used graver. This will happen on many occasions during the constant graver uses.
This is the half-completed "Cut-Down" cutting technique. These wire-beads hold the stone in place so very tightly. I never leave the metal without any cutting or being untouched by any graver.
In between the four 'wire-hooks', I'll cut the metal with a fanciful Bright-Cutting.
This how the beginning of the "Cut-Down" actually starts, interesting to look at, agree?
Even for a round disk, this procedure is rather attractive. The large spaces in between the stones, needs not to be left untouched. Experiment as often as you can.
Here is just another view after the 'wire-hooks' have been created. BTW, To make these hooks, I used wide #41, Flat graver to corner-dig into the metal and twist the wire-hook over the girdles over the stones.
All of the 'Oil Stones' must be kept well oiled, continually. I use a strong magnet to remove the steel shards from the graver.
These Bead-Burnishers are used only to round off the hand-made beads. The little 'dish' should and must cover the whole bead. If the burnisher is too small, there will be a little edge around the tip. Just too UGLY to look at!
This is the completed "Cut-Down" configuration. Although it is quite complex, I'd rate this process & techniques at a definite "9.5+ out of 10, on my Difficulty Scale".
This Emerald Bezel setting along with the Pave' set diamonds is not for the 'feint of heart'.
This complete necklace is the highlight of my Diamond Setting (65 years) career.
I'm hoping that this long tutorial-essay was enlightening to you and everyone. Many of these photos have been used and seen in prior essays, lets call this an extensive review.












No comments:
Post a Comment