It is very labour intensive even for me! A vague knowledge of graver cutting will make this exercise difficult to grasp, this technique is basically...very demanding & technical, trust me!
The Difficulty Scale: This is about 30, out of 10. (If not more!)
What setting tools are needed?
>Planning ahead of every cutting action will be well advised.
>Experience in using your gravers of at least 5-6 (or more) years.
>Experience in using your gravers of at least 5-6 (or more) years.
>Mistakes will happen, leave your frustrations in another room..:>(
Flat graver of #40, with a face height of 0.30 mm's.
Knife-Edge Graver of 0.25mm's in width, why so thin? You'll see in a few moments.
Optivisor with #5 lens. Lens #3 is not strong enough, lens #7 is even best.
Hand-held loupe of 10x power, you must continually 'double-check' what you're doing!!!
Onglette #1 graver, that is shaped to cut only on the Right-Side..(if you're right-handed).
Polishing Paper for your gravers. I suggest #800, or even a #1,200 grit.
Oil Stone, to keep your gravers (extremely) sharp at all times. You can't cut with a dull graver!!!
Marking-pen. This is used extensively to layout your new patterns, prior to your 'rough-cutting'.
I use this method on a regular basis.
I will be showing two variations of graver cuttings. Each version is similar, but just slightly different from the other.
This little ink-pen is my favourite (new) setting tool, why? Without it, I might not know where the next cut will start or even finish, buy one and get used to it.
I like this pen because it has a very fine point to it...get the point?..:>)
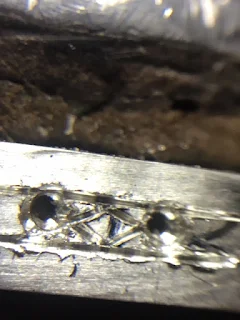
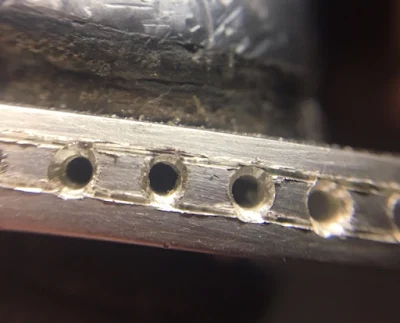
Start your very fine graver cutting right at the edge of the hole. You don't want any sort of metal remaining once the stone is set, it just looks ugly!
Take a few little cuts if you are not familiar with this sort of rough-cutting. This is a learning curve, but once learned it'll be then it'll become 'second nature' to you!
See where the graver cut, it's cutting right inside the hole? I like this 'close-cutting'.
Use your 'ink-pen' and draw a little square, as shown below. This will be the first group of many cuttings you will be needing with your graver, If you feel the drawing is not as expected, rub it off and start again! You can't do that once you cut into the metal!!!
With your fine Onglette Knife-edge graver start your cutting right into the center of the hole. Then make a cut right to the line-cut you made previously.
Here is an "up-close, diagram" of where to start your cutting. This will take some time in figuring out how it's going to finish..two words 'Practice & Practice"!
With your ink-pen acting now as a guide, you can visualize how the next few cuts will look.

Here is your first cut, now continue on with the next three cuts.
With the four cuts being made, do you see a pattern starting to evolve?
What I would like you to do NOW is to re-cut, again a little deeper and a third time deeper, why so? This is for your Flat-Graver to get into that 'deep line' and to start your Bright-Cutting!!!
Look at the difference of the dimensions between the inside bead-triangles and the outer "v" shapes! The main reason is that the outside cuts are there for the final finishing..not to be discussed now!
You can see just where the Flat graver started to cut, remembering that all of four sides to this pattern MUST BE CUT AT THE SAME & EQUAL ANGLE.
The reason is that your Flat graver should not be leaning over too far and making this pattern to look mediocre.
This takes much practice and your graver blade has to be well maintained in being able to cut with no stirations.
With all four Bright-Cuts completed there is still one little surface to look at; 'it's the top flat area'.
I use my Flat graver and remove the top 'rough textured' area as to make this a 5-sided bright cutting area! Now this section might look like another stone has been added, that is my intention from the beginning!!! When this is polished...WOW!


SECOND VARIATION:
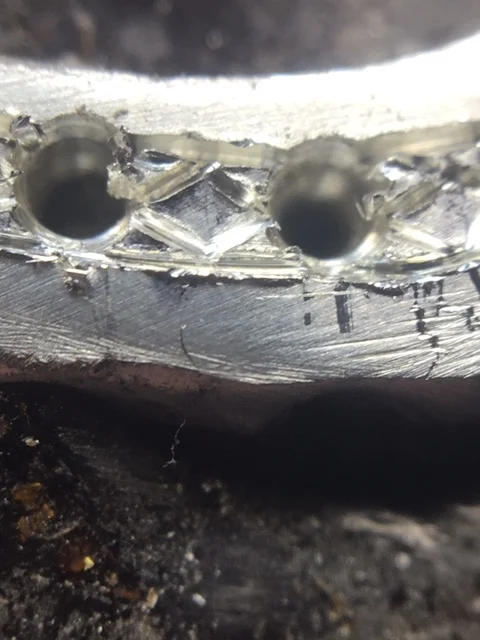
Although this picture is the same as the first version, this cutting gets more interesting as we will now see.
I'm now going to be using my ink-pen extensively. Without it, I won't be able to have a guide where the multitude of cuts will eventually be made.
Remember that this point is only 0.24 mm's wide. I will start at the middle of the two holes and end at the far side of that hole
These two diagrams still apply to this 'second version'.
Always keep your graver-point sharp!!!
These rough and jagged cuts are to be cut away further on in this Bright-Cutting process, don't worry if this looks ugly. It will be in a pristine condition when all is done!
I suggest making your cuts deeper at least three (3) times. This will be better for your Flat graver to get inside and make sharp cuts.
If these cuts are left shallow, you won't be getting a definite and exacting design/pattern!!!
This polishing paper is "your friend", use it as often as you can. As I always say you can't get great looking cuts with a dull or a worn graver..:>(
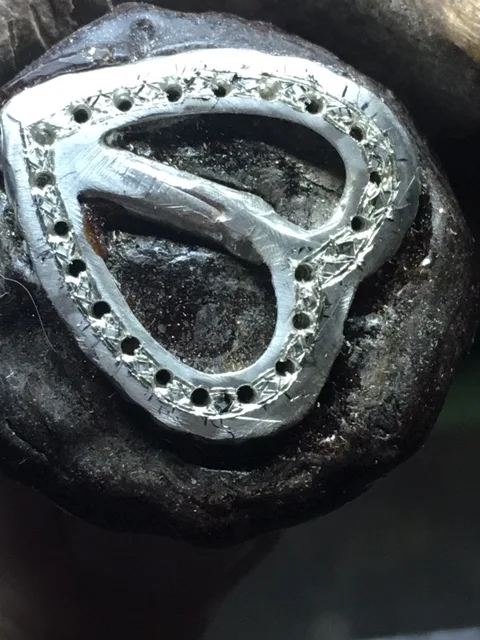
From a distance, this looks nice, agree?
But from a closer inspection, this first square looks even nicer. Don't forget to 'cut the top of the square', all surfaces need to be as shiny as possible.
The long bar in the center, is the 'casting sprue', I keep it there as I don't want any movement during the delicate graver cutting.
I've accomplished literally everything I need in creating these "Bright-Cut, Ornamental Squares" When you are creating this kind of pattern, don't look at your watch, timing is not essential.
I can spend literally 1 hour in getting to this stage of setting. Then comes the actual Bright-Cutting process, I'll be leaving this 'continuing setting process' to another essay.
When all is done, this completed process could take me about 2.5 hours. But when perfection is warranted, don't ask me how long this could take..:>(
If you have any questions, please contact me "gerrylewy18(at)gmail.com"


No comments:
Post a Comment