During our workdays, we will encounter the need to cast an unusual design. I will explain where the wax sprues should be placed in this essay. You might have your own thoughts on this topic, but let's keep this essay running smoothly and without any difficulties.
==============================
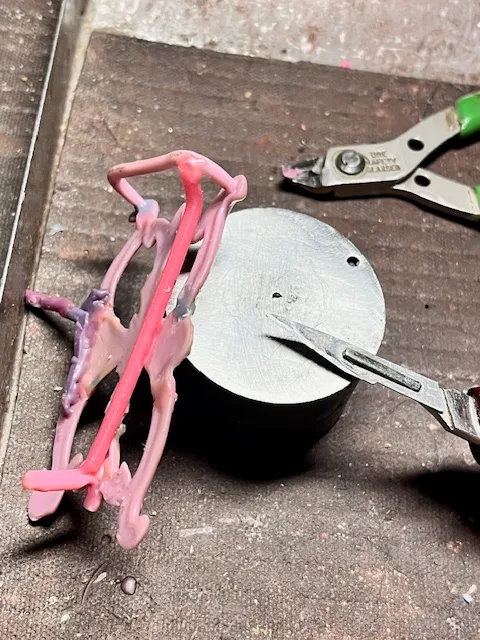
This one wax sprue wasn't thick enough for the flow of metal, so what I did was to allow 'more freedom' for the hot metal. I created additional 'junction spots,' and there they are.

.jpg)

.jpg)
.jpg)
.jpg)
I wanted to show why I cut off the long sprue. The answer was that when the flow of metal has entered the flask, the hot metal could very well start to cool down before reaching its 'destination'.
In retrospect, I could even shorten the sprue further.
.jpg)
This disk has one problem, what is that? The disk does not have enough chance to get its full amount of flowing metal. WE HAVE TO CORRECT THIS PROBLEM.
.jpg)
The width of this particular sprue must be made wider than normal. I always have extra thicknesses on hand.
.jpg)
.jpg)
The 'junction spot' must be thought of, and an understanding of how and where the hot metal will flow is required..jpg)
This 'bow' MUST HAVE MULTIPLE contacts for the hot flowing metal. One spot is just not enough. If there were only one spot, there could be a problem in not having all of the flowing metal reach its desired areas.
.jpg)
On the reverse side is the epitome of having a correct sprue layout.
.jpg)
This belt buckle gave me some challenging moments. First of all, the main pattern was not in good shape.
.jpg)
.jpg)
.jpg)
When joining of sprue to the disk, I will melt more wax around the contacting spot.
Just 'touching wax to wax' isn't the correct method; there must be much planning and a realisation of how the hot wax will flow.
.jpg)
.jpg)
.jpg)
.jpg)
I had to correct many defects using a sharp blade and fix many spots that had signs of breaking.
.jpg)
I decided to create 3 sprues for the metal to easily flow. Every new 'contact sprue' had to be given additional wax.
.jpg)
There are to be no shortcuts anywhere on any of these patterns.
.jpg)
If a wax sprue was close to the main pattern, I gingerly bent the sprue further and made it permanently touch the pattern.
This long sprue has one purpose, and that is to allow the hot flowing metal reach many critical areas.

Here you can see the added wax around the sprue shaft. On the other end is where I will cut the sprue to fit against the disk. Being very cautious in this planning is #1 on how to prepare for metal casting.
.jpg)
.jpg)


.jpg)
In preparing to cut any sprue, this is not 'cut and goodbye'. There has to be much planning in how the sprues will rest against the pattern. One error will put the whole casting into jeopardy.
(If you aren't fully trained in this process, I suggest contacting a person who can help you.)


No comments:
Post a Comment