I've posted many essays on this topic of "Gypsy-Flush Setting" and every time people still want to learn the 'full story'. It's my pleasure to present this topic, once again!
============================
A "blue stone" hole need not be the exact size of the stone just YET. The hole should be approximately <75% that of the stone. The reasons will be explained in this tutorial essay.
The very first drilling to take place is to remove the metal where the Pavilion will be seated.
Many stone setters rely upon the "156C" that is displayed on the top bur to create the seat inside of the hole. These 'bur teeth' are placed very closely together and will be acceptable.
The "HSS" bur teeth as shown on the lowest bur in the photograph are 'too aggressive' for this delicate setting.
These 2 burs; the round and 1/2 burs are not generally used. This leaves only the 156C and the HSS burs that are used in creating 'seats' in the hole for the 'blue stone' setting.
This is the "156C" bur that is commonly used in "Flush-Gypsy" settings. You can observe just how close the teeth are together, if I used the strong-cutting HSS bur, it would tear the metal apart while being in the 'rotating process'.
While holding the rotating bur at a 45degree angle I'll prepare a seat in 3-4 increments inside the hole. The depth of the bur can be seen while the 'tip of the bur teeth' is at the level of the metal.
This bur is a "High-Speed Steel" bur that I won't use. It cuts into the metal with too much force and it could ruin the chances of an accurate even cutting of a well-defined 'seat'.
After 'opening the hole' (carefully) to accommodate the stone, much care is needed to slide the stone into the ring/metal. I would use a "brass, or copper pusher" to secure the stone. If a steel pusher is used the chances of breaking the delicate stone are almost 80-90% positive
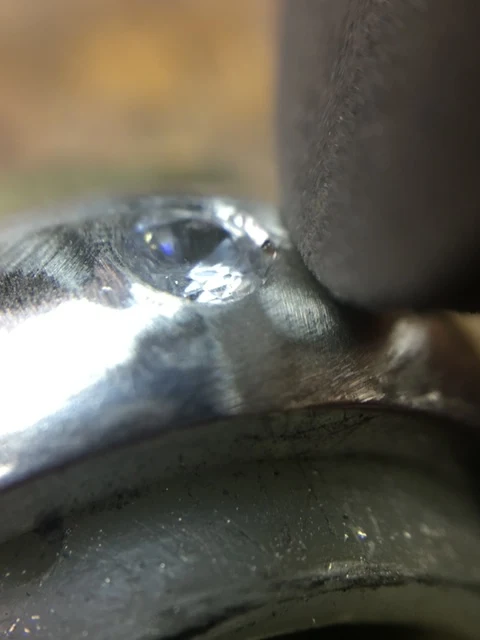
Once the stone is 'resting' in the hole, now starts securing this blue stone. I will press over 'two spots of metal' to prevent any unnecessary movement.
I would use a "Reciprocating Hammer" to lock in the stone, BUT NOT ALLOWING THE HAMMER ANVIL TO TOUCH THE STONE.
( REVIEW )
This is the optimum depth that the stone should be in the hole. If the "Table Facet" of the stone is BELOW THE SURFACE, let it be there.
While I'm hammering I will do this in 4 sections, why is this? I want the stone to be held tight and of course level to the metal. There should not be a slanting stone in the width on both sides.
When the stone is 100% secure, tight and level. My next step is to initiate the "Bright-Cutting" around the inside of the hole.
Don't start any filing or smoothing of the metal surface until the 'metal cutting' has been finished.
DON'T USE A FLAT GRAVER, why not this blade? The Flat graver will rub against the Upper Girdle Facets and leave a FACETING EFFECT ALL AROUND THE INSIDE METAL.
The best graver is an Onglette graver that is polished on the Right Side of the blade. This will definitely be a bright contoured surface.
With a "Snap-On" Emery disk of a 'Medium' grade rotating paper start the smoothing of the metal. Please do not let the rotating EMERY paper get too close to the stone, or the stone will get scratched.
I use now the series of two Pumice Wheels, the first will be a wheel of #180grit with a mild abrasive texture. This wheel will smooth the metal from the Emery wheel contact.
Make sure that these wheels don't (again) touch the delicate stone.
This particular softer Pumice wheel is of a #1,000 grit texture, why use this wheel? Instead of using a cloth polishing wheel that will ruin the surface, this Polishing Wheel will polish the metal only in the desired areas.


%20(1).jpg)


.JPG)

.JPG)


hi gerry! why do you cut the seat in 3-4 increments and with the burr at an angle each time, instead of once straight on all around? and i was taught to use a setting burr, not a hart burr, when would you choose one over the other? thank you!!
ReplyDelete