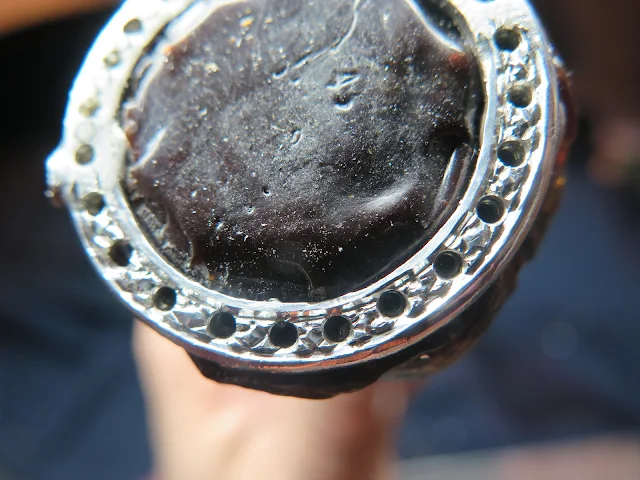
Pave' setting can be so very difficult, but most times it's a real challenge. Either way, it has to get done! In the photo, I created mini-claws out of flat metal.
I even Bright-Cut the metal before placing the stones in each separate hole.
After putting each smaller stone into a recessed hole, I raised 4 'wire-beads-hooks' around each stone.
My "Right-Sided, Onglette #2" is now getting ready for some interesting work.
I just NEVER, NEVER Bright-Cut when the stones are in the metal. I can easily set Genuine Emeralds without the risk of damaging any of them.
As you can see that I cut the metal AFTER the stones were set. It's a bad choice as there are pieces of metal surrounding some of the stones.
I call this setting process "Pre-Cutting". I can now Rough-Cut and Bright-Cut wherever it's needed. There won't be any extra metal surrounding any of the stones.
As this was a very thin plate of metal, I chose to emphasize the Bright-Cutting on the curves and line cutting. I'm so very sure "Nancy" would be have been proud to wear her name plate.
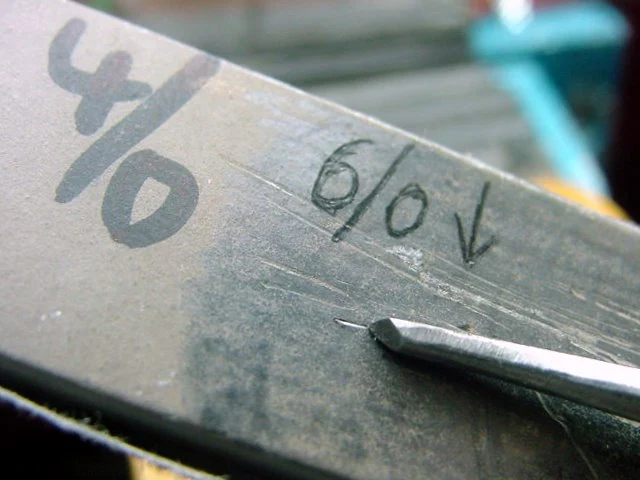
My "Polishing Paper", not named as Emery Paper is literally polishing the Onglette graver on just one side. I used a soft cored drafting pencil to fill the pores of the #4/0 paper as it's now to be a #6/0 paper.
I'd even lightly touch the fine edge of the graver to make the cutting smooth as its being used.
Here is another example of the "Pre-Cutting" and "Bright-Cutting" processes. You can just barely see a reflection of the beads being reflected on the walls of the line-cutting.
This was a plain flat bracelet with no holes. I decided to do my drilling & engraving on each letter at a time.
In using my modified graver I ALWAYS Bright-Cut around the OVAL Bezel inner-wall. When I touched the graver front edge (on the previous photo) on my Polishing Paper it was for this sole purpose. My sharp graver could have scratched the facets of the soft & very delicate stone.
Instead of using a Bead-Burnisher to fold over the very small claws, I chose to use a FLAT graver to gain access to the ultra small, mini-claws.
To use a "77B" Cup-Bur this would endanger the claw tips. Always picture your setting ahead of time and think before you do.
I see on many jewellery community sites on how to hold a graver in your hands, here is the answer.
The graver handle must sit into the palm of your hand. The graver tip must not exceed the first knuckle, as being shown.
The correct positioning of the blade must be very comfortable for you all through the cutting processes. Your graver "Is your long-time friend", don't fight with it!
Here are a few of my blades. I use a "wine-coloured" handle for easier identification as I don't want to waste my time searching for the location of a graver. All of my FLAT gravers are using this one colour. 

As I was travelling, my client asked me to show how I start my Pave' style of cutting. I created a 'square' in between two stones and I Bright-Cut that area again, I want every area to shine brilliantly.
Every area of this disk MUST be highly polished before any setting of stones. The chances of destroying the beads from touching the cloth polishing wheel will destroy the delicate beads.
In this photo, the FLAT graver is being polished in 'graver maintenance'.
I use my Bench-Grinder to constantly reshape my graver point. Always keep your graver tip COOL and keep your water container in close proximatery to the rotating wheel. Never let the graver get too hot or it will loose it's tensile strength.
Can you imagine that many decades ago that all of these patterns were cut out by hand? This cutting process is named AZURE, the inside of the ring is a soldered plate.
Today all that remains after the CAD designing & casting, is to do the gemstone setting. Even the ornamental Milgrain is done with and in CAD.
If you have any questions just email me at "gerrylewy18@gmail.com".


.bmp)
.JPG)

%20(1).JPG)
.jpg)
%20(1).JPG)


No comments:
Post a Comment