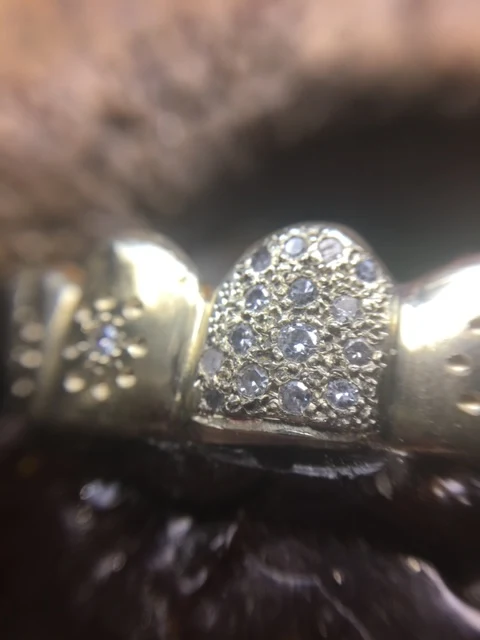
I looked into my archives and found that some very important photos were missing. Here are the extra 'smiling' photos that needed to be displayed again, in greater 'text' detail.
I selected a series of very large diamonds, these will be placed in the center of each tooth, why is this? I want the eye to gravitate to the center of each tooth and the smaller stones to be 'little extra bursts of light'.
Every center stone will have '8 beads' holding each stone.
Excessive polishing on the setting areas is not required, as this is where the multitude of diamonds will be situated.
My client gave me 'mediocre quality' and the colour of diamonds were also lacking. My job was just to bead set those diamonds and 'enjoy the ride'.
If I 'find' a pin-hole from the casting, that is where some of the diamonds will be set.
I like to keep my tool selection to a minimum, why is this? If I drop a stone, I won't have to keep looking for it around my other unused setting tools.
These are my assortment of burs, I like to keep my burs in an orderly layout.
This is my Onglette #2, Bead-Raiser that will be used to set these Diamonds. There are well over 600 diamonds in this 'set of teeth'.
This Beading-tool that I used is an Onglette graver of #2 that is measured in it's width. To avoid the tip of the graver from breaking, I 'round' off the tip of this tool.
All over each tooth, there will be many diamonds. I estimated that there are 16-18 stones PER TOOTH.
There is little opportunity in doing any Bright-Cutting, my client wanted only "Diamonds and Beads" to be seen on each tooth.
There is little space to do any graver-cutting, that is because of the close proximity to all of the stones.
Once that a group of stones are set into each tooth, I will start the 'beading process' around the center stone. Even the layout of beads is so very important, as the beads will be located in between each stone (as shown).
You can see the overall layout of each Bead to the center diamond. That Bead MUST BE POSITIONED OVER THE GIRDLE OF THE STONE.
Every few minutes, I will apply my Onglette to a 'semi-rough' Emery Paper of #400 grit.
I don't want any bead to get ruined by having the graver to 'slip & slide' along the metal.
The graver must be rubbed along the paper, this rubbing is done under and against the underneath section of the blade. I'm giving a "texturing" effect to the blade.
I'm using my mini-torch to adjust the positioning of the few teeth to my Shellac-Stick.
I want to have the shellac get very soft (almost watery) as I need to have the 'underneath' give support to the few teeth.
Even on this photograph, I will 'move' the teeth just a bit further, how much? I need and want the tooth to be in the center of my 'stone-setting' position on the shellac stick.
For further underneath support, I will rest the tooth against and on my bench-peg.
The 'beads' as shown, must be literally 'against and over' the Girdle of every stone. Use your 10x power Loupe and examine each bead for this rule.
Many times these sets of teeth are not made in thick gold, this is because of the weight problem on the persons jaws and its many teeth.
I suggest not to drill a large hole into the metal. You need the 'angled metal' to allow the diamond to be resting against this metal.
I always sift through the many hundreds of diamonds and put them into groups of sizes and stone-colours.
After the first stone is set, it's always better to study the layout for the first group of stones. From here the minor indentation is ready for drilling of the holes, BUT NOT ALL OF THEM AT ONCE.
I wanted to do some testing if any Onglette cutting would be required, I did only one line on each tooth. (I wasn't too pleased with these results) PITY!
These 'temporary' and as well partially drilled holes served only as a guide for the actual hole spacings. If I was satisfied, then I completed the drilling processes for each tooth.
For each 'temporary hole' I completed the drilling with my thin twist-drill. But NEVER FOR THE SIZE OF THE STONE. I needed the balance of the 'curved hole surface' just to allow the Pavilion of the stone to sit against it.

.JPG)


.JPG)


.JPG)


.JPG)
.JPG)


.JPG)

.JPG)
.JPG)
No comments:
Post a Comment