I have put together 4 extensive topics consisting of 49 photo's into just one essay. Just collecting this large number of displays was fairly easy, but now came the challenge of writing 'tutorial notes' for each of them.
REMEMBER, there is still no charge for my time and labour.
With this photo you can see that the hammer-hitting must be exactas this diagram suggests. There must be NO SPACES remaining between the stone and the Bezel.
I suggest that you use a hammer with the weight of only 85grams, if it is heavier, then you will endure tough times as in breaking the gentle stone.
This heavy hammer is too heavy and the face covers your line of sight.
Now we are using the correct size, now lets proceed further with the Bezel Setting, agree?
I decided to use a bezel that is 25% larger than the selected stone.
What kind of bur is required? As it is written. "Thou Shall Not Use Any Bur that Has It's Teeth Too Close Together" for example a 156C (aka 'undercutting bur').
For this kind of Bezel Setting I and you should use a HSS (High Speed Steel) bur and nothing else!!! These burs are more aggressive and you can see the separation of the teeth.
Before you use the HSS bur I really suggest that you use a small round bur and create a line just below the tip of the bezel. This line, or indentation will act as a 'guide' for the HSS bur cutting. This will prevent any cutting running amok while you starting to do your initial bur cutting.
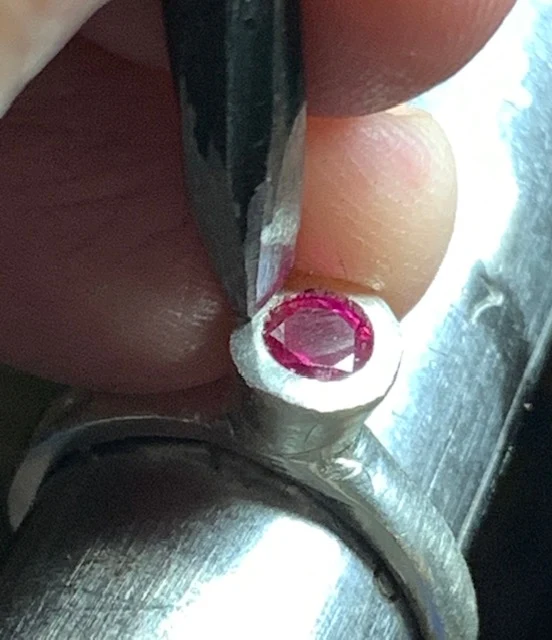
The most important aspect of Bezel Setting is to keep the stone FLAT not crooked, as shown here.
In this photo is what I mean, the stone must lay FLAT.
WOOPS, this stone slightly crooked. This will interfere with the Bright-Cutting further in this process.
This Full Bezel is nicely set and ready for the Reciprocating Hammer to do it's work.
I prefer to put my ring into an "Inside Ring Holder", these can be bought at any tool supplier in your country or 'online'. This device gives you much contact for your setting, but there are limitations.
If you are using this ring "Inside, Ring Holder" clamp, please keep the ring tightly secured.
With your Reciprocating Hammer I ask you to put the ring on a steel mandrel, why? If you use a wooden or plastic clamp, the 'hitting power' gets easily absorbed and the setting is not functioning to your expectations.
As the hammer anvil is rectangular, it has two widths. 'narrow & wide' With the narrow width, your hitting will have little or limited contact.
With this 'wide hammering' your anvil now has more contact to the metal. But realize that the anvil must not get too close to the stone, or breakage will occur.
I use an Onglette #2 graver that is highly polished on one side, why is this? I want my graver to Bright-Cut the metal all around the inside of the Bezel. DON'T USE A FLAT GRAVER. If you do use a Flat graver, the blade will make ripple or faceting in the metal. This will not occur with an Onglette tool.
When you are ready to start the cleaning process please use your #180 grit Pumice wheel and proceed with the utmost caution. Keep your wheel at 30-45 degree angle.
The next step is to use the your Pumice wheel at #1,000 grit. This will give you a near polishing effect and avoiding the uses of a cloth polishing wheel.
Only on the shank of the ring may you use your "Medium" grade, Emery Wheel.
If you need to remove any marks on the ring itself, do so NOW.
This is the most important diagram for setting an Oval stone and not getting the stone crooked.
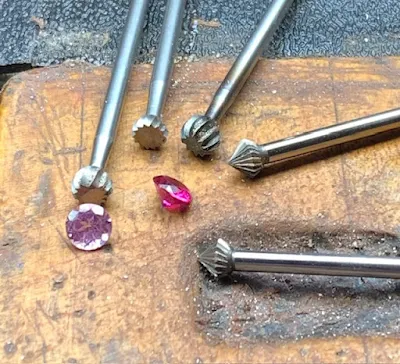
These are my collection of burs that have helped me in setting stones. Those 'half-round' burs can be used in Cabochon settings with a Flat underneath surface.
=>"ROUND STONE SETTINGS."<=
Once that the stone is set, the next step is to Bright-Cut the inner circle of metal. Again, the hammer is held at a 45degree angle.
In this photo, you can see the highly polished surface of the face of the hammer.
This is my 85gram hammer that I use in 100% of my hammering. I can see just where the contact is in relationship to the Bezel.
I can see the actual 'contact spot' to the Bezel, I wouldn't ever use a wooden ring clamp, why? I want all of the 'hitting power' to be transferred to the Bezel and not absorbed to the leather or wood.
If a hammer-anvil is desired in your hitting, don't let the steel anvil get too close to the stone.
In this photo, you can easily see that there are no defects or aberrations on the surface of the Bezel tip. The hammer is kept so very clean an already the ring top is smooth to the 'touch'.
In this diagram, you see just how important the hitting is to the metal, with no spaces anywhere.
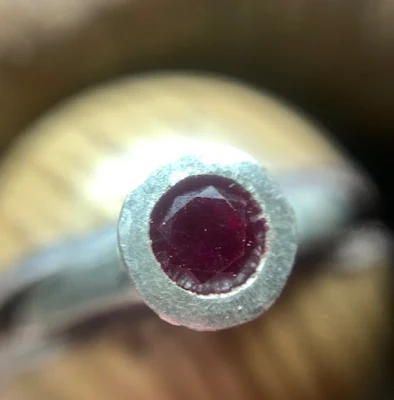
The inside Bezel needs to be kept very clean. I won't accept any ring setting if it's seen to be in a 'rough' appearance.
I will Bright-Cut as with my Oval setting prior to this Round setting.
If there are defects in the cutting then this is due to fact that the graver is not kept sharp and smooth. Just get rid of the defects in the front of the graver blade.
Let it be put to your oil-stone again and resharpen the face of the cutting angle.
To avoid any 'rippling' don't let the graver point get in contact to the 'facets' of the stone. Just aim for the metal.
For a smaller Bezel I usually file with a narrow Pillar or Triangular file of #4 grit, #2 grit is too coarse.
On smaller Bezel tubes, I would use my Pumice Wheels #180 grit, as well as any larger size of Bezels. As I did with the large Oval stone, this process still applies to the smaller stones.
Following the Pumice Wheel of #180 grit, I would now use #1,000 grit 'Polishing' Pumice Wheel.
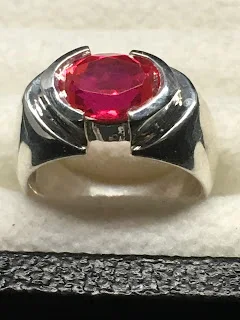
Isn't this ring just so darned beautiful, size doesn't matter, it's the care and skill that has gone into it.
Here are the collection of various 'finishing burs' that I use all the time.


.jpg)
.jpg)


.jpg)
.jpg)


.jpg)


.jpg)
.jpg)


.jpg)


.jpg)


.jpg)
.jpg)


No comments:
Post a Comment