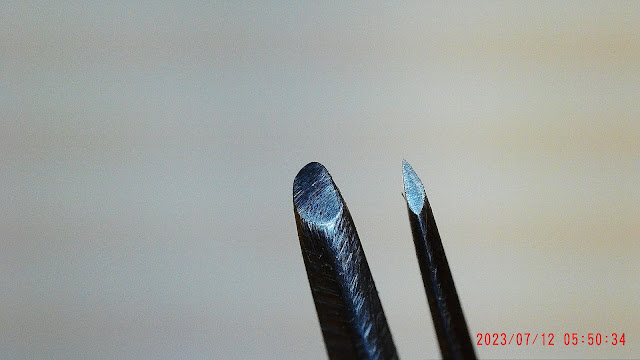
All of the photos of metal cutting were not CAD-created. These series of gravers demonstrate their purpose in our jewellery world.

The 'graver on the left' is what I used to use as a 'bead pusher', you can see that I let it remain thick and with a rounded point.
The 'graver on the right' is my metal carving blade, both of these have been created with the same style of blade.
(I always experiment and invent newer tools from the basics).
This reshaped Onglette graver was shaped to cut on only one side. In this case, it was reshaped to cut metal on the 'right side', hence the name "Right-Sided Graver".
The left side of this blade is of no beneficial use, even the 'face' of the graver is slanted thus enabling the graver to give the engraver a "Bright Cut".
.jpg)
With careful planning of the Onglette blade, here is the opportunity to 'Bright-Cut" when absolutely needed.

(I don't want to be repeating myself), but you can see the reflection against the metal of the new and many mini-claws.

I polished 'both' sides of the graver as it will give me cutting access to both sides of the blade if needed.

This is the very thin cutting blade that's given the name of "knife edge". This blade gets into areas where the wider graver just can't manage to get to.

"GRS" sell pre-shaped Onglette gravers for you to use as soon as you buy them.

In this remarkable photo, you will see the untouched & new Onglette graver #2 width. The lower blade is how I shape all of my gravers after my buying.
.jpg)
Can you show me another tool that can demonstrate how to create wonderful patterns in metal? You can see the reflection in the metal carving, now compare the initial cutting to the row just below it.

This is my bench-grinding abrasive wheel starting to shape my "Flat Graver, #10".
.JPG)
Here are two gravers showing the guides where bench grinding will be cutting the steel blade. The optimum length is 'one inch of shaping'.
.JPG)
This Onglette graver HSS #2 is almost 3/4's of being finished against the bench-grinding wheel.
.JPG)
I keep my glass beaker of water within finger reach, as I don't want the graver to overheat. Overheating is the 'arch enemy' of ruining or softening the new HSS cutting steel blade.
.JPG)
This is the most reasonably priced bench-grinding apparatus available. These can be bought at any hardware store, try to look for one with two mini-lights.
%20(1).JPG)
. Compare the GRS version being shown here against the one being made ready underneath. This is the Onglette graver ready to do its metal cutting.
(Why have a large blade of steel when only a small amount is really needed?)
.jpg)
This particular blade has been shaped and is now ready to do the metal cutting.
%20(1).JPG)
%20(1).JPG)
The 'rubbing' of a graver blade onto the #1,200 polishing paper will remove any unnecessary rough spots on the side of the graver blade.
.jpg)
This is my Onglette #2 'workhorse' as it cuts any or all of my new patterns in Silver or Gold metal.
.jpg)
After a series of polishing, or rubbing on the Polishing Paper any remaining rough edges will be easily removed.
.jpg)
These two gravers demonstrate the "before and after" views. It's worth noting that the 'new' graver cannot cut into your metal as it appears here. All gravers must be reshaped extensively on your bench-grinder.
.jpg)
The lower blade is a Flat graver that has been honed to allow any "Bright-Cutting" to start.

The angle of the Onglette #2, graver now allows the "Right-Sided" Bright-Cutting to commence.

Many times I prefer to use my "Right-Sided" blade instead of a Flat graver. With this great tool, I can now have a sharp point at the front of the graver, this is totally lacking with the Flat graver.
.jpg)
No comments:
Post a Comment