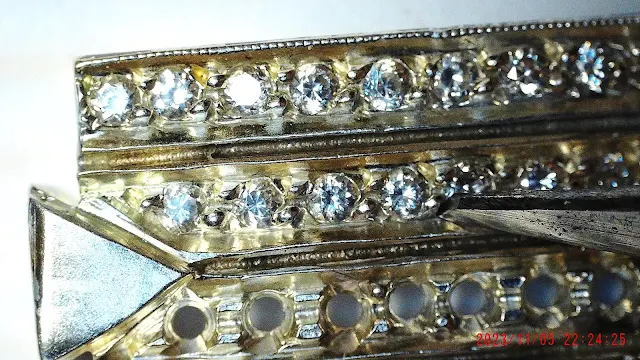
As I am writing my 555th tutorial essay, I would like to celebrate this occasion by introducing the skill involved in metal engraving. You might have seen the displayed large 'bangle bracelet' in my previous essays, these engraving techniques are worth repeating.
A lady wanted me to scrap her collection of old jewellery, this bracelet was among the many items. I told her "Here are a few dollars for the silver, as I'm keeping this bangle bracelet for my students to learn engraving and what tools were used".
The line of Bright-Cutting was finished with a FLAT graver. You can observe how reflective the metal is after the cutting with this graver. This bright cutting is even before any 'cloth-wheel' Rouge polishing was used.
What are the gravers that were used in this essay?
A) Onglette #1,
B) Onglette #2,
C) Flat graver #40.
Why have a large & thick blade to do all of your metal-cutting when a greatly modified Onglette will do the same cutting? There is much more control over the cutting of designs.
Imagine what the metal-cutting aspect of our profession would be like if 'we' didn't have these basic 3 tools?
There was no "CAD" aka 'COMPUTER AIDED DESIGNS' used in these patterns.
I have greater access to the metal and subsequent new designs with an Onglette graver that has been shaped to these specifications.

When the Pave' area is greatly reduced, the 'modified' Onglette #2 or #1 blade has to fit into a smaller space.
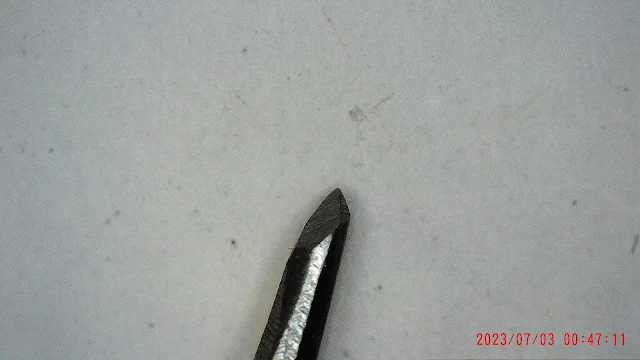
I'm showing the graver that I use on many occasions. The initials "HSS" signifies that the metal is of a higher quality of metal "High Speed Steel". The "0" refers to the width or thickness of the blade.
This is a close-up of the front 'face' of the blade before any grinding that is to take place.
Now compare these two blades 'before' and modification is to take place.
With the preliminary fancy cutting, the only blade to use is the Onglette #1 or even a thinner Onglette #0.
All of those "0:-:0:-:0" cuttings were started with using the Onglette #1 blade. These cuttings are a multiple 3-4 step process.
There is no other blade to start your cutting than to use an Onglette #0, or Onglette #1. The need is to make a cut using only the thinnest blade possible.
I call this blade "a spear", as it looks just what it is, it won't cut any new patterns, but it must prepare for new designs.
This ultra-thin blade is also used specifically in preparing for the new 'in-between beads'.
Here you can see just how thin the first cutting is being prepared. WE NEED A STRAIGHT DEEP LINE.
This is a photo of a blade that is shaped to only cut on the right side. I name this blade a "RIGHT-SIDED, BRIGHT-CUTTING ONGLETTE GRAVER ". You can see just how highly paper-polished the blade is.
The left 'unused' side of the same blade is not necessary to be so highly polished.
Another feature of the same blade is to reshape the blade to be modified on your oil-stone. The new shape is to eventually cut at a 45degree angle.
I used a FLAT #40 graver to cut at an angle. These little cuttings were done BEFORE THE STONES WERE SET.
The wider graver was only used to 'move the new beads' over the stones. Now compare the narrower blade to the 'bead-pusher'.
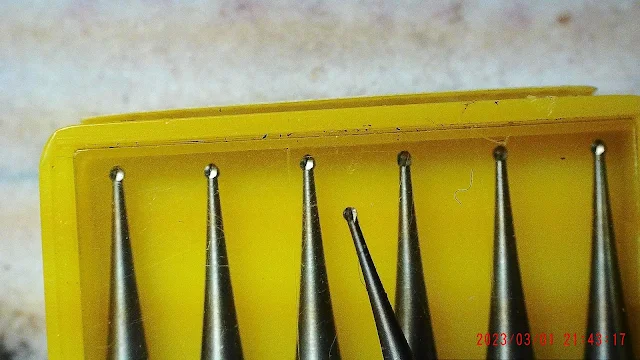
I use a ROUND bur of #001 - #002 to excavate the 'in between' metal. This done AFTER cutting with the thin Onglette graver #0, the emphasis is to do this "round-burring" as deep as possible.
I keep a large inventory of burs always in my bench, if one bur gets worn, I have another at moments notice.
The need is to cut as deep as possible, as to make future beads to firmly fit over & against each stone. "The deeper you cut with the round bur, the higher each new claw will be".
All of these 'mini-claws' were originally...just flat metal. "My gravers are my tools of the trade". I used a thin round bur to dig deeper, thus giving me a wider straight line of cutting.
A rounded 'inside trough' is better for polishing, than a deep line of cutting in between these two lines of claw setting.
If the beads are not high enough to move over each stone. I'd use the same process of cutting deeper into the metal. Isn't this a simpler idea? As you can see that CAD was never thought of, or used.
(This is an out of sequence photo)
With a thin round bur of #001, I would make a deeper burring into the metal, thus making the new claws higher for setting.
With a thicker Onglette blade #002, I would move each bead, well over each stone.
There is no possible way any thick Onglette graver can cut this intricate pattern. I always stay within the boundaries of cutting with the hope of having a great finish. "I always think & plan ahead".
Here is my 'Bead-Raiser" that has been greatly modified with a 'rounded point' just for moving beads.
Just a repeat of using a round bur-carving a line into the metal.
Again, as I stated that this is not a CAD pattern, but a well executed series of graver cuttings. The Difficulty Level just on this STAR pattern is 20, out of 10.
I used only Onglette #0, #1, #002 and FLAT gravers. It served no purpose, except an exercise in metal cutting.
Here is a greater image of the above "Star" taken with my 400x power microscope
This "Triangular" section was initially a flat plate, again NO CAD was used.
This is my 'FLAT graver of #40 width' after many times it's been used, it needs a full 'touch-up'. The underneath section needs to refurbished again, and again.
I will use this 'refurbishing technique' as a 'new tutorial essay' in a few days from now.
This is just a collection of some of my patterns all done with "ONGLETTE GRAVERS".


.jpg)
.jpg)
.jpg)
.jpg)
.jpg)


No comments:
Post a Comment