I'm using my digital-microscope that is showing these photographs from 60 => 100+ power magnification.
Many of these 'shots' show that not every setting project is clean and precise, the human-hand does make some little slips and minor errors. This is not what we're concerned about, its just that we now have the jewellery technology in seeing them, all up close!
Any idea what these spikes are? How about the steel bristles of a wax-file cleaning brush. You can still see some residue of little pieces of wax on the tips of each piece of wire.

Would you believe that this is a very common cleaning wheel, how about a #180 grit Pumice wheel?

Everyone has these at their benches, this is a #4/0 saw blade!

Are you ready for this little saw blade? If you cut waxes, you will for sure use this. This is a saw blade just for cutting into wax patterns,

Just how large are these CZ stones? Would you believe these are only 1.5 mm's in diameter!!!

Do you cut rubber molds, then this little curved item is an "Exact-o" blade? Don't go on any airplane with this very sharp tool. This will cut your skin, I can attest to that fact!..;>(

This little item is for wax shaping, you can see some residue on the bottom left corner of this bur.

This is a Corundum spindle that's used for anything that you need, you name it and it works!

This is an easy item to identify by looking at the brass covered hole. This is my "Medium" grade, Snap-On Emery Wheel!

Do you use a wax file? Then here is a 100 x power magnification showing more residue pieces of some other unknown materials.

I was drilling holes with my twist drill and this is what came off that drill. I 'saved' it and took a photo of the metal shaving.


This is the wax-shaping file.
"Shingles on a house"? No way, just a #00 grit file

Here is the same wax-file & the cleaning wire brush in action.

This is a #1 grit file!

File with a #2 grit.

Is this a sharp #2 Onglette graver? Up close it looks (yuk) rough, but it sure cuts nicely!

Pink coloured Pumice Wheel of #1,000 grit!

This is a very rough cutting graver that only 'rough-cuts' (but not Bright-Cutting). I use this graver as only acting as a cutting guide 'prior' to my Bright-Cutting processes.

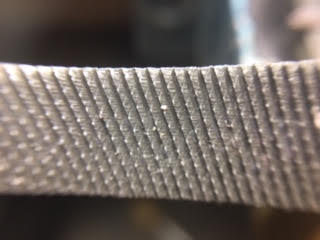
This is a wire-wheel, can you see the tips of the wires?


This is a well-used "Medium grade, Emery, Snap-On-Wheel" with the frayed well used edges and loads of residue embedded into the Corundum granules.


This is a simple photo just showing the Bright-Cutting inside the Bezel frame. All of my Bezel settings have been Bright-Cut.

From a distance, this "Star-Setting" looks nice and clean..but not under a 80 power photo..:>(

Every Gypsy setting MUST be Bright-Cut. I just never, never 'burnish' the metal to set a bezel stone.

Here is my favourite setting pattern. The "Fishtail" as it's been used & seen in my demo-ring.


"Florentine" cutting showing a 'finished' border pattern.

Another view on a Channel-set ring, prior to setting of the stones.

Many engravers use the name of a "Liner" which it is, I prefer the name of a "Florentine" graver.

Same tool/graver but used in a different application..just making decorative 'lines'.


Two photographs of a simple pin-lever watch with a view of its many gears!


Any idea what is this used for? Ever bought a shaving brush? I had one as a gift, but now it's a regular cleaning tool in my setting bench! Why?
It has very soft bristles and it comes in handy brushing away some of the gold & silver granules in my tray!

Just another view of the soft bristles!

Would you believe that this is the underside of a Flat #40 graver? It looks like a disgusting piece of steel, but the results are of a very shiny cutting surface.

Another side view of a Bezel setting, you can see the Bright-Cutting. Also you can see the crimping of the metal, as its bending over the stone.
Normally this wouldn't be seen, but with this microscope, everything is being now observed with the greatest detail.

This is one ugly, overly used and abused "H.S.S.' (High Speed Steel) bur. You can see that many of the teeth are just not being able to cut into the metal anymore...aka scrap!


This is a very good picture of a great 'cup bur' bur. The generic name is a "77B" it's used to round off the tips of all claws after being set.

Here is the packet of some of the well used sizes!

I shave off the sides of these burs on an oil-stone as it's rotating, but why? Now you can literally hold the bur in an upright position and not be concerned in touching the stones' facets.

Have you ever thought of what this bur looks really up close? You can now see the curved teeth that will grind away the metal on the tip of each claw.

I like this picture as it's showing the reflective surface that was Bright-Cut just for this photograph! BTW, the opening is used for a 1.75 mm stone.
You can even see how I used two burs to 'open' up the deepest part of the hole for the "Pavilion" and leaving space for the "Culet".

I think this one picture explains many of my previous essays on how to create Fish-Tail 'beads'.


Contact me, anytime at "gerrylewy18(at)gmail.com" have fun learning and setting stones!
Great photos on magnification of jewelry parts. Thank you, Gerry.
ReplyDelete