This particular topic is the absolute epitome of the series! On my 'Scale of Difficulty', this rating is at least 75 out of 10.
What you see in this tutorial essay is that there is no "Computer Aided Design" (CAD) program involved, as everything has been hand-cut.
I located an article that was printed in 2005, which provides an accurate description of this technique in great detail. I supplied 33 photographs for this tutorial essay. Many photos have been deleted as some of them were not required.
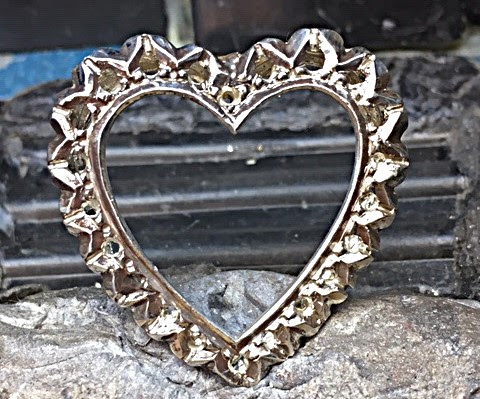
This photo shows the final metal cutting. The name "Fish Tail" refers to the 'eyes and tail of a fish'.


This partially completed pendant has been completed and is ready for stone setting.

With an extra amount of metal on the inside of this pattern, I used my engraving tools to add 'a bit of glamour'.


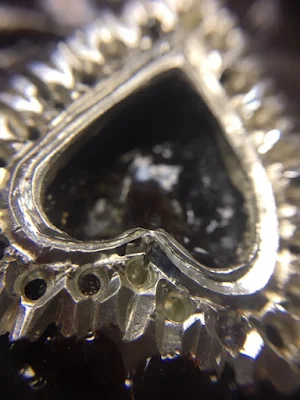
These are the preliminary 'outlines' needed to start the initial onglette graver cutting. After careful scrutiny, I decided to again cancel this silver project. Why waste precious time fixing something that is not acceptable?


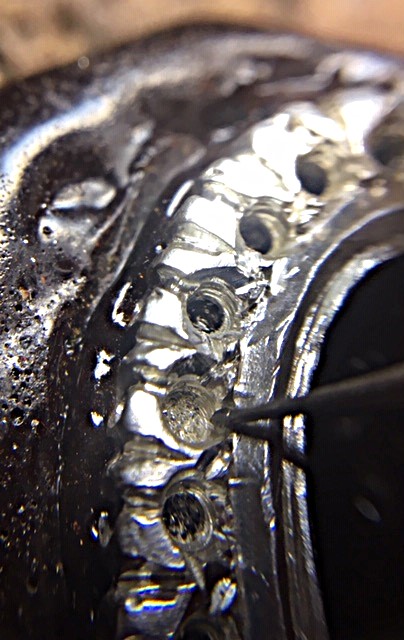
If one hole is not centred (as shown here), the only option is to drill the diamond hole (carefully) and try to relocate that hole with your round bur.
If this isn't an option, if you have another pattern, then just scrap this heart pendant. I would start with a new and improved designed wax form.

Get those graver lines cut uniformly. My second option is to make the holes drilled in an even line and cut DEEPLY, 'not just scratching the surface'.


This is my "Right-Sided Onglette graver". Why is it named in this fashion? The graver is styled to cut only on one side, making a 'right-sided cutting blade'. THIS IS MY INVENTION, which I created about 25 years ago.

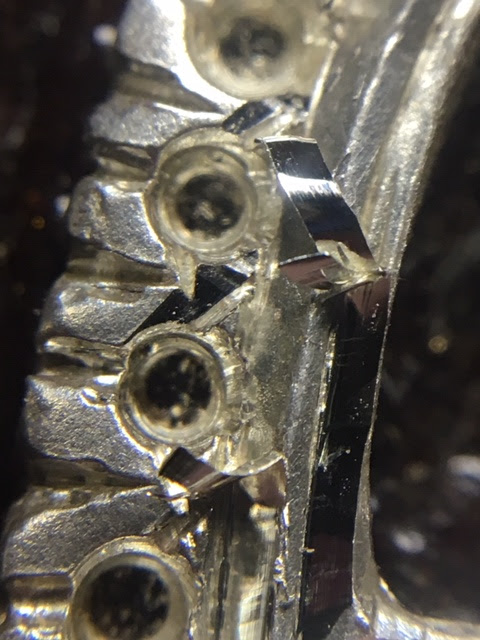
Where there is 'extra' metal, how do you remove it? YOU CAN'T! But what I did in these photos is to use my FLAT graver of #40 width and Bright-Cut the extra metal.


Where there is 'extra' metal, how do you remove it? YOU CAN'T! But what I did in these photos is to use my FLAT graver of #40 width and Bright-Cut the extra metal.
This will give you a spectacular finish all around the heart-shaped pendant.

After the Bright-Cutting has been completed, if you wish to Milgrain the heart-shaped wall, this is your decision!

Where the bright-cutting has failed to clean the track, what is next? I decided to use a mini-bud bur and clean the cutting area as much as possible. This will give the stone a better chance of being seen, instead of seeing extra lines of metal.


Your FLAT graver is now being used extensively. Why is this? This will give you more reflection on your Bright-Cutting. Your Onglette graver lacks the possibility of giving you this same reflection, PITY!

Here you see the remains of the FLAT graver cutting. Again, the Onglette graver doesn't give you this option.

The FLAT graver can be used anywhere where there are walls that need to be shaped.
To me, this is one of the most interesting photos. Why is this? The results of the cutting are what make Bright-Cutting much more desirable. There are no files or Pumice wheels that can achieve this process.

Remember that every wall needs to be graver 'cut & polished'. Don't hesitate to avoid this FLAT graver process.

Why should I use a "156C, Under-Cutting" bur in gem setting? The girdle of the stone will gently rest in the groove in the hole.


Remember that every wall needs to be graver 'cut & polished'. Don't hesitate to avoid this FLAT graver process.

?

This photo is spectacular as all of the metal carving has been completed. WOW!


This photo is spectacular as all of the metal carving has been completed. WOW!

EVERY FACET & ANGLE NEEDS TO BE MADE SHINY for the viewer.

The reason for using this 156C bur is to have the stone sit accurately and not be crooked.

When the stone is set, all that is required now is to burnish the mini-claws or beads. All you need to do is burnish and press the metal down onto the Girdle Facets.

IN REVIEW!

IN REVIEW!
I will engrave 3-4 times DEEPER into the metal, as I want the cutting not to be just a dainty fine line. This line of cutting is what makes metal carving the true beginning of Diamond Setting on this heart-shaped pendant.

BTW, this tutorial essay has taken me approximately 5 long hours to write.

No comments:
Post a Comment