I decided to instead of piling all of the 58 photos into one long essay. I'm creating two tutorial essays to facilitate easier understanding. I could have selected many more, "but enough is enough".
This is the first of many necessary patterns to demonstrate this technique. I'm using two styles of gravers, they are an Onglette #1 and a Flat graver #40. I'M NOT CUTTING LINES, BUT SCULPTING PATTERNS INTO THE METAL. In this case, I'm using (soft) silver as an easier metal to cut.

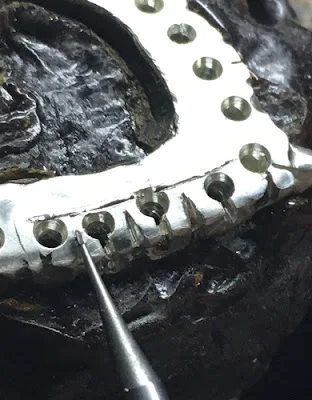
In using the Onglette graver, my first cut is to cut a line right against the hole where the stone will be set.

This is how the first cutting line appears.

I'm using an Oval (#002) or a maximum #003 bud bur to separate the two openings. (This is a very delicate process. DON'T LET THE OVAL BUR EXTEND INTO THE CUTTING LINE. We need this space for more designs in the cutting.
TO QUICKLY REVIEW:
THE FIRST LINE OF CUTTING SHOULD BE ALONG THE EDGES OF THE HOLES. This is so very important!

Using a thin Onglette graver of #1 width, cut the pattern for the 'eyes' of the fish. All this takes is an inverted 'V'. With the same thin, Onglette graver cut a pattern for the 'bead' at the bottom of the hole.


In my version #1 on this topic, I'll be demonstrating all of the many metal cutting techniques. There is so much to explain, which is the reason for the two versions of this essay.

Now with these multiple Onglette cutting designs, you can see the pattern come to life. This is one of the two most 'challenging' metal-cutting projects in my library.

With your Flat graver of #40 (width), you can start to execute your Bright Cutting.

.JPG)
.JPG)
What are the requirements to execute this design? There must be at least 3-5 years of metal cutting experience. There are no shortcuts anywhere in this pattern


No comments:
Post a Comment