Tuesday 16 April 2024

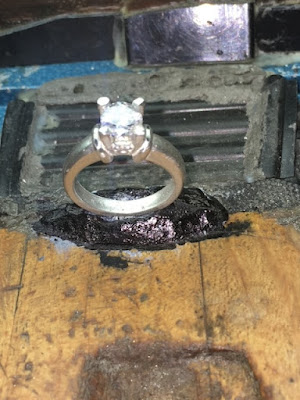
"Filing & Claw Trimming " on a 4-claw setting. - 21 photos.

 The most attractive thing to see on a 4-claw setting are the claws. I hate to see large chunks of metal covering a beautiful and expensive diamond. 

 (This essay is not on the actual stone setting, but it's delicate finishing.)

This process is similar to an artist 'sculpturing' his diamond claws.

The Level of Difficulty is at an '8 out of 10'.

-------------------------------------------------------------------------------

What tools are needed in this exercise?

1) Pumice wheels #180 grit (Blue colour).

2) Pumice wheels of  #1,000 grit (Pink colour).

3) Emery, "Snap-On" Wheels (Medium, 220grit)

4) Triangular file, 8" in length, with a soft grit of #4. 

 These pumice wheels need to be BOTH of a 'Flat' and 'Tapered' configuration.

 I've borrowed 11 photos from other essays, but more will be seen here for the first time.

===================================================

 I like rounded claws, but many times there is a little piece of metal around the claw.

 My answer is to file each of these claws with my Triangular file of #4 grade, therefore there isn't any sliver of metal remaining.


 All of the sides of each claw MUST BE CLEANED AND HIGHLY POLISHED PRIOR TO ANY GEMSETTING.

 In this photo you can see the remnants of some 'extra metal' surrounding each claw. This is not nice to see under greater magnification.

 Before any High Speed Steel (HSS) drilling is to be used, I will use a bud shaped bur and prepare for the seat to be made.
If I didn't use this bud bur, the results could be catastrophic, how is this? The bur could verily be seen with many stone setters as the HSS bur wraps itself around the claw.
 The result is that the teeth of the bur will dangerously 'dig into the claw' as it rotates around the metal.

 Here you can see the after-cutting from the HSS bur. It looks nice, agree? NO! what if the Girdle of the stone is too thick? What do you think what we should do now?
 I'd use a bud shaped bur and prepare a space for that thicker Girdle, simple as that!

 This is the prime example of attempting to set a wide (thick) stone where it wasn't created.

 To have the claws laying FLAT TO THE TABLE-FACET, I truly suggest that using an Emery 'Snap-on' disk at #220 grit and avoid using a 'Pillar' file.
 In finishing this process, all of your claw tips will be of the same height and having the same thickness of metal on the stone.
----------------------------------------
 All of the intricate and detailed designs must be cleaned long before any stone is set.

 This photo shows the old & worn emery disk, the one below is the newer wheel. These are quite cheap and if any wheel 'has seen better days', get rid of it!

 All of these Emery disks are of a #220 grit and wonderful to use in 'cleaning and finishing'.

 The following 2 photos are showing why I wouldn't use these wheels again. All of the necessary "Emery Compounds" have been worn away and the wheel is no longer useful. Get rid of it!!!

   Here is a photo of another (excessively used) Emery wheel ready to be discarded.

====================================================
 Here are the newest photos that will be an addition to my future 'essay-archives'.
 There was a little flange remaining from the wax-injection and the caster who drew the wax neglected to see it.  I saw it after it was cast and it was removed before stone setting.


 Here is a stone setting that is slightly off center, but still acceptable. The Culet doesn't coincide with the pattern/design of the ring.

I used a #003 Bud-shaped bur to prepare for the HSS bur cutting.

As you can see that the 'seats' for the stone have been carefully prepared.

  Once that the seats are drawn for setting, we can start the actual stone setting.

  The front of the 4 claws are now 'filed & trimmed' on it's way for the final 'claw finishing'.

 These 'final steps' are quite easy to manage, as most of the difficult work in setting has already been completed.
--------------------------------------------------------------------------------
 The sides of the claws have been nicely shaped and now comes the 'trimming'.


This trimming should be given equal care on ALL 8 SIDES, OF THE 4 CLAWS. I use a Triangular file of #4 cut (smooth texture).

 On the back end of the 4 claws is where a 'rounding' is made. This leaves the claws smooth and with no sharp corners.

 To give more of a smoother finishing, I use BOTH #220 GRIT and a #1,000 PINK Pumice wheels that will  give a higher texture & luster.
 This will reduce the need for an intense cloth wheel polishing that will wear the claws long before the customer gets her ring.


Finally finished, eh!!!!!


Monday 15 April 2024

What are "Pumice Wheels" and how can they be reshaped? - 8 photos

 The question is "how can you clean the Pumice wheel and return it back to its original shape?"

 What tools are now needed in this exercise? There is only ONE, it is a piece Corundum that will eventually re-carve the pumice wheel to be used again.

Rate of Difficulty is only '5 out of 10'.

 This is a well-used 'Tapered Pumice Wheel', for this essay I'm using a Pink Wheel that is of #1,000 grit. (I like the colour for this ongoing demonstration).

=========================================

As you can see that the tapered wheel is no longer 'tapered', but nearly rounded from ongoing use. 


Here is my piece of Corundum rock, I've had it for literally decades and it hasn't worn out, one millimeter. 

I found a little corner of this stone that is my sharp cutting facet. It is so very sharp that it's just like a diamond.

 There is a little extrusion of Corundum in this stone. This will cut into the soft Pumice wheel with no effort whatsoever. I DON'T SPEED UP THE ROTATING WHEEL, I need to be very careful that I don't waste any of the pumice in this resurfacing process.

 The residue of the pumice is easy to remove, I just use my little brush to clean as I need to be sure where the little pointed-edge is touching the pumice. You can also use a sonic-cleaner to clean any remnants of pumice that your brush overlooked.                
If you don't have any Corundum, you can use a Tungsten alloy to do the resurfacing.

The newly resurfaced wheel is now being seen after a complete over-haul. I want to show that any shape of a Pumice wheel CAN BE RESURFACED WITH NO EFFORT.

 A clean Pumice Wheel is essential in accurate Diamond Setting as well as jewellery manufacturing. Sharp and Flat edges are a priority, but they can get easily worn round.


From using a mere sliver of pumice, here is the epitome of a 'new cleaning tool'.

This essay is only on reshaping, but not on using it. I haven't seen anyone else write about this technique. Hoping that you and everyone appreciate my blog-teachings.


What is a "Thumb Guard" and why is it SO important? - 5 photos

 This topic might seem like a ridiculous essay, but the thick rubber cover is a 'skin-saver' for me.

 The thumb-pad is a wonderful section of the finger, but when it's injured from having the Onglette graver cut into the skin, this is when major trouble ensues.

 You just can't get any engraving done until it heals and this could take a many days. Those scars will last for literally weeks, or even months.

 The number #14 is the size for my thumb, before you buy yours check the finger size. Those holes on the side, allow air to reach the skin.

These individual costs are minimal, but well worth the few pennies. 

Without our thumb-guards, we would be continually subjected to ongoing pain.

Just look where the underneath area of the Onglette graver is resting?

 Without our thumb being subjected to the non-stop cutting, the skin is now free from any serious damage. The sharp Onglette is similar to a dull razor blade, having it protected by this little important thumb-guard is well worth the buying costs.


Can you imagine the constant laceration that is being done to the skin of this thumb? It takes weeks for the damaged thumb-skin to repair itself. OUCH!

 Never ignore the little notes I've being showing you in this essay. My many thumb-guards can get worn out, but my thumbs are the only two that I have.
 Edited by 'Gerry Lewy'.
 

Thursday 11 April 2024

Why is it extremely important to use a saw-blade in "4-Claw Setting"? - 7 photos.

First of all, I'm writing about only using one size of blade, that is a #4/0 and no other width. There are many applications in gemstone setting that is using a saw blade. 

 I'm sure that this essay will be an 'eye-opener' to many of my international jewellery friends, wherever they live. The Level of Difficulty is about 7.5 out of 10. 

 How many times have you found yourself in this unsavorily predicament? When you read and learn this about 'repairing' technique, your problems are then hereby solved.


 Although this photo shows a decent looking gemstone setting, there is a problem here. They will be seen once the stone has been inserted. I'm here to correct and show this major flaw.

 This is the container of my saw-blades that I use continually. The thickness of each blade measures in at 0.20mm's. Although these are very thin, they have to get inside very delicate areas, as we shall discuss shortly.


 The insides of any claw MUST REST AGAINST THE GEMSTONE. There mustn't be any sections of the claw not touching the stone.
 But what happens if the claw is not sitting against the stone? Then this #4/0 saw-blade will be definitely used, but with the greatest of care. 

 My 'roughly drawn diagram' explains the next step. Once the sawing has travelled along the "Crown Facets" keep going until the blade reaches BEYOND the Girdle of the stone.
 
 This is why a thin blade is used in this very delicate exercise. If the blade is much thicker such as #2/0 too much of the inside of claw will be removed, it can be a disaster for you.


 From this diagram shown, here is the actual transition from my drawing to the gemstone. Don't go beyond the Girdle of the stone as the claw might be made weak for the continual wearing process. 

 Before any sawing is to be done, align the blade from the "Crown-Facets" as to get the correct angle. This total cutting will take only 3 sawing-cuts (maximum), if you take further cuttings, you could very easily saw through and ruin that claw.
 
 DO NOT SAW BEYOND the half-way width of the claw. As being shown here, the blade is now even reaching that dangerous point.
 This is where your "Opti-Visor" is specially needed to examine each saw-cut, never guess where the saw blade is cutting. 
 
 Being careful and observant will give you a good chance of succeeding in repairing any errors.....But what happens afterwards? 

  The stone will be loose, as it is now having a new seat. What I do is to use my 'fine-nosed pliers' and gently bring the claws together once more, but using extra care.

 Don't 'hand-push' the claws together, as they will be moved out of being in a 'square layout'. (There are not short-cuts in this delicate exercise).

 Hoping as always, that my setting techniques work well for you. Now you know exactly why a saw-blade is required at certain times in 4-claw-setting. Gerry Lewy.

Saturday 6 April 2024

What are 'Metal & Rubber' molds & which is best for you? - 16 photos.

 These two kinds of processes have one thing in common, they can duplicate all of our hand-made, or CAD creations with total ease.


--------------------------------------------------------------------------------

 When a wax is injected in such as this, the numbers or letter are reversed, but that is not a problem. I modified the wax original and included 16 gemstones, just to add some more flavour.


 This is the metal mold that I honestly prefer from a rubber mold for larger disks. But, the costs are somewhat high as compared with the 'rubber mold' technique. 


 "Stars & Stripes plus a "Peace symbol".


"CASTALDO" is the commonly used company that makes 'rubber slices' for creating molds.

 The two (very hot) jaws of the vulcanizer squeezes the rubber slices together and encapsulate the original pattern. This process of 'heating and cooling' takes about 30 minutes.
 When slices of rubber are covering the original design the heat of the rubber softens and covers the item. Then afterwards, the caster will use a steel knife blade and remove the jewellery item. This is a skill that I won't go into in this essay, the end result is what you see here.


Now many original patterns can be duplicated regardless of the difficulty of the pattern.


From one rubber mold, I can now duplicate as many 'disks' as necessary.
 

The choice of the 'duplicating medium' is up to you to decide. The 'best medium' is the rubber mold for rings, as it is less expensive.


 The choice is up to you, the jeweller, as to which is more profitable. Each technique offers the same level of accuracy. For my opinion, if the ring has a 'cluster claw' design, I'd stay with the rubber mold. For a large & wide pattern as seen here, I would 100% consider the metal mold.